Your First Make Automation: Auto-Save New Gmail into Google Sheets
Use Make (formerly Integromat) to build your first no-code automation: whenever Gmail gets a new email, automatically write the sender, subject, and body as a row in a Google Sheet. This covers picking a ready-made template, authorizing the Google connection, and configuring the trigger and write modules — the foundation for adding AI auto-classification later.
 卡住很正常——點段落旁的 😵 卡關 讓我們知道,或直接往下滾到問答區發問。
也可以用 👍 看懂 / 😢 看不懂 告訴我們哪裡寫得好、哪裡要改。
卡住很正常——點段落旁的 😵 卡關 讓我們知道,或直接往下滾到問答區發問。
也可以用 👍 看懂 / 😢 看不懂 告訴我們哪裡寫得好、哪裡要改。
In one line: On make.com, use the ready-made “Save a Gmail email to Google Sheets” template, authorize your Google account, configure the Gmail “Watch emails” trigger, then map Gmail fields into the Google Sheets “Add a Row” module — and a “new email auto-saved to a sheet” automation is running.
Keywords: Make, Integromat, automation, scenario, Gmail, Google Sheets, Watch emails, Add a Row, connection, module, field mapping
What is Make, and how is it different from coding?
Make (formerly Integromat) is a visual automation platform: no coding — you connect services by chaining “module to module” so things run automatically. One such flow is a scenario.
The first scenario here is genuinely useful: every time Gmail receives a new email → automatically turn its sender, subject, and body into a row in a Google Sheet. You end up with a running log of all incoming mail, and you can add stats or AI classification on top.
Step 1: Start from a template (don’t build from scratch)
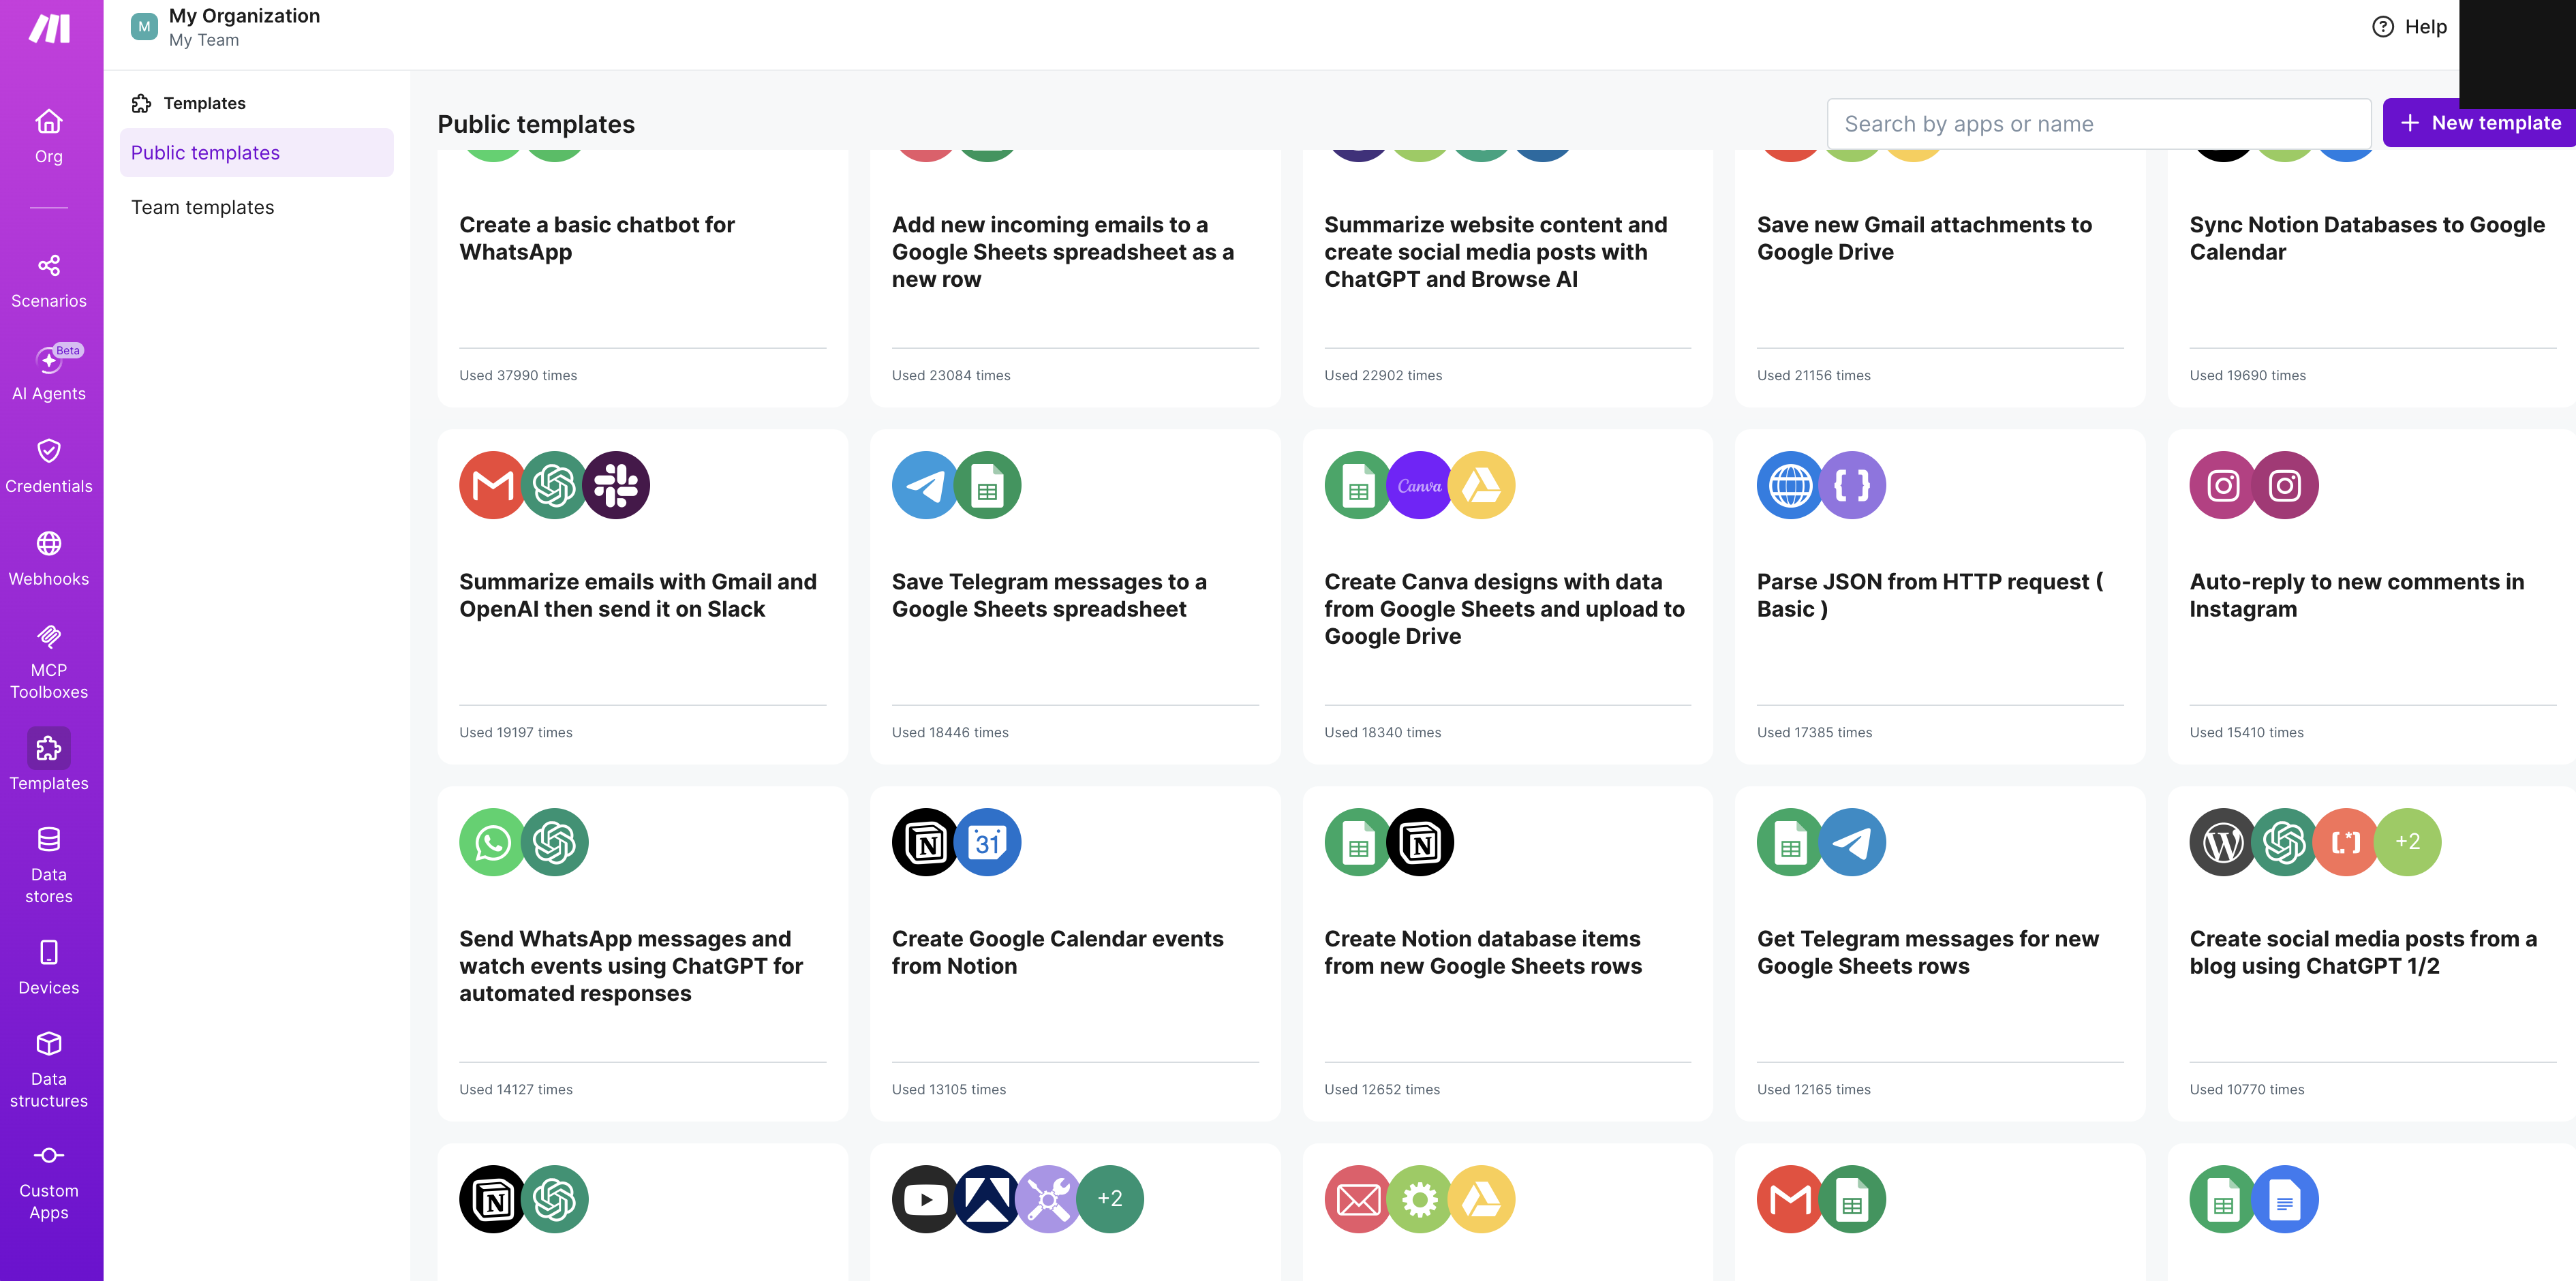
After logging into Make, click Templates in the left menu. Templates are scenarios others already built — apply one and tweak a few settings, far faster than a blank canvas.
Search Gmail or Sheets in the template gallery and find something like “Save a Gmail email to Google Sheets as a new row.”
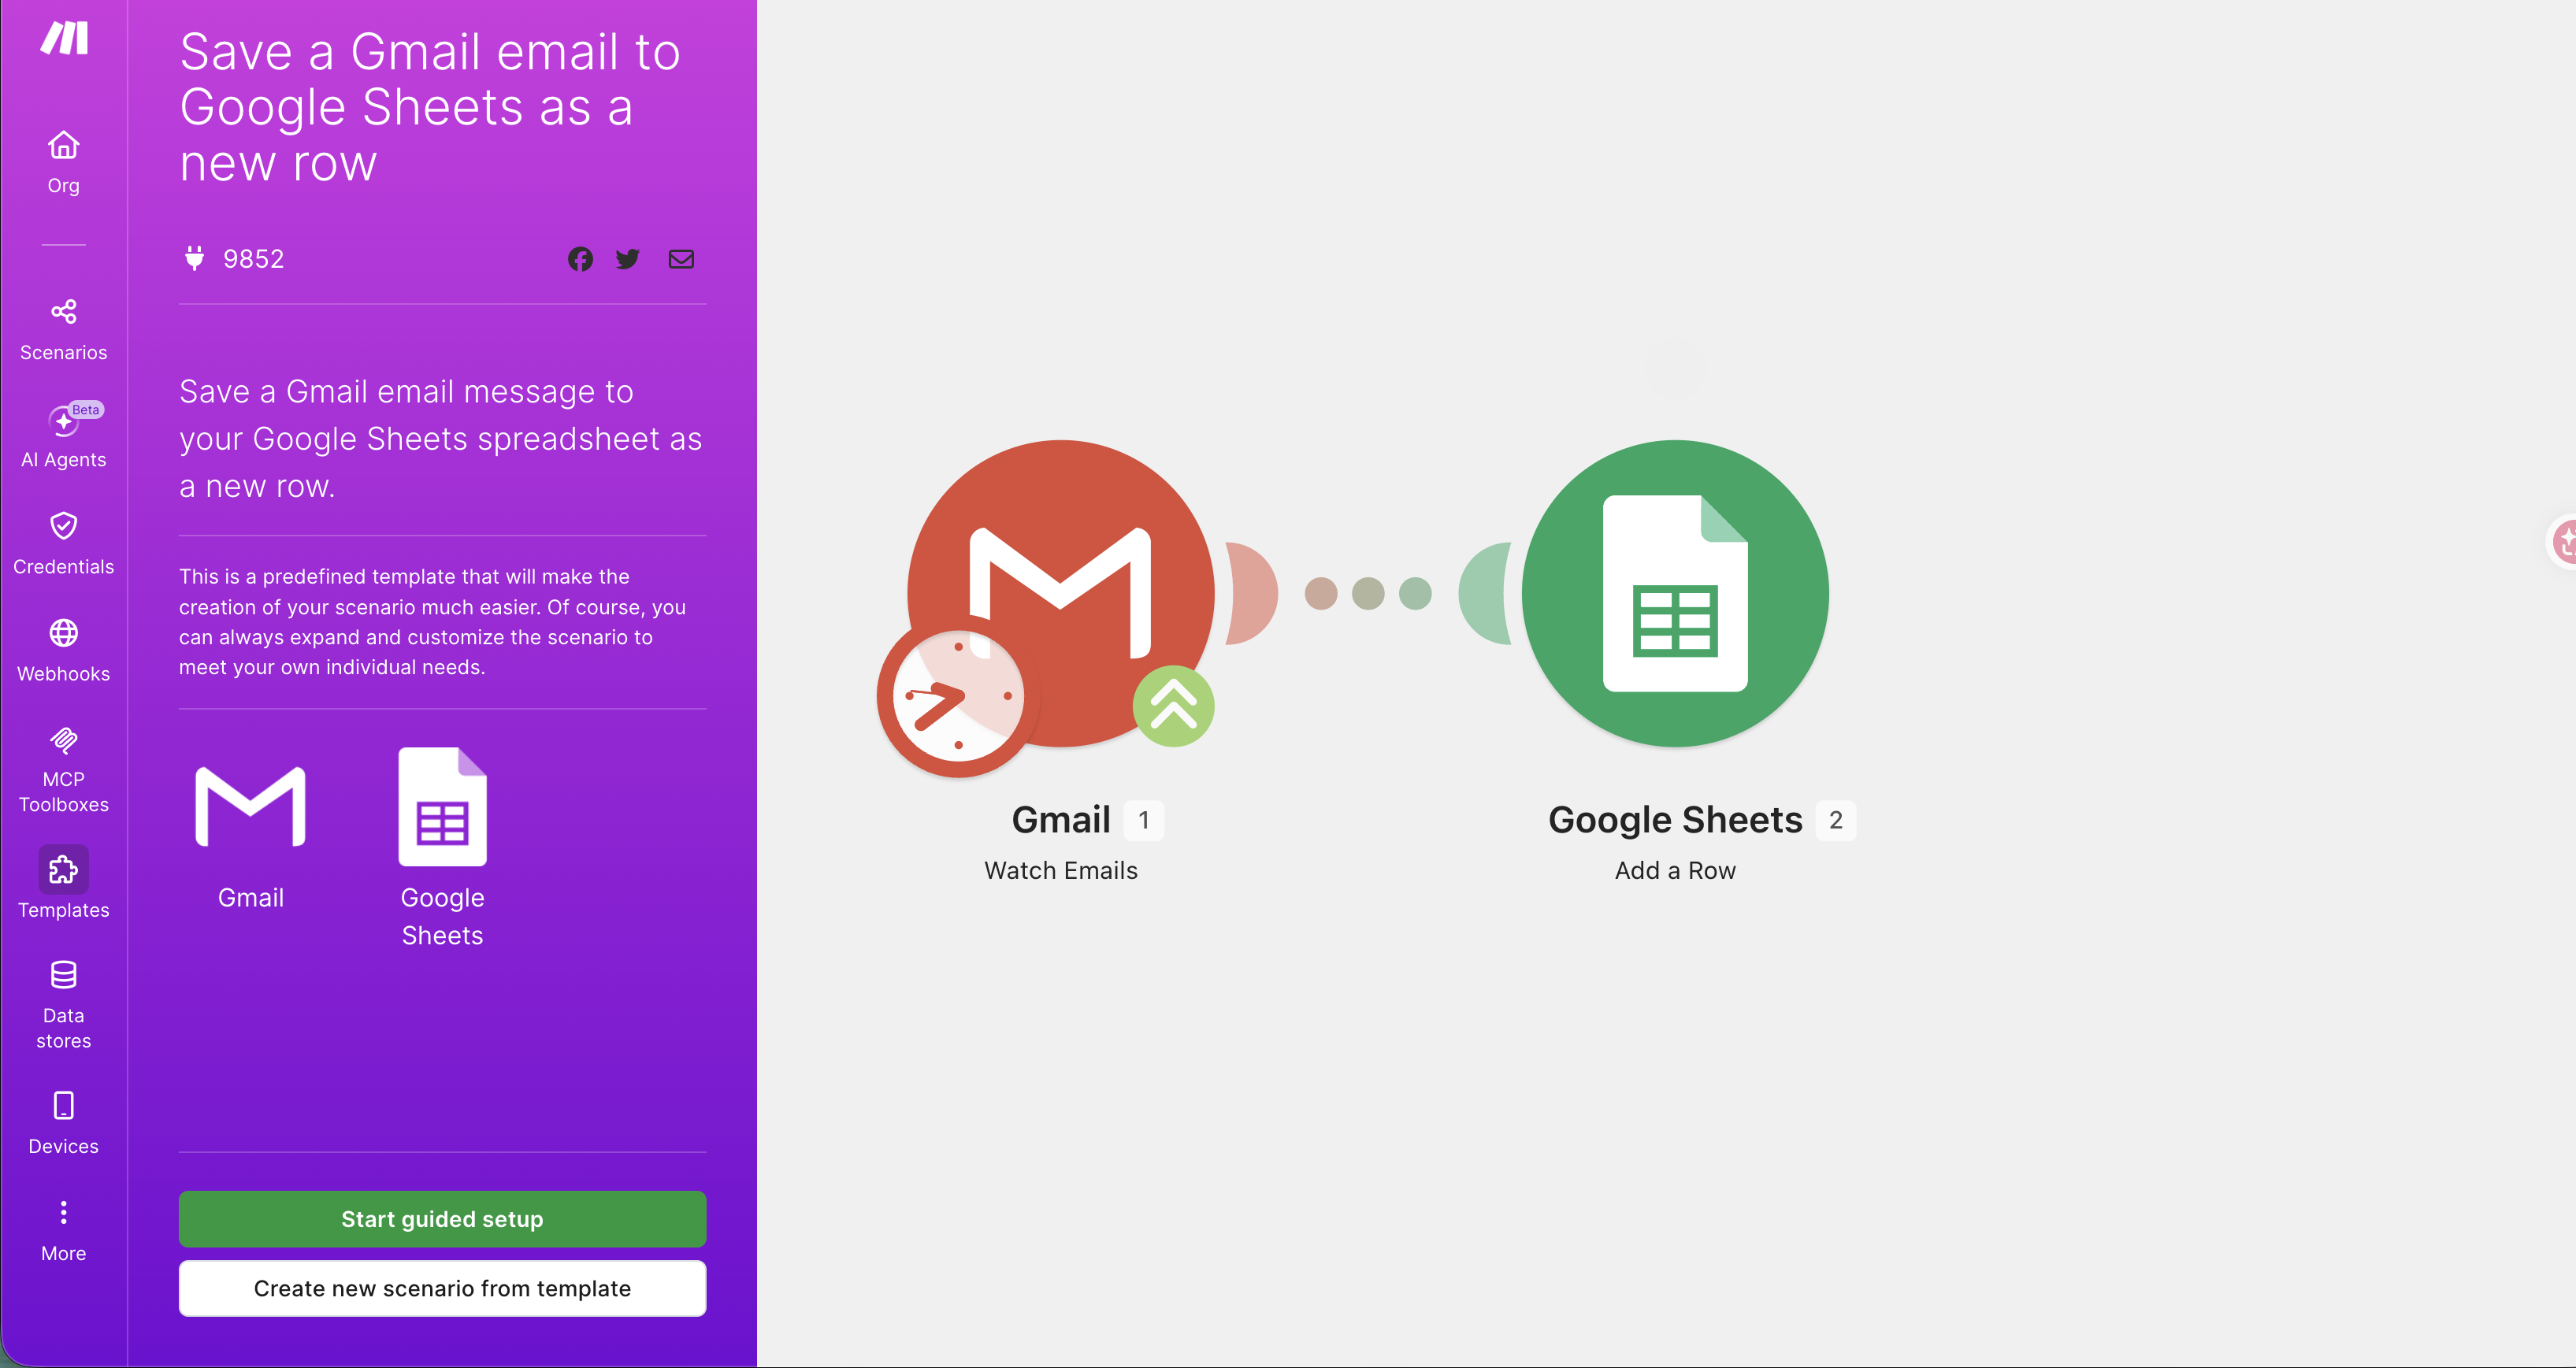
Open the template and you’ll see its pre-drawn flow: Gmail “Watch Emails” → Google Sheets “Add a Row.” Click “Start guided setup” or Create new scenario from template.
🚨 My URL starts with eu1 / eu2 / us1 — normal?
Normal. Make’s URL prefix depends on your account’s region (eu1.make.com, eu2.make.com…). Just follow your own account’s URL; ignore which one the tutorial screenshots show.
Step 2: Configure the Gmail trigger “Watch emails”
The flow’s first module is Gmail “Watch emails” — a trigger that “watches” your inbox and kicks off the whole flow whenever a matching new email arrives.
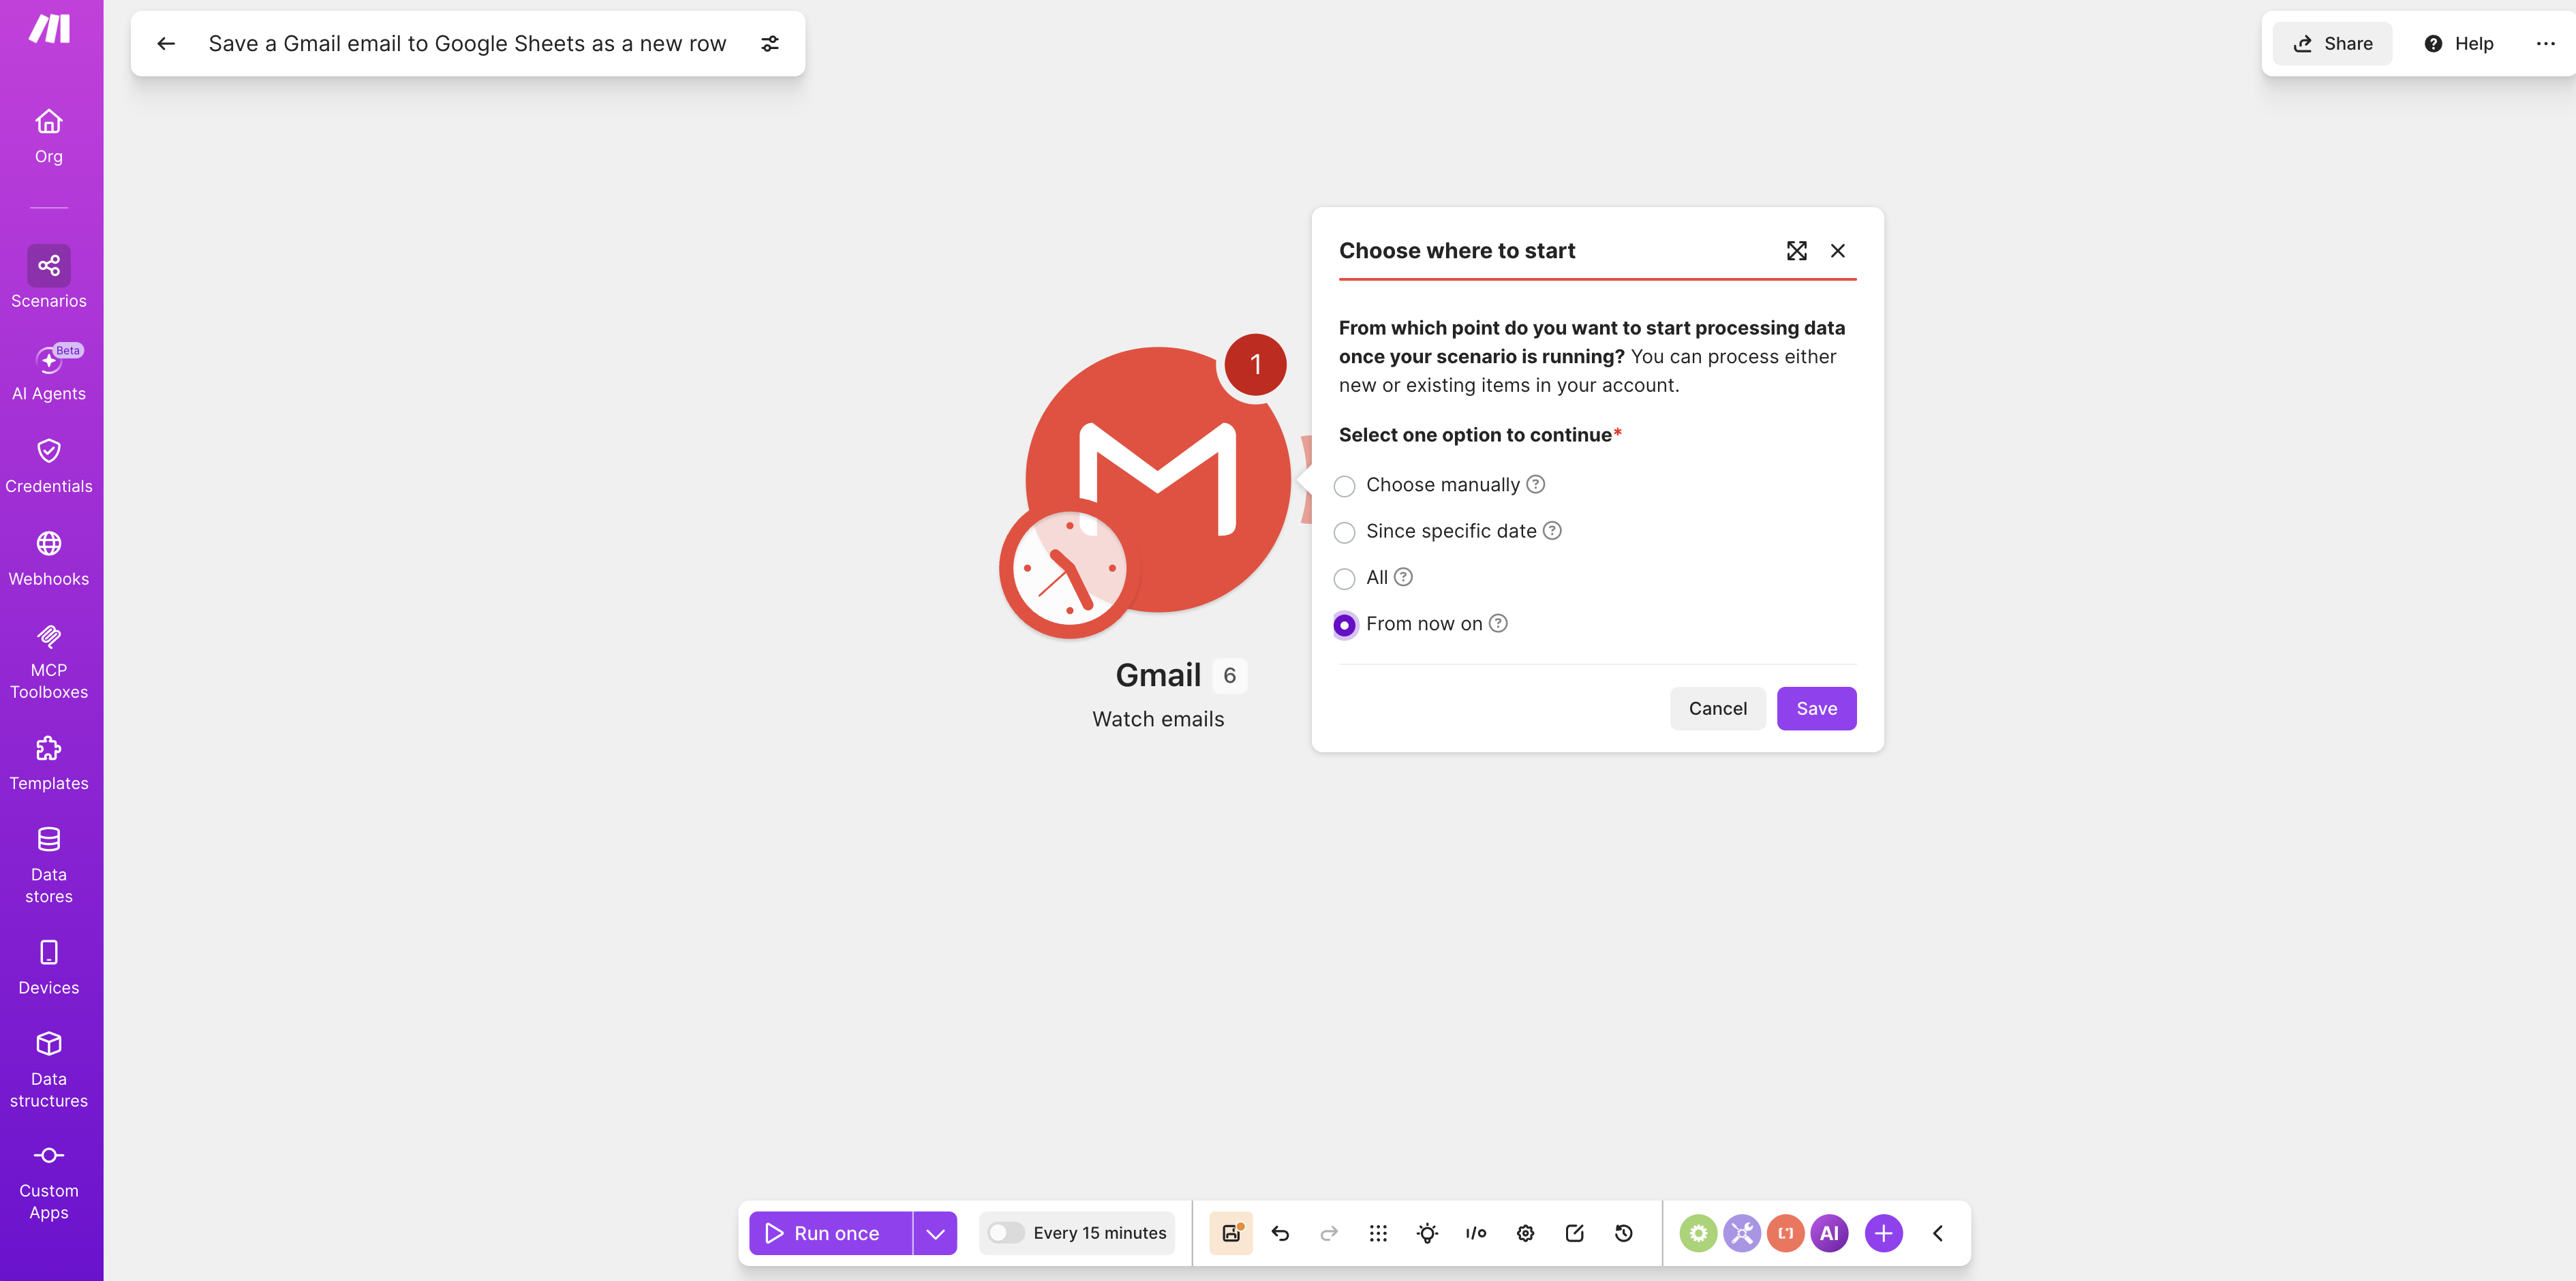
Click it, and it asks “Choose where to start.” Pick From now on — the simplest choice: process only emails that arrive afterward, without pulling in thousands of old messages.
Step 3: Authorize the Google connection (Sign in with Google)
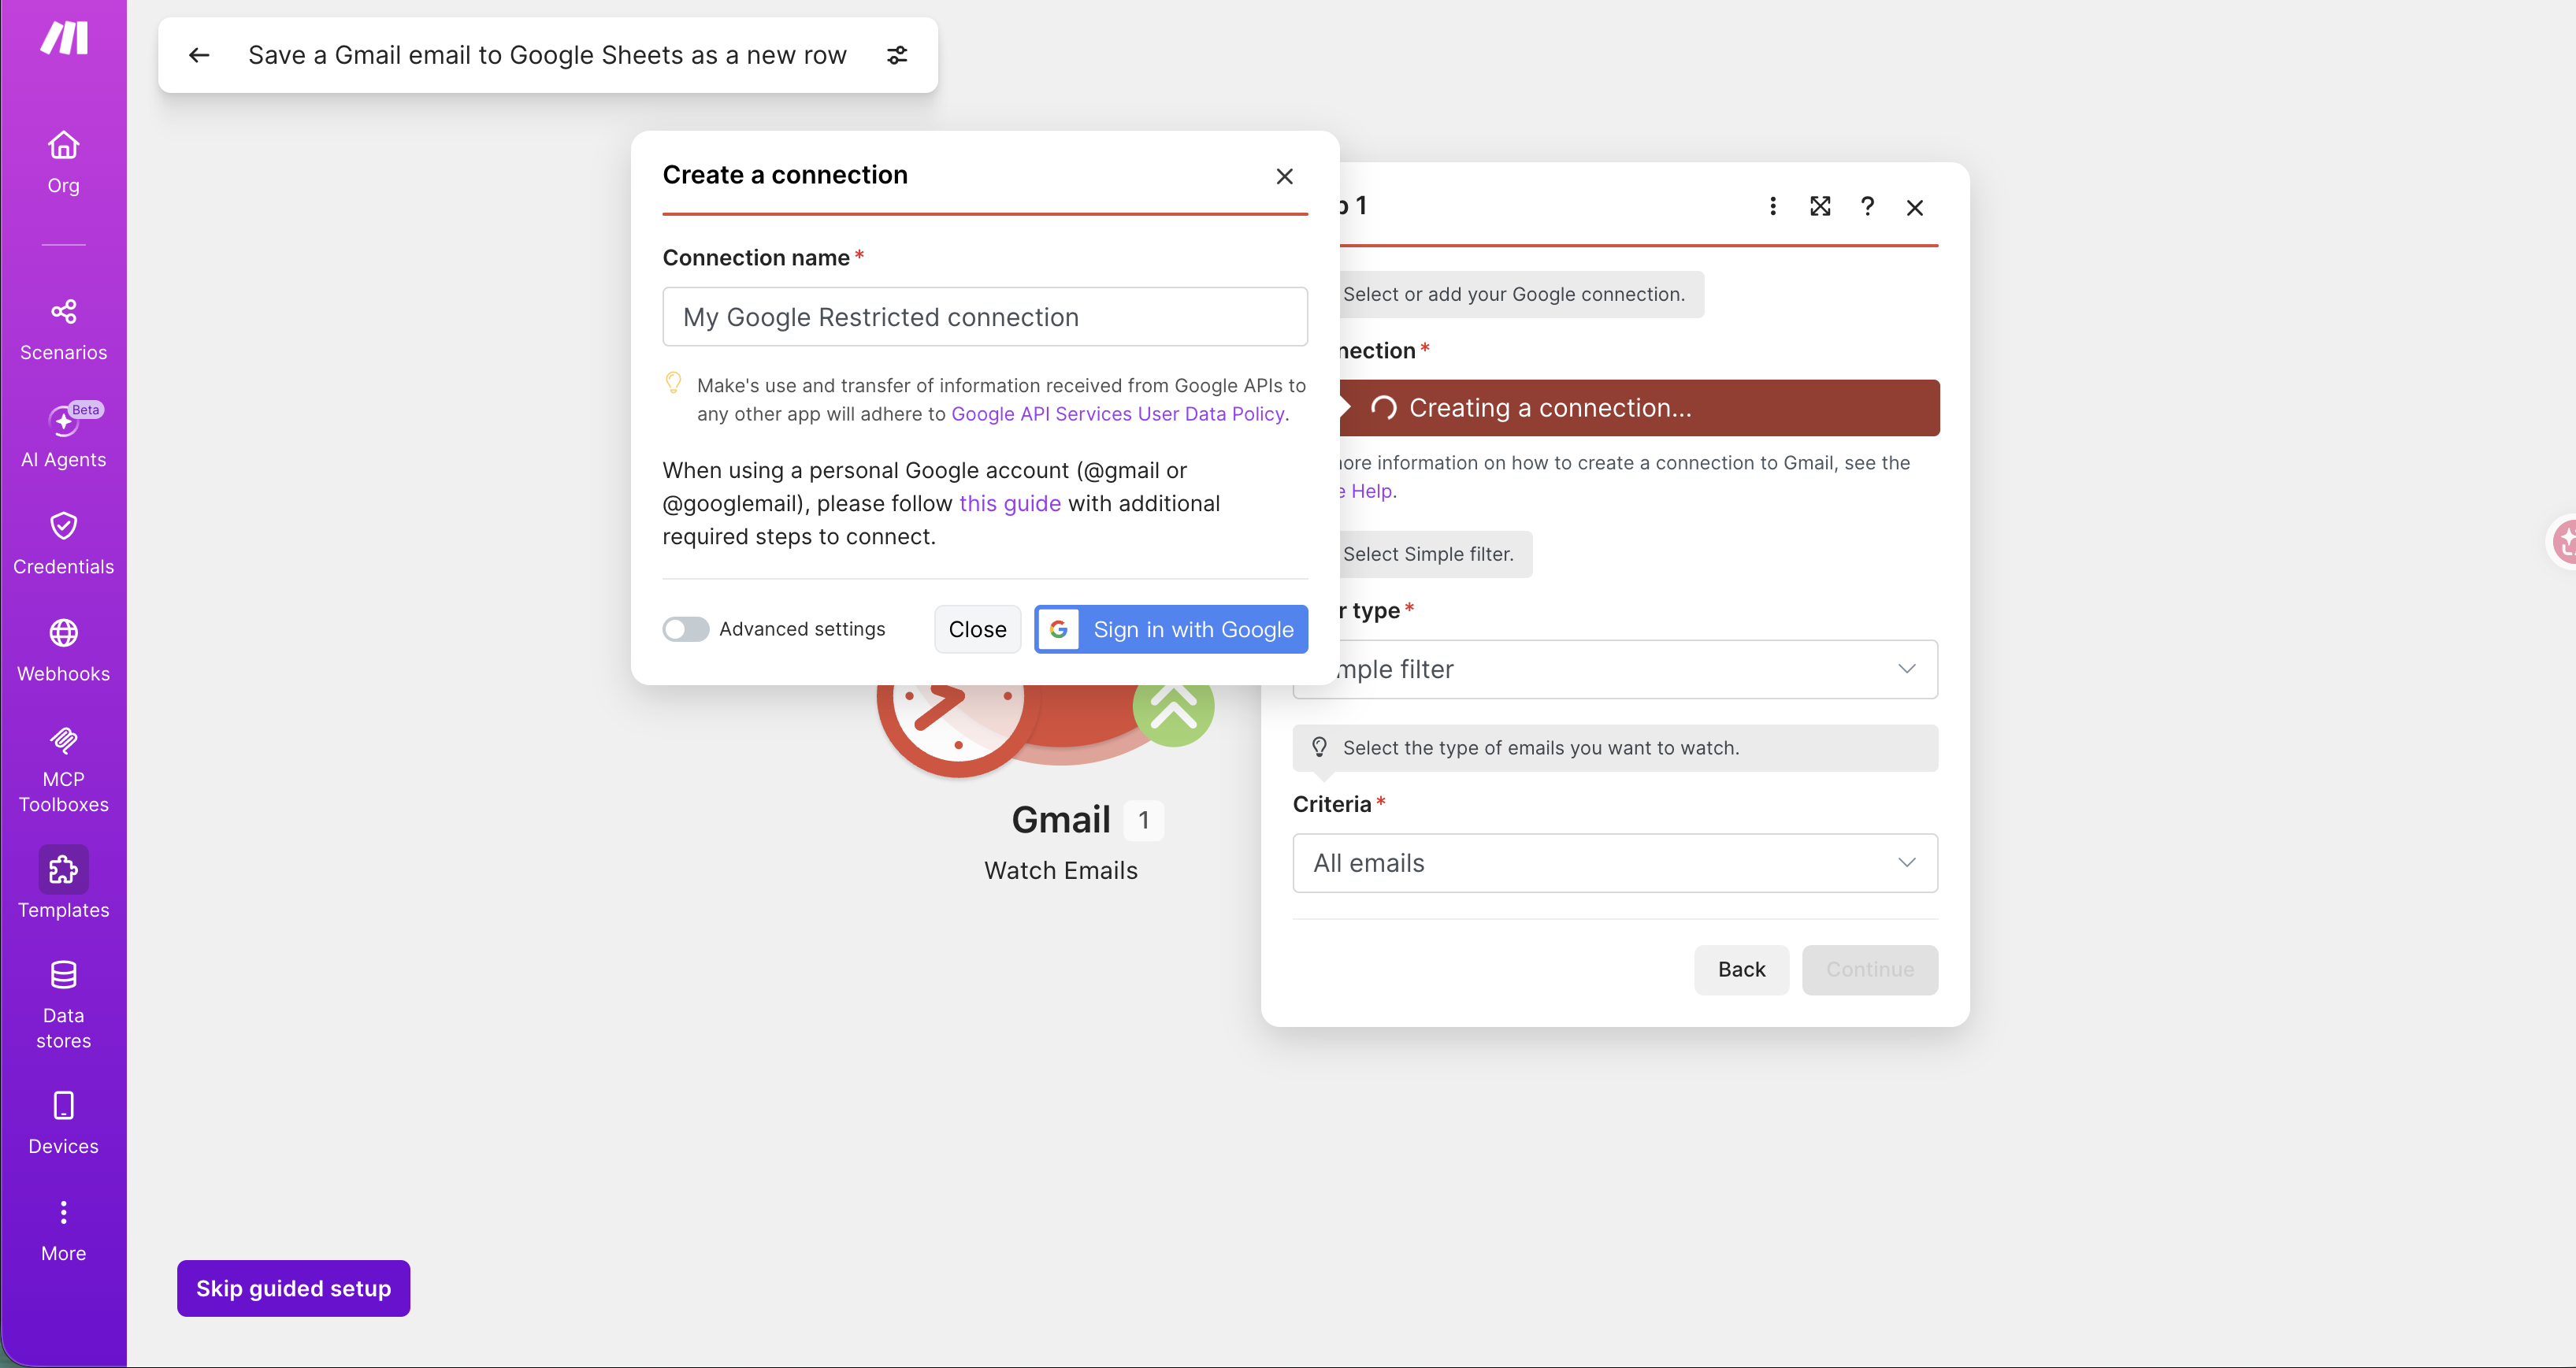
The first time you use the Gmail module, Make asks you to create a connection to Google:
- Name the connection (default like “My Google connection”).
- Click Sign in with Google.
- In the Google popup, pick your account, review the permissions, and consent.
During authorization Google lists the permissions Make wants (e.g., “read and compose Gmail”) — these are necessary for automation to read/write mail. Confirm it’s the official Make app and consent.
🚨 Connection stuck on “Creating a connection…”?
- Make sure the Google popup actually opened (it can get blocked by the browser).
- If your Gmail is a personal account and needs more sensitive scopes, Google may require stricter verification — that’s when you build your own Google Cloud project + OAuth client. That’s the advanced path; see “Google Cloud: Create a Project, Enable APIs, Configure the OAuth Consent Screen.”
Step 4: Configure the Google Sheets write module “Add a Row”
The second module, Google Sheets “Add a Row,” writes data as a spreadsheet row. Click it and fill:
- Connection: use the Google connection you just made.
- Search Method:
Search by path. - Drive / Spreadsheet Name / Sheet Name: pick the drive, spreadsheet file, and sheet to write to (e.g.,
Sheet1). - Table contains headers:
Yes(your sheet’s first row is column headers).
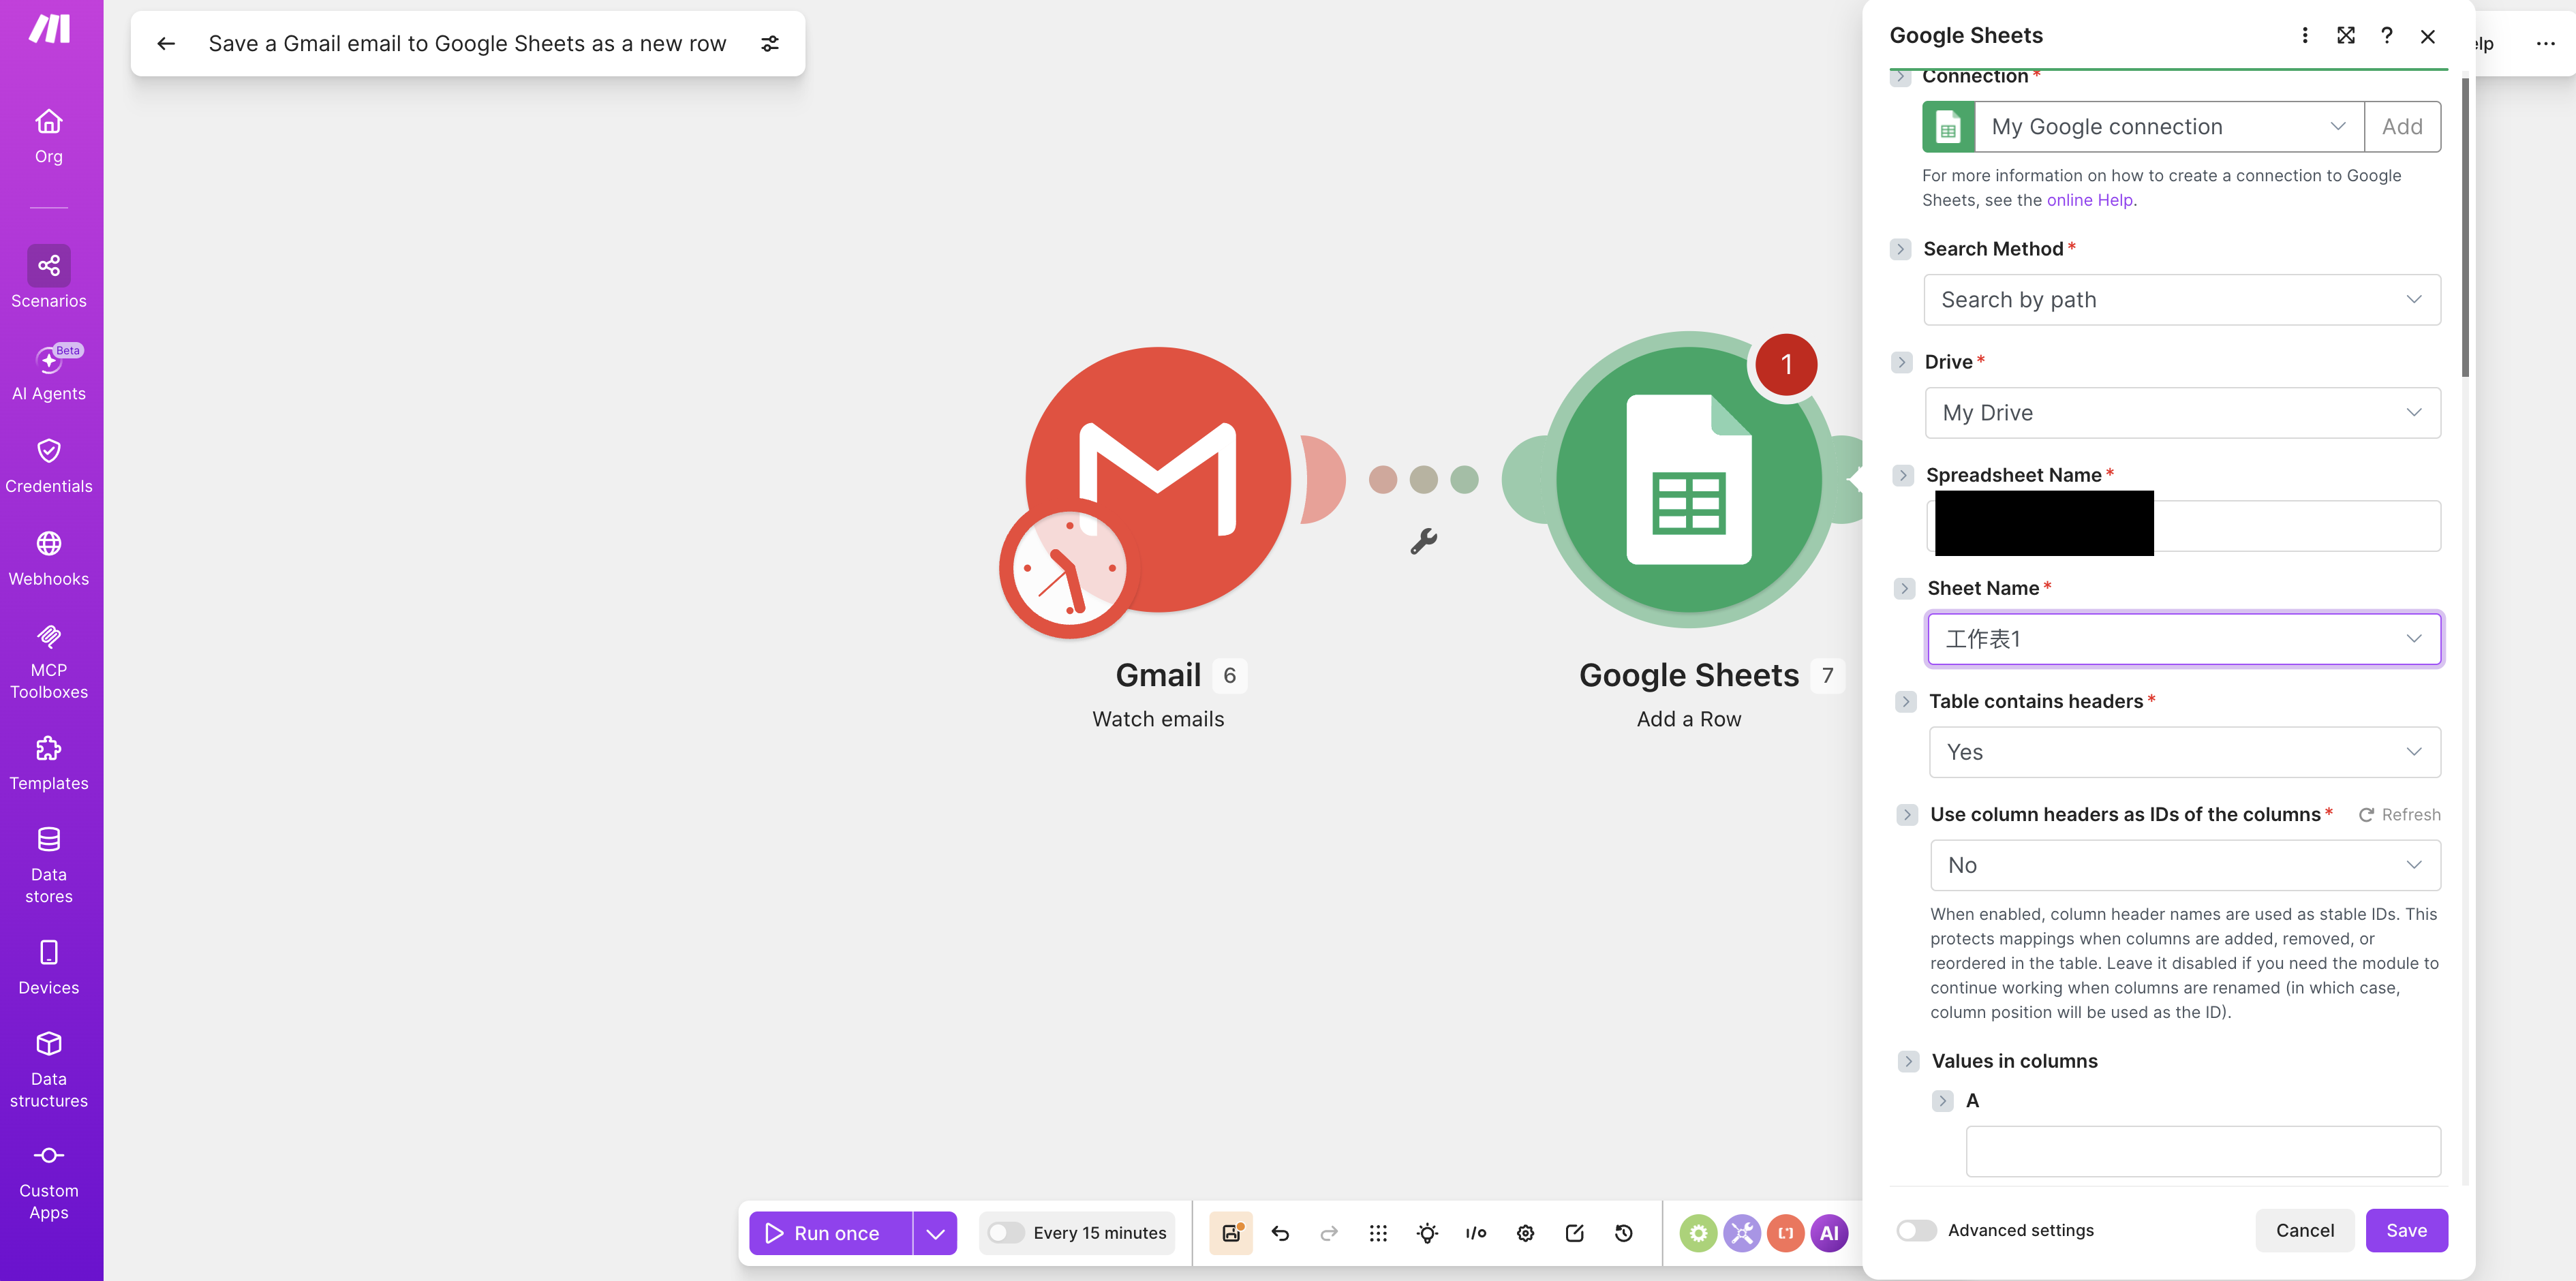
Date,Sender,Subject,Body) so Make knows which columns to fill. Prep the sheet, then configure the module — much smoother.
Step 5: Map Gmail fields to spreadsheet columns
This is the key — and most fun — step: field mapping.
In the module’s “Values in columns” area, click a column’s input and Make drops down a panel listing everything the previous Gmail module can output: Subject, From, Date, Full text, Snippet…. Click the data you want in that column — it becomes a colored “chip” inserted into the field.
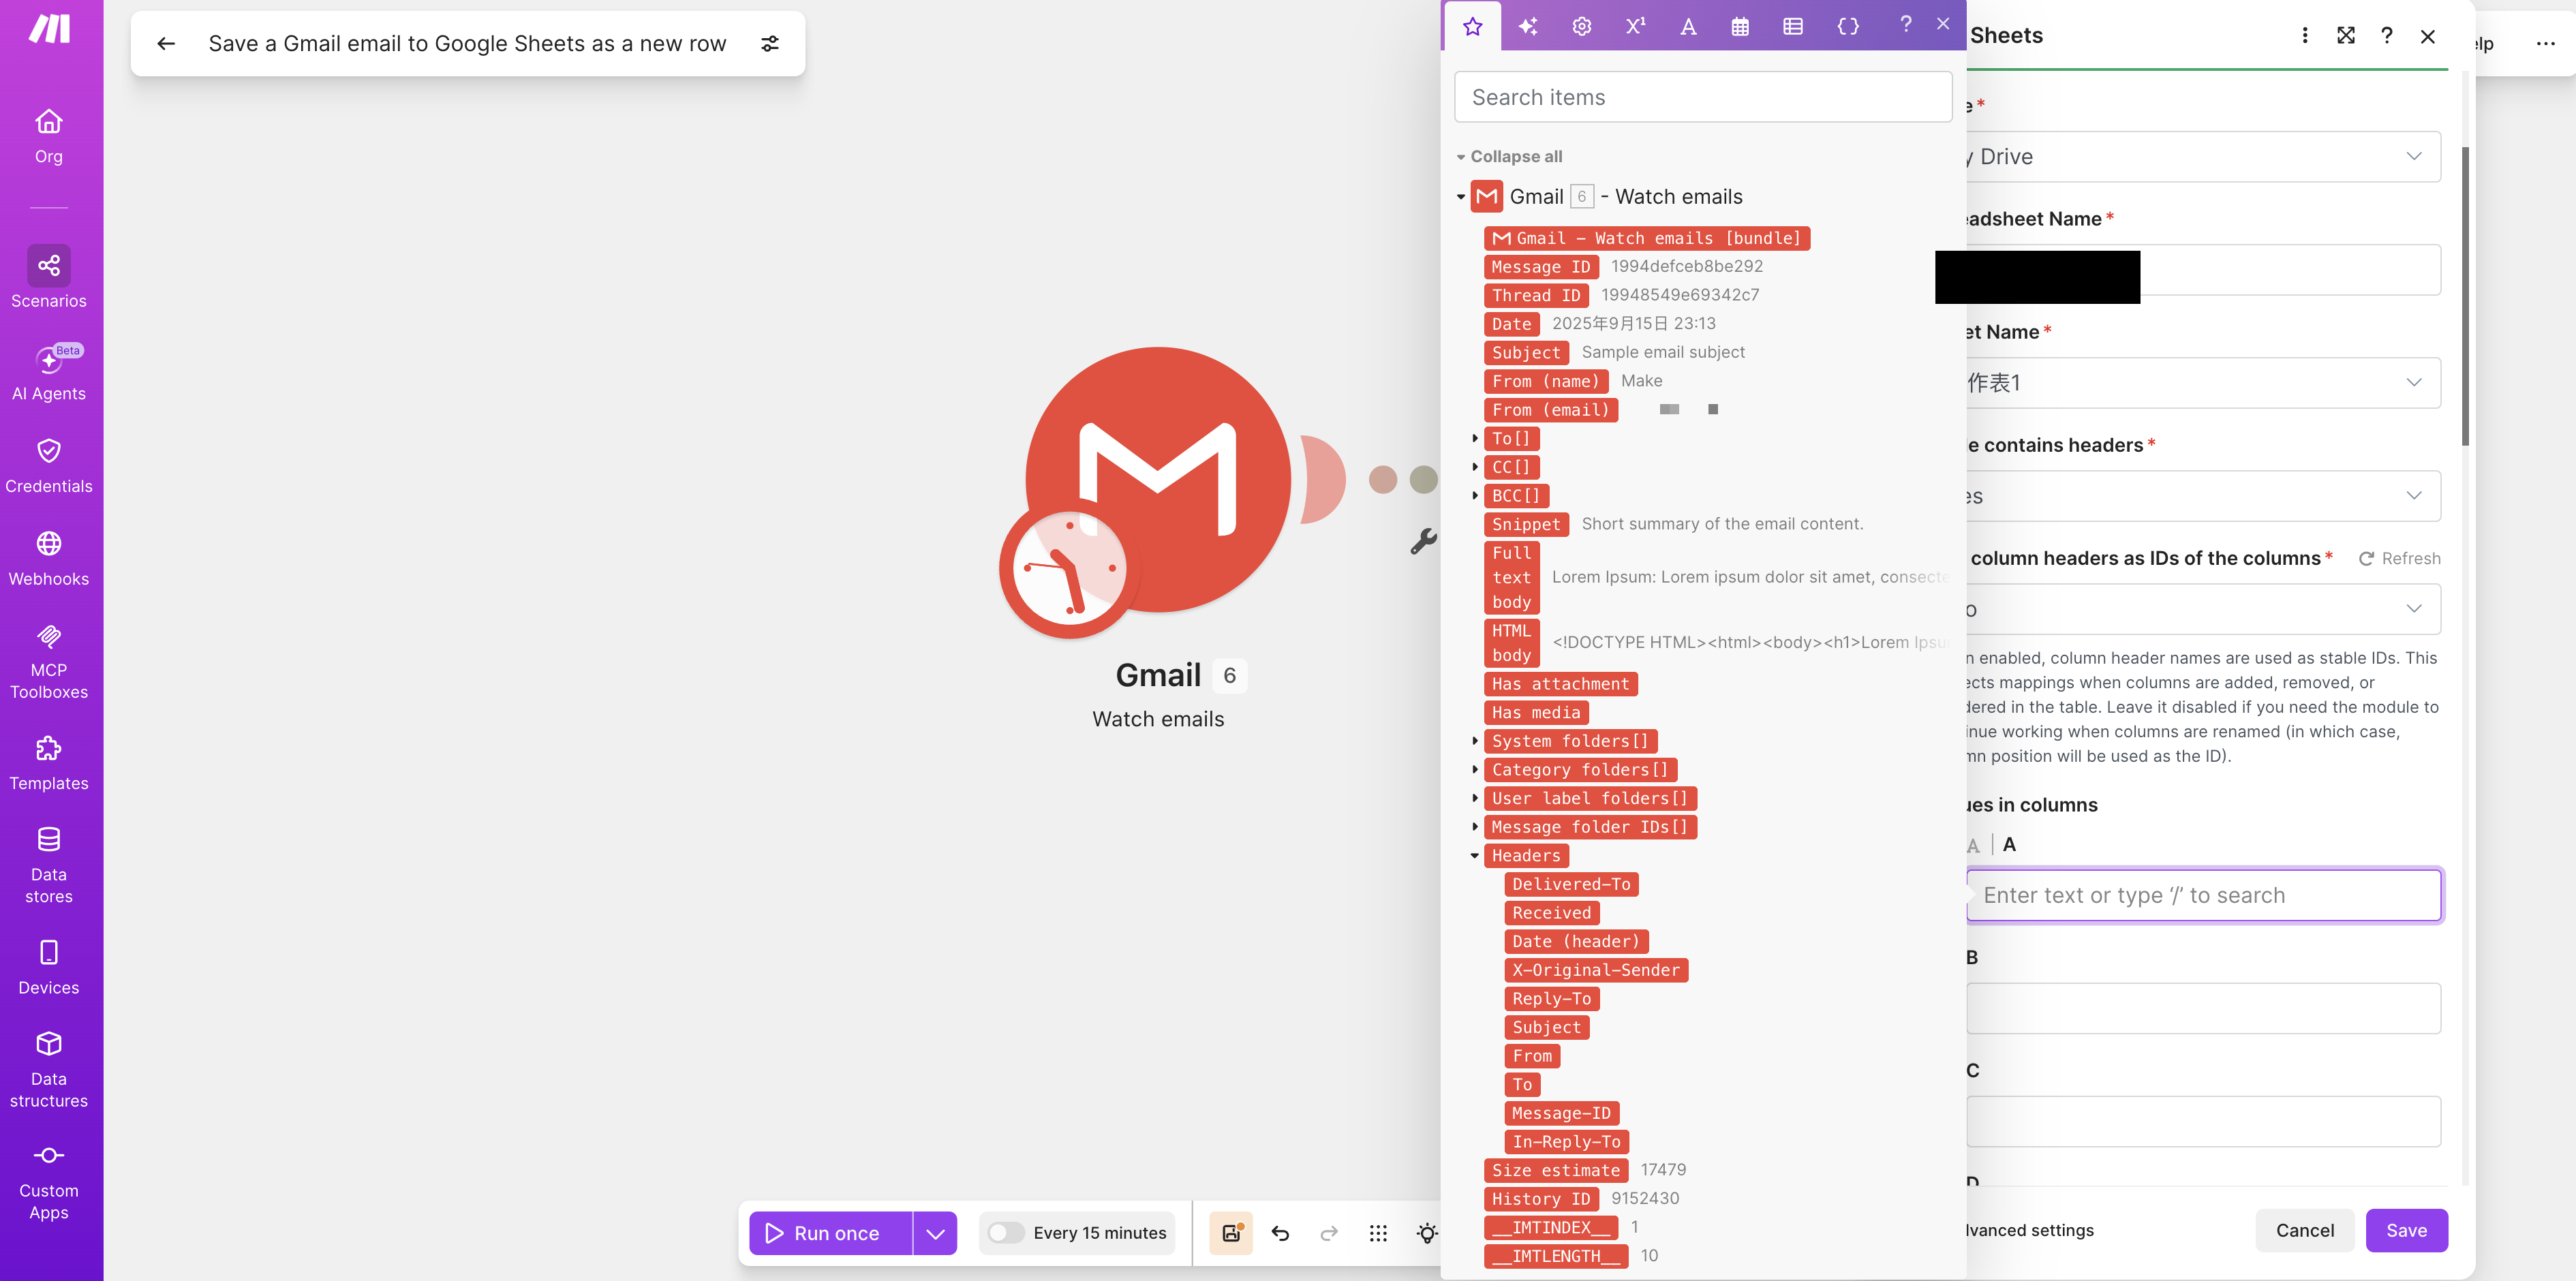
For example: put Gmail’s Subject into the “Subject” column, From into “Sender,” and Full text into “Body.”
Step 6: Done! Look at your first scenario
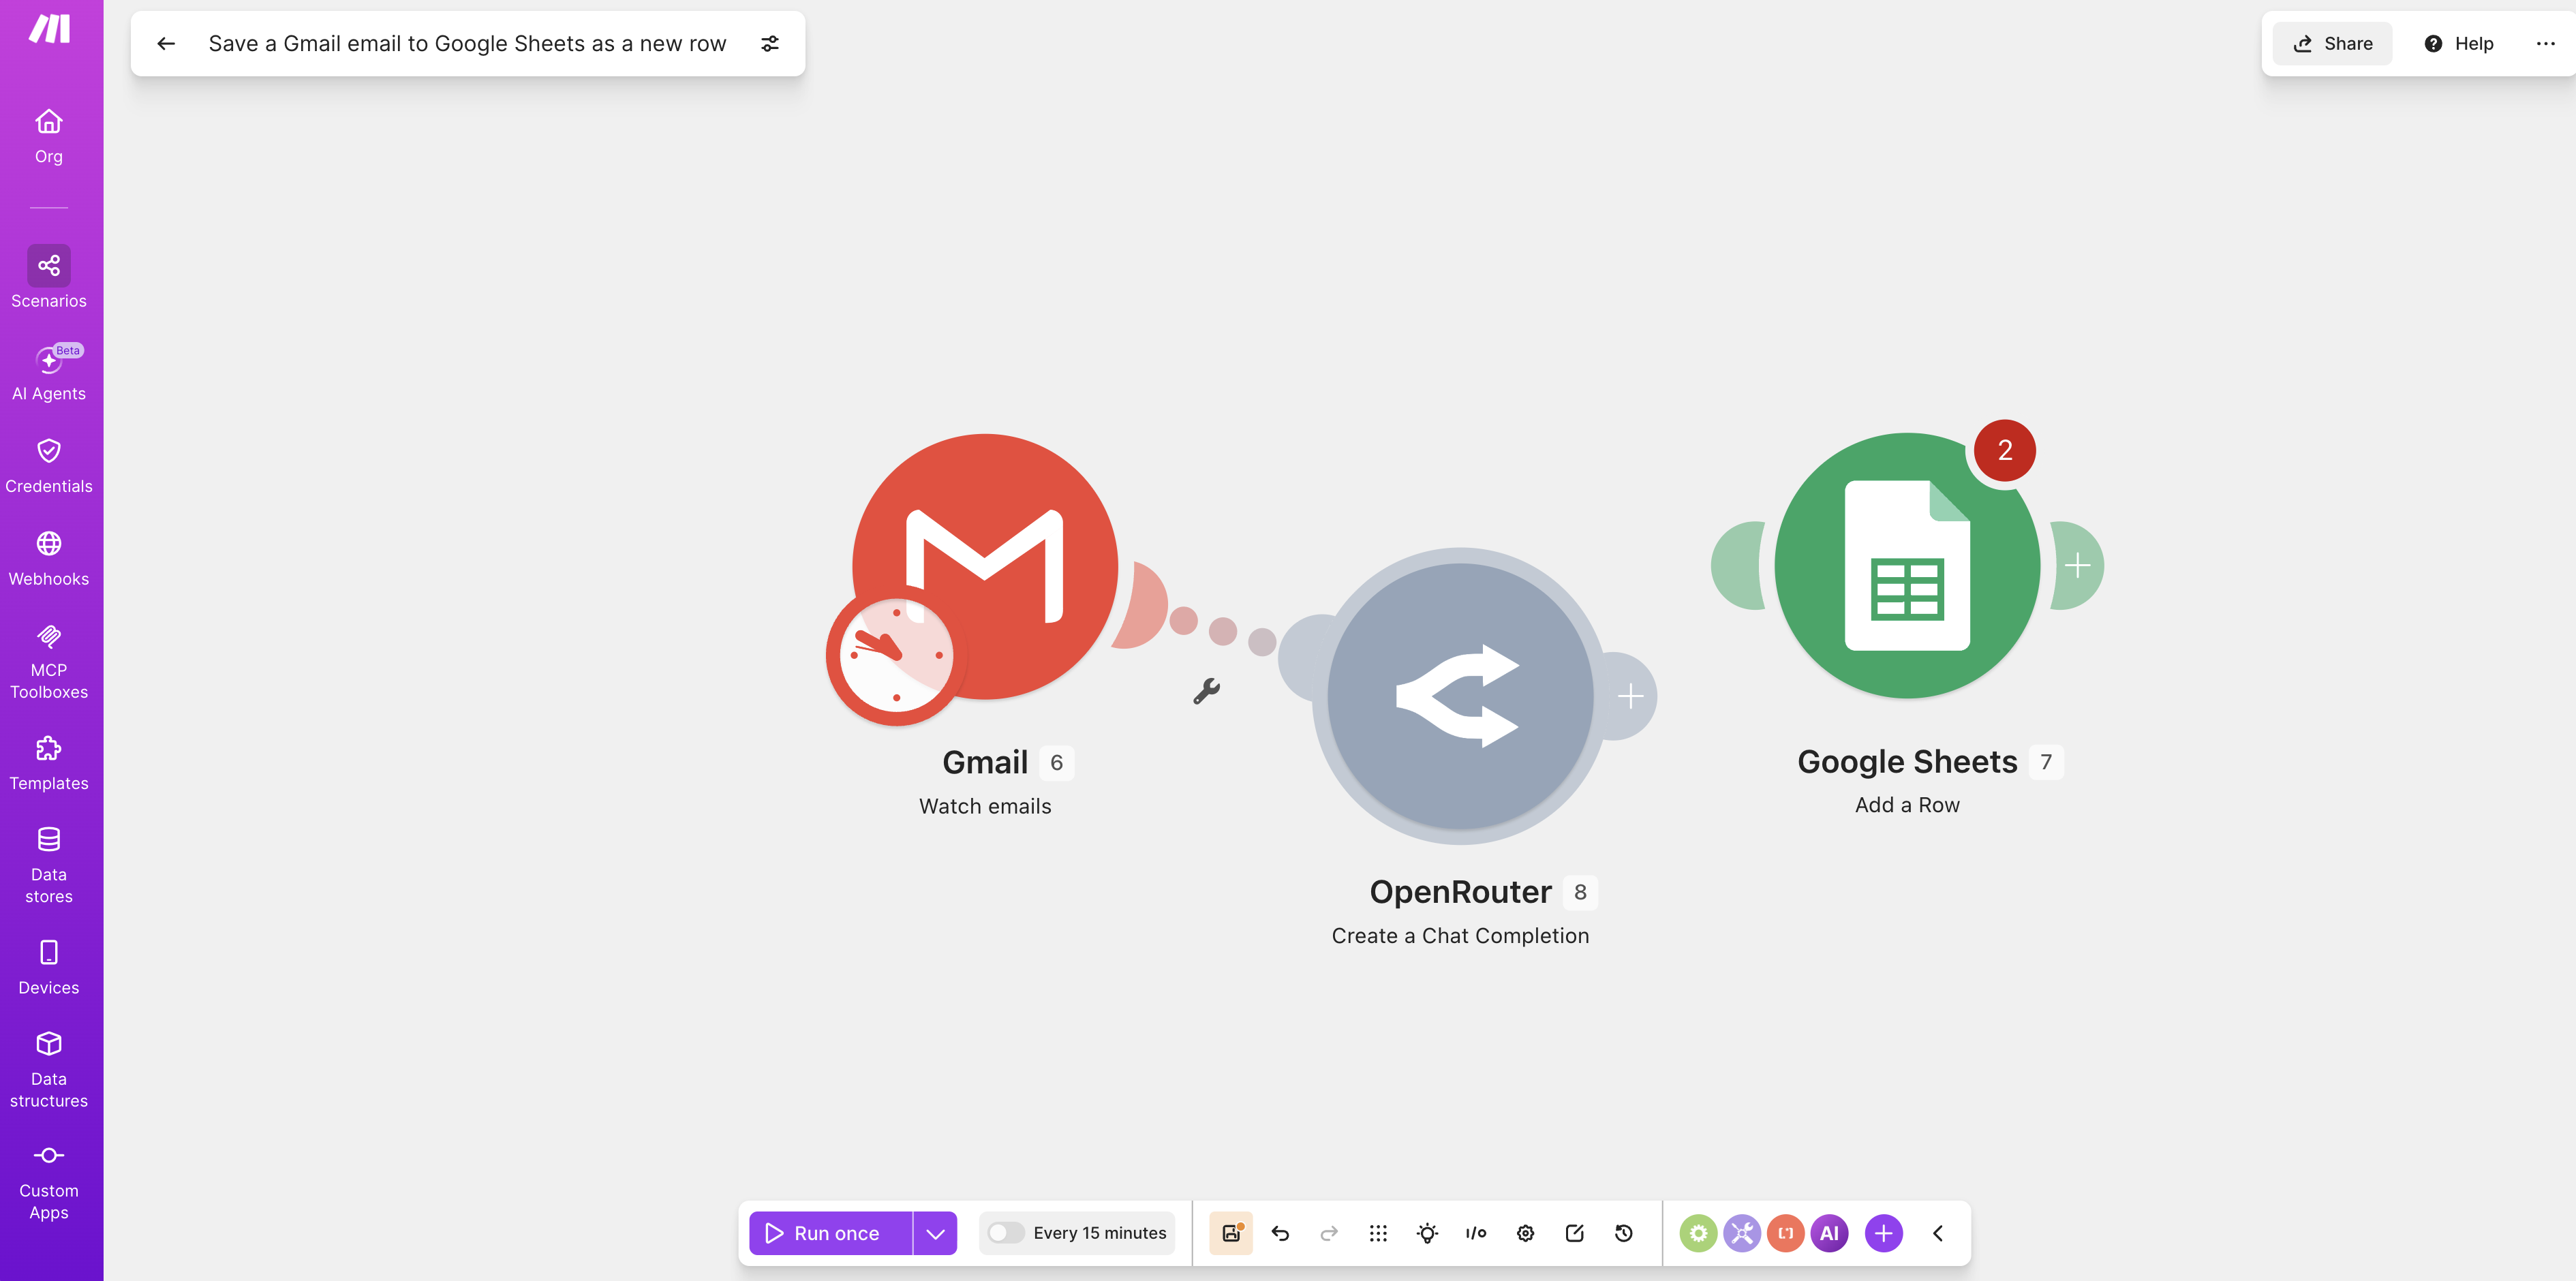
With both modules set, the canvas shows a complete flow: Gmail “Watch emails” → Google Sheets “Add a Row.”
At the bottom, “Run once” lets you test manually (send yourself a test email, click Run once, and check whether a row appears in the sheet). Once it works, turn on the schedule at the bottom-left (e.g., “Every 15 minutes”) and the automation runs on its own.
Next: let AI classify for you
You now have a “new email auto-saved to a sheet” flow. But with lots of mail, just saving isn’t enough — you’ll want to know is each email support? sales? spam?
That’s when to add an AI module: between Gmail and Sheets, insert an LLM to read the email, auto-tag a category, and write it in alongside. See the next article: “Auto-Classify Gmail with an LLM in Make.” And for the key that module needs, see “OpenRouter Sign-Up.”
這篇文章對你有幫助嗎?
💬 問答區
卡關了?直接在這裡問,其他讀者和作者都能幫忙解答。
載入中...
Found this useful? Share it with a friend who’s also getting their hands dirty
Share on LINE