Auto-Classify Gmail with an LLM in Make: Just Add One AI Module
Level up the previous 'Gmail → Google Sheets' automation: insert an OpenRouter LLM module in the middle so AI reads each email, auto-tags it 'support / sales / spam / urgent,' and writes the label into the sheet. This shows you how to wire the OpenRouter connection, pick a free model, and write a solid classification prompt.
 卡住很正常——點段落旁的 😵 卡關 讓我們知道,或直接往下滾到問答區發問。
也可以用 👍 看懂 / 😢 看不懂 告訴我們哪裡寫得好、哪裡要改。
卡住很正常——點段落旁的 😵 卡關 讓我們知道,或直接往下滾到問答區發問。
也可以用 👍 看懂 / 😢 看不懂 告訴我們哪裡寫得好、哪裡要改。
In one line: Insert an OpenRouter “Create a Chat Completion” module in the middle of the previous Gmail → Sheets flow: build the OpenRouter connection via OAuth, pick a free model, write a System prompt that “returns only the label,” feed Gmail’s subject + body as the User message, then map the AI’s returned label to the Google Sheets category column — and you have an auto-classifying email pipeline.
Keywords: Make, LLM, auto-classification, OpenRouter, Create a Chat Completion, System prompt, User message, free model, Gmail, Google Sheets
What are we building? (See the whole picture)
The flow from “Your First Make Automation” was: new Gmail → write to Google Sheets.
This article inserts an AI in the middle, making it:
new Gmail → 🤖 OpenRouter LLM reads and classifies → write to Google Sheets with the label
Now your sheet has not just “who sent what” but an extra column: “is this support? sales? spam? urgent?” — when mail piles up, that column sorts it instantly.
Before you start: ① the Gmail → Sheets flow from the previous article; ② an OpenRouter API key (see “OpenRouter Sign-Up”).
Step 1: Add the OpenRouter module between Gmail and Sheets
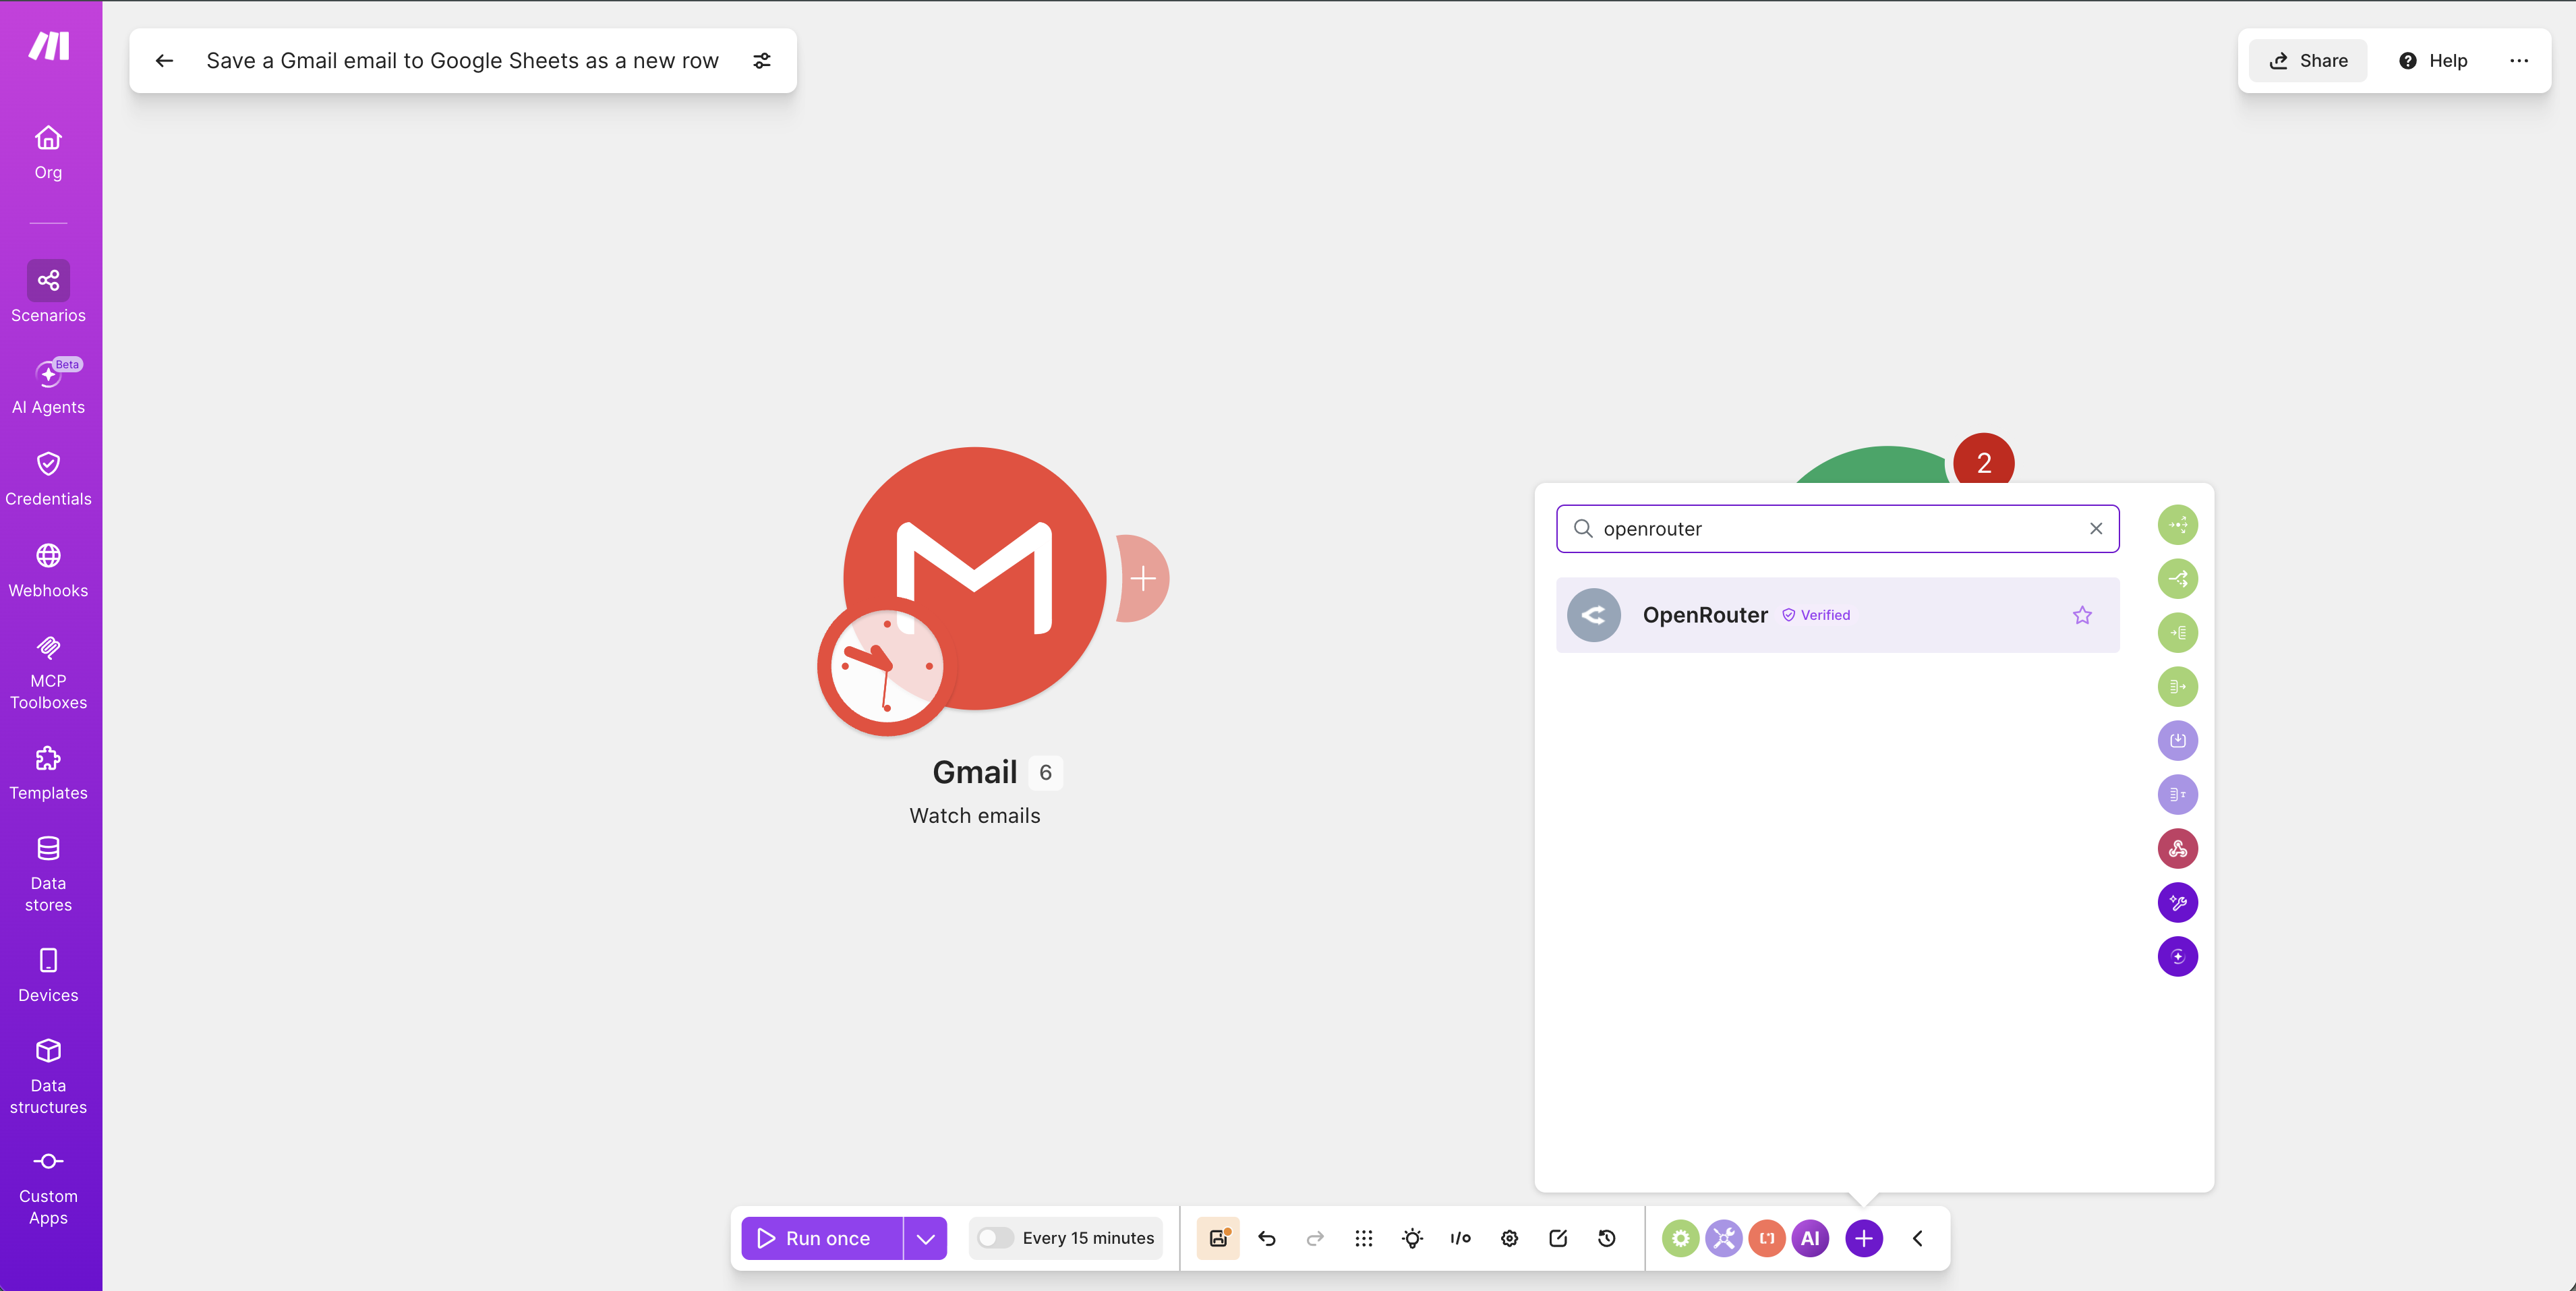
In the scenario editor, click the ”+” after the Gmail module to add a new one, type openrouter in the app search, and pick OpenRouter ✓ Verified.
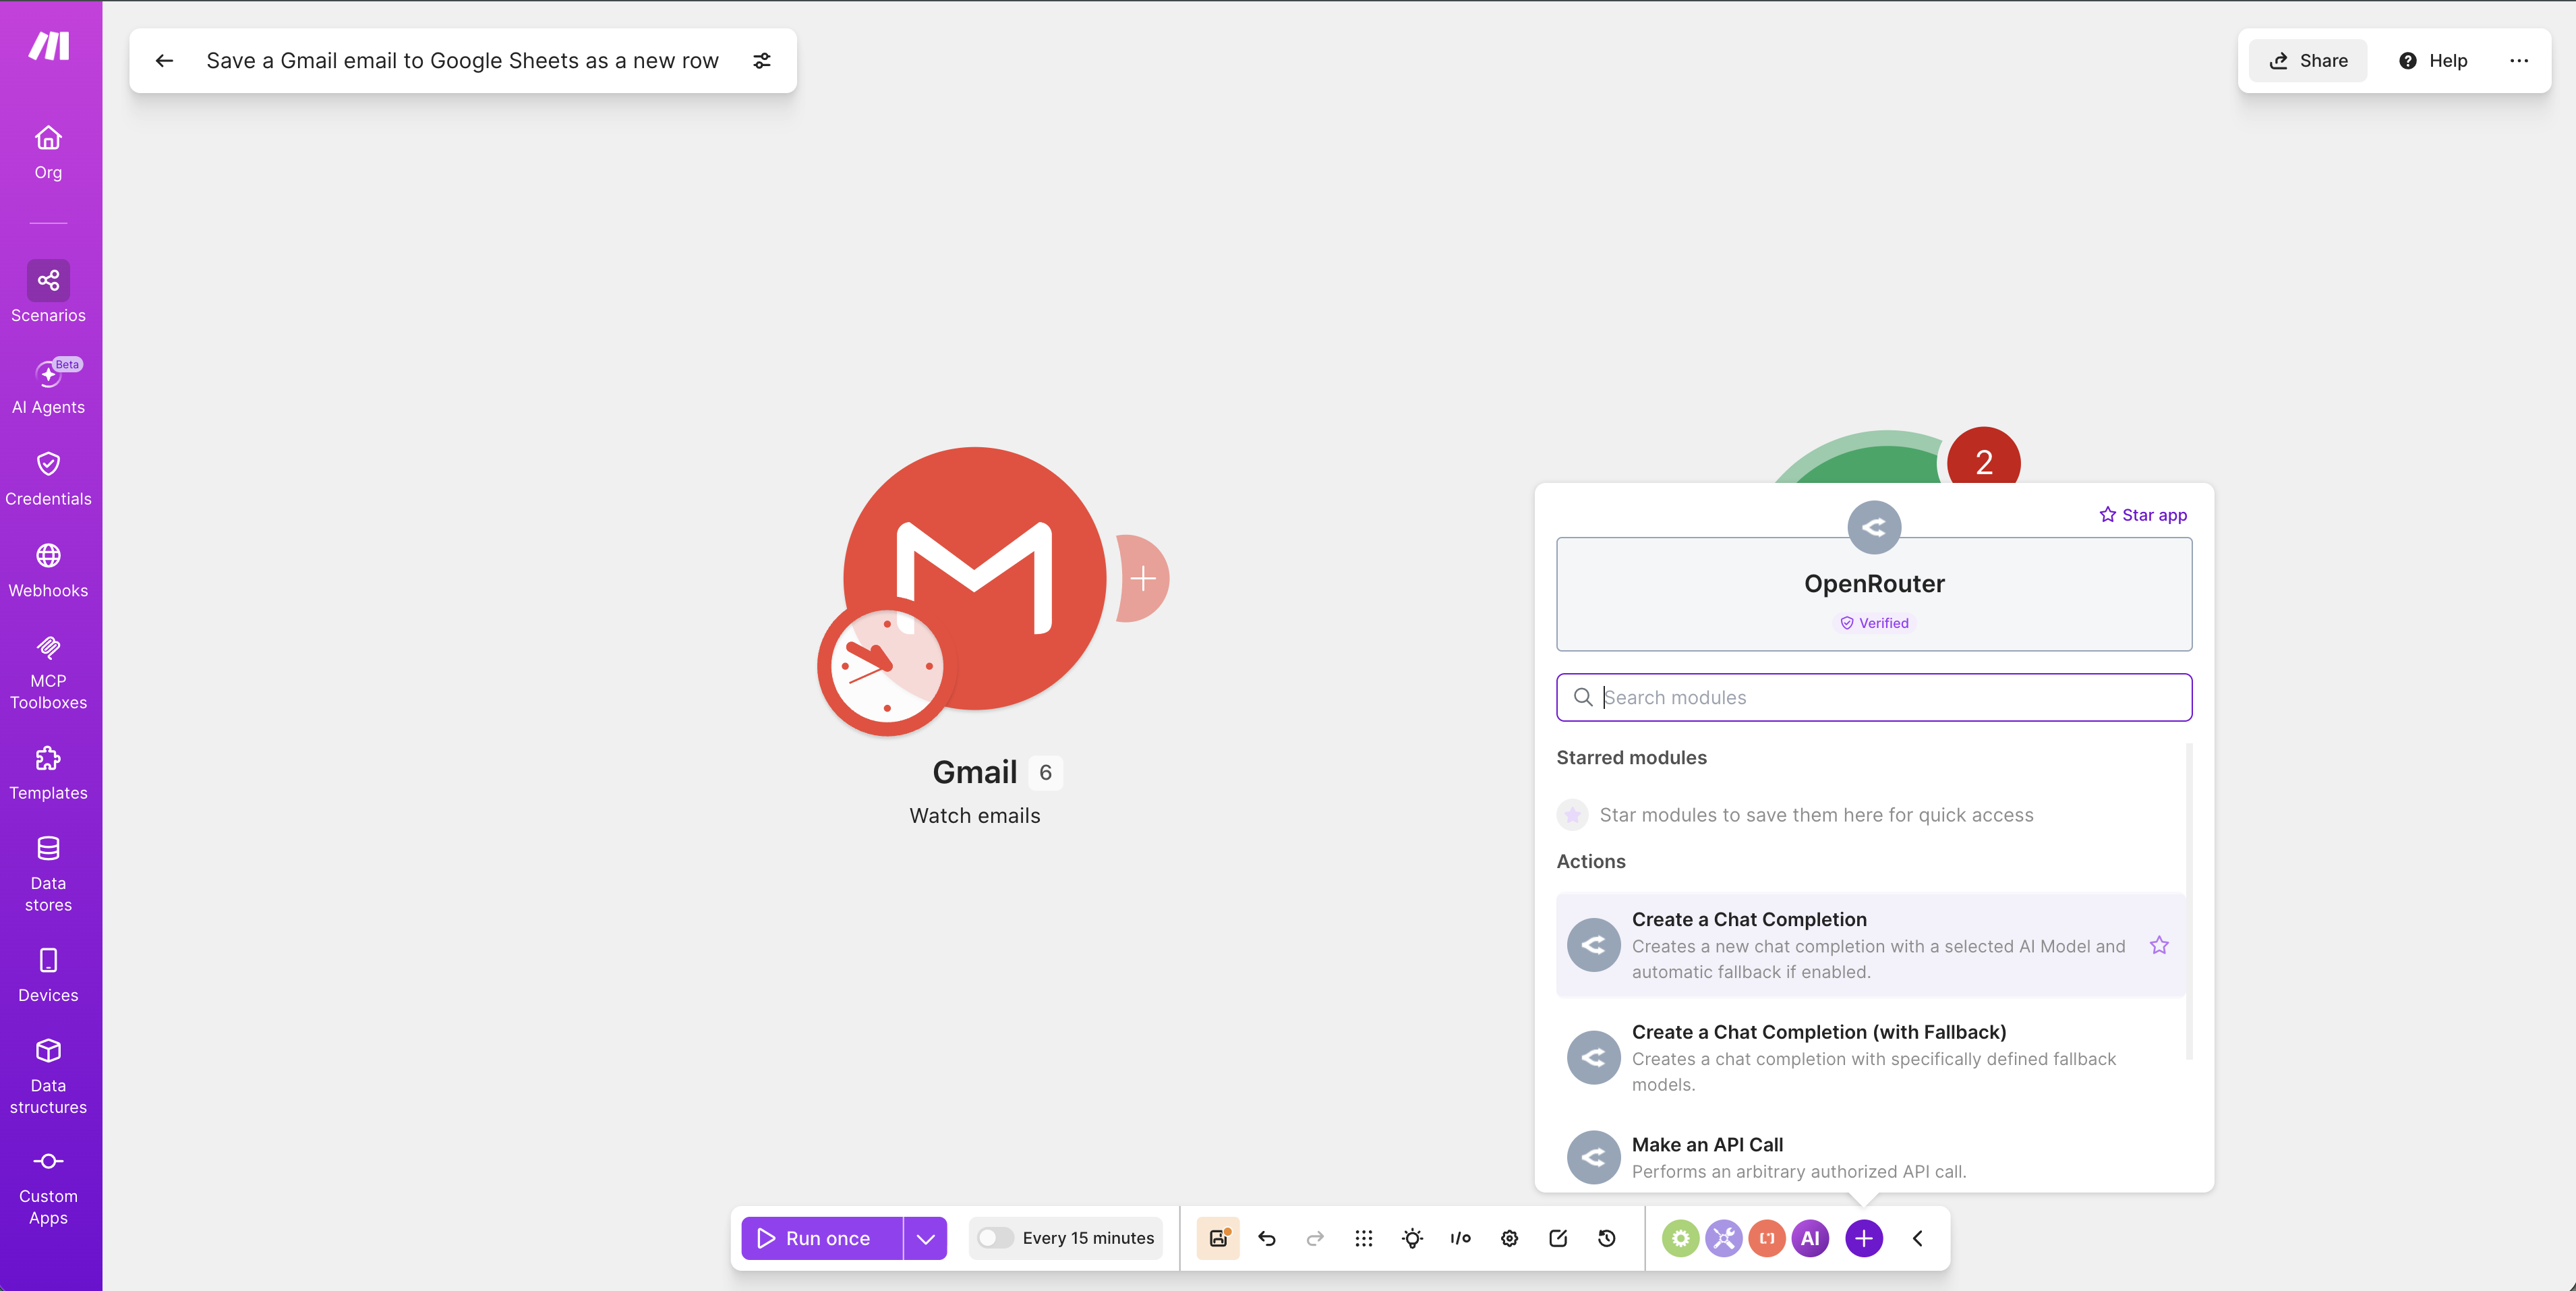
It lists OpenRouter’s Actions — choose “Create a Chat Completion” (send some text to the AI, get a reply back).
Step 2: Build the OpenRouter connection via OAuth
First time using the OpenRouter module, you build a connection. Make sends you to OpenRouter’s authorization screen asking whether to let make.com access your account and create an API key.
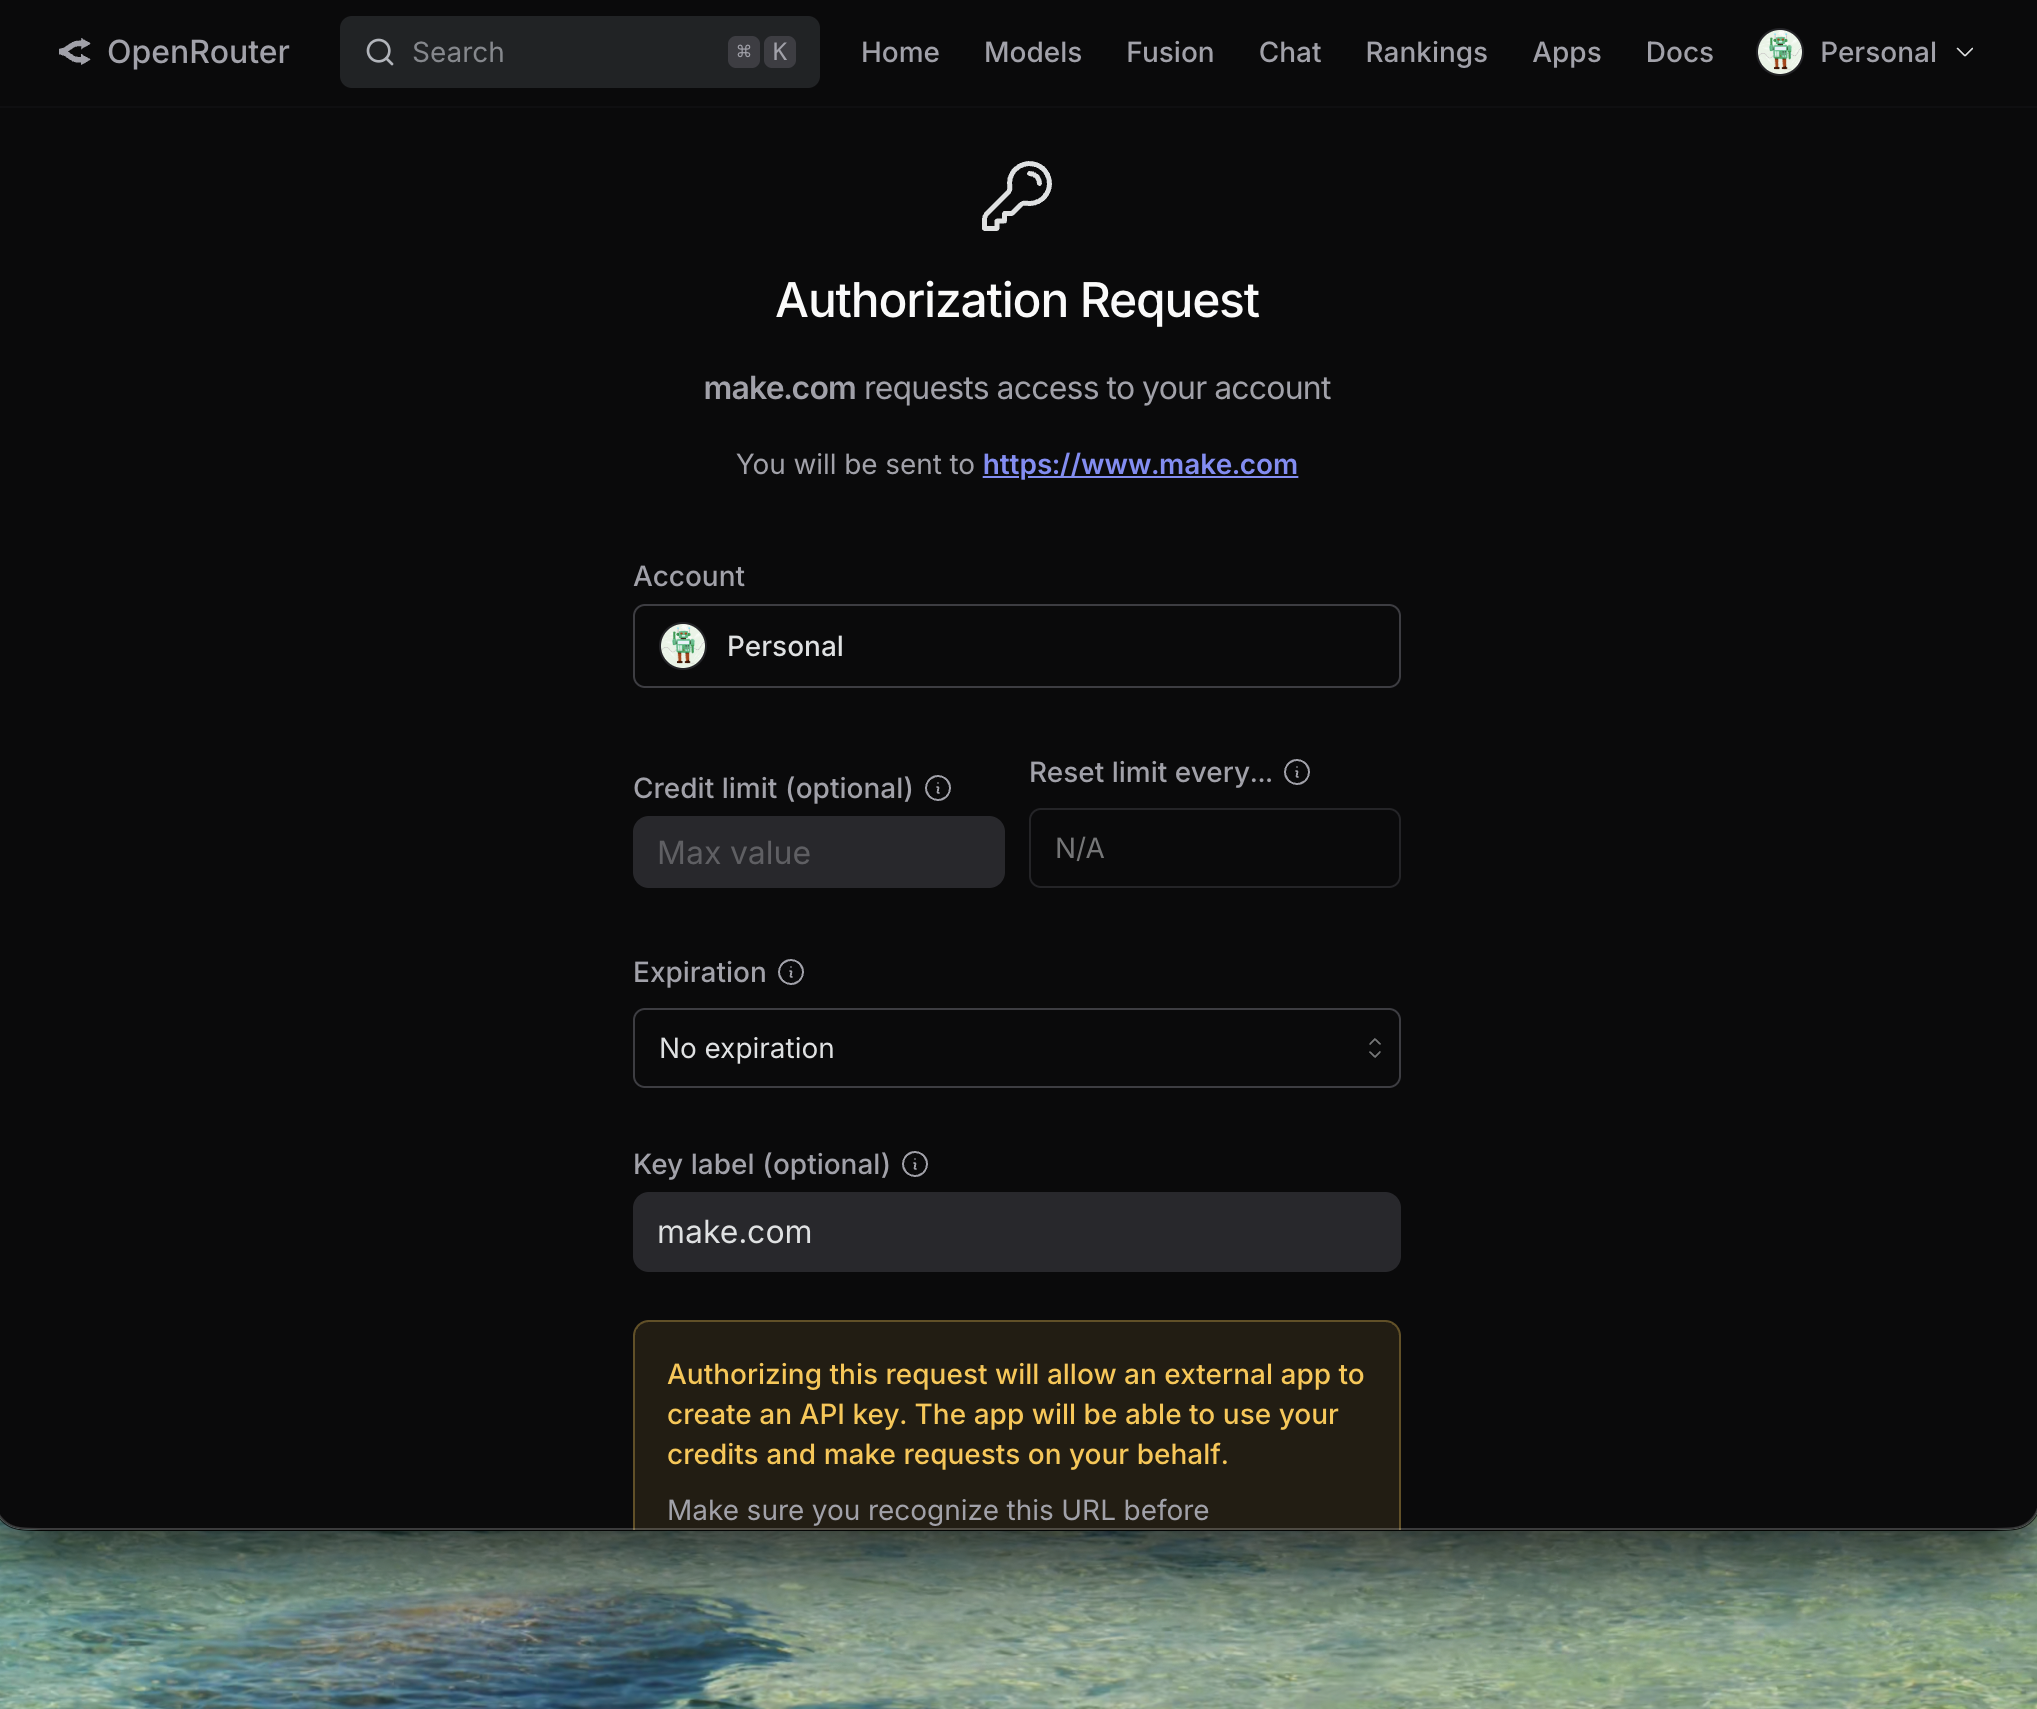
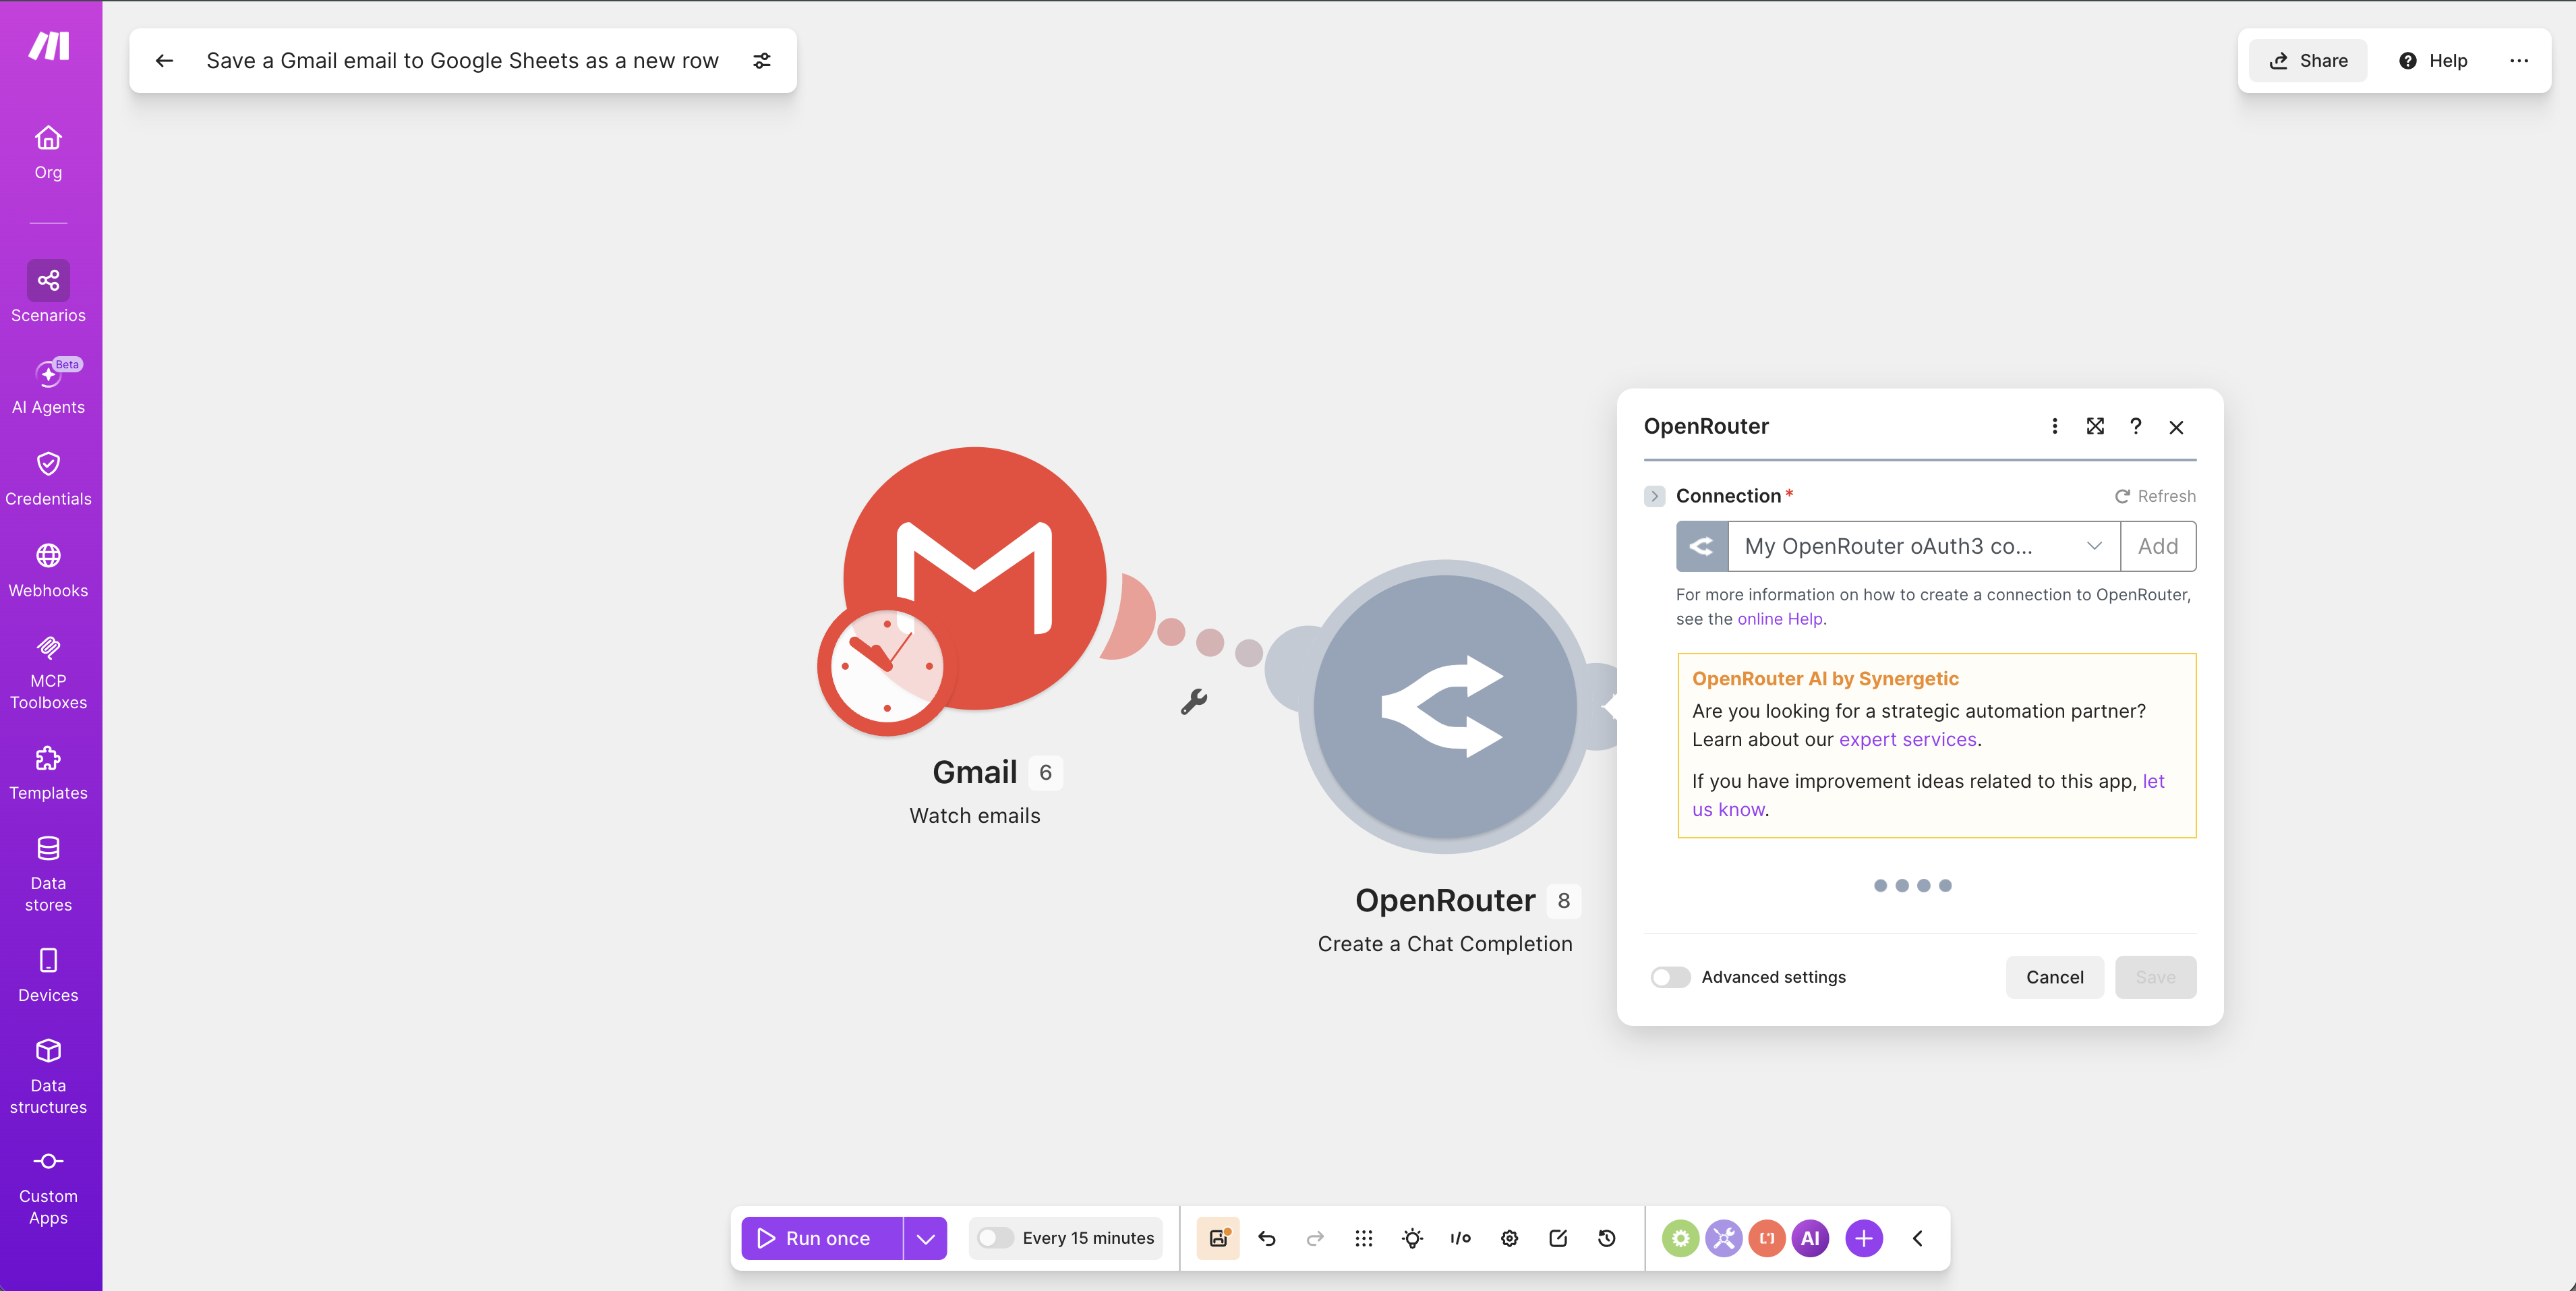
Confirm the URL is official OpenRouter and click Authorize. Once authorized, the module’s Connection field is your new OpenRouter connection.
Step 3: Pick a free model
In the module’s Model field, search free to filter free models. The example picks Google: Gemma 4 26B A4B (free).
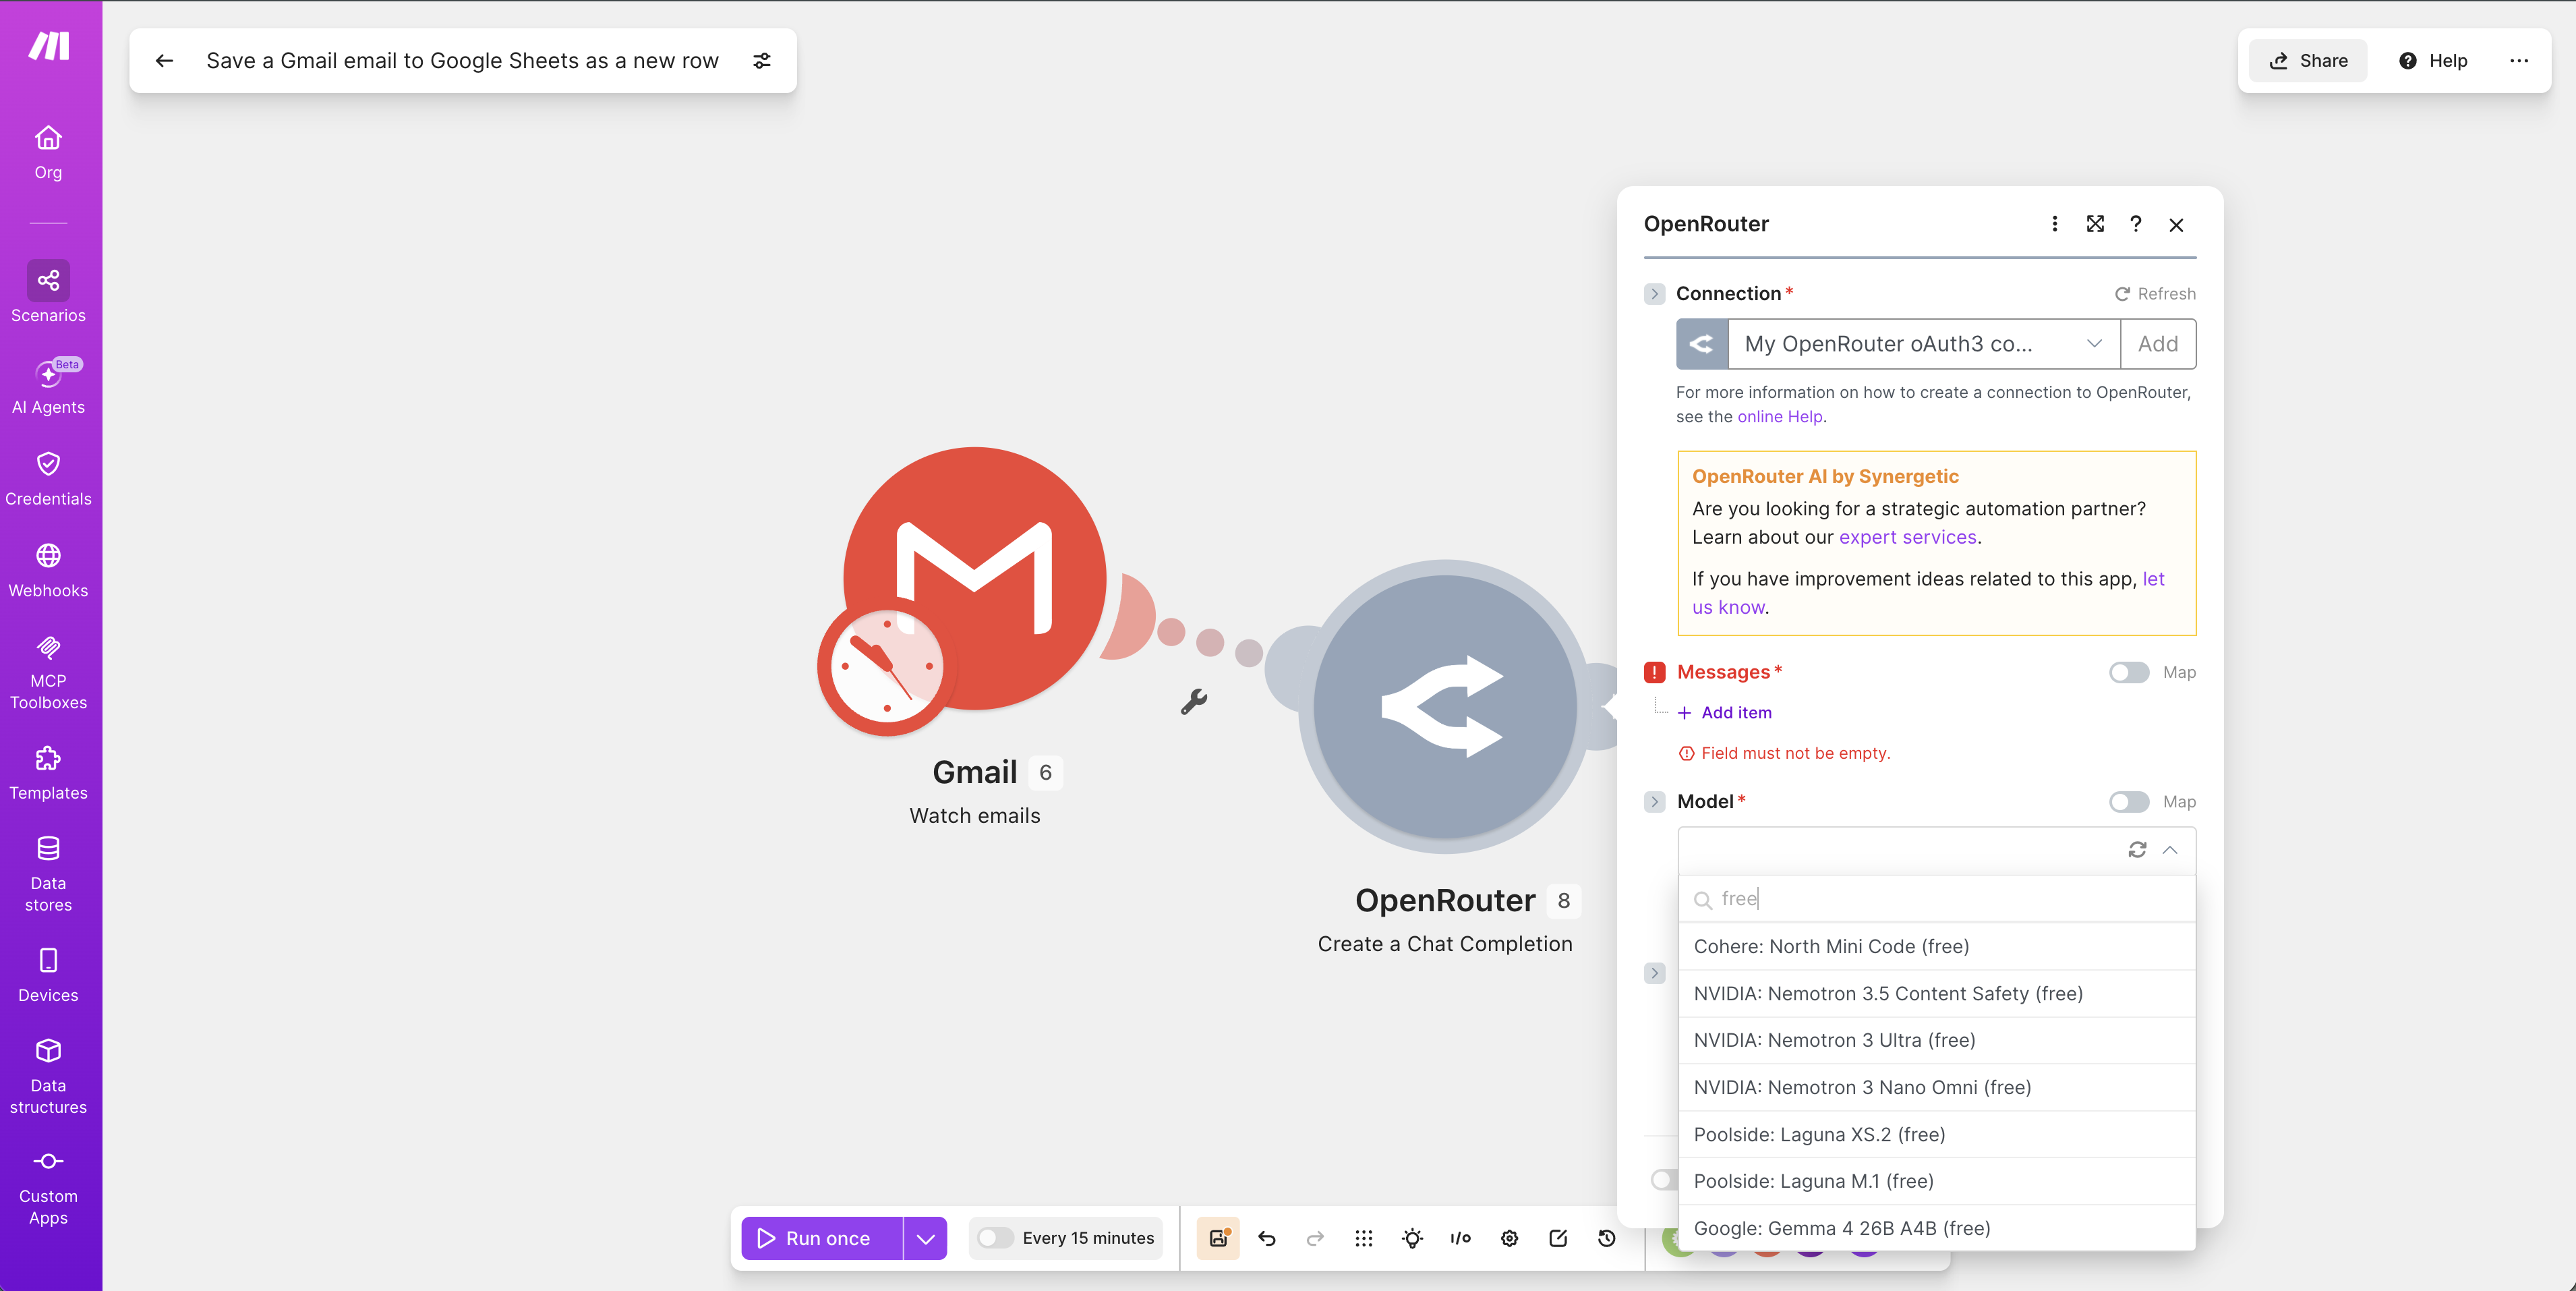
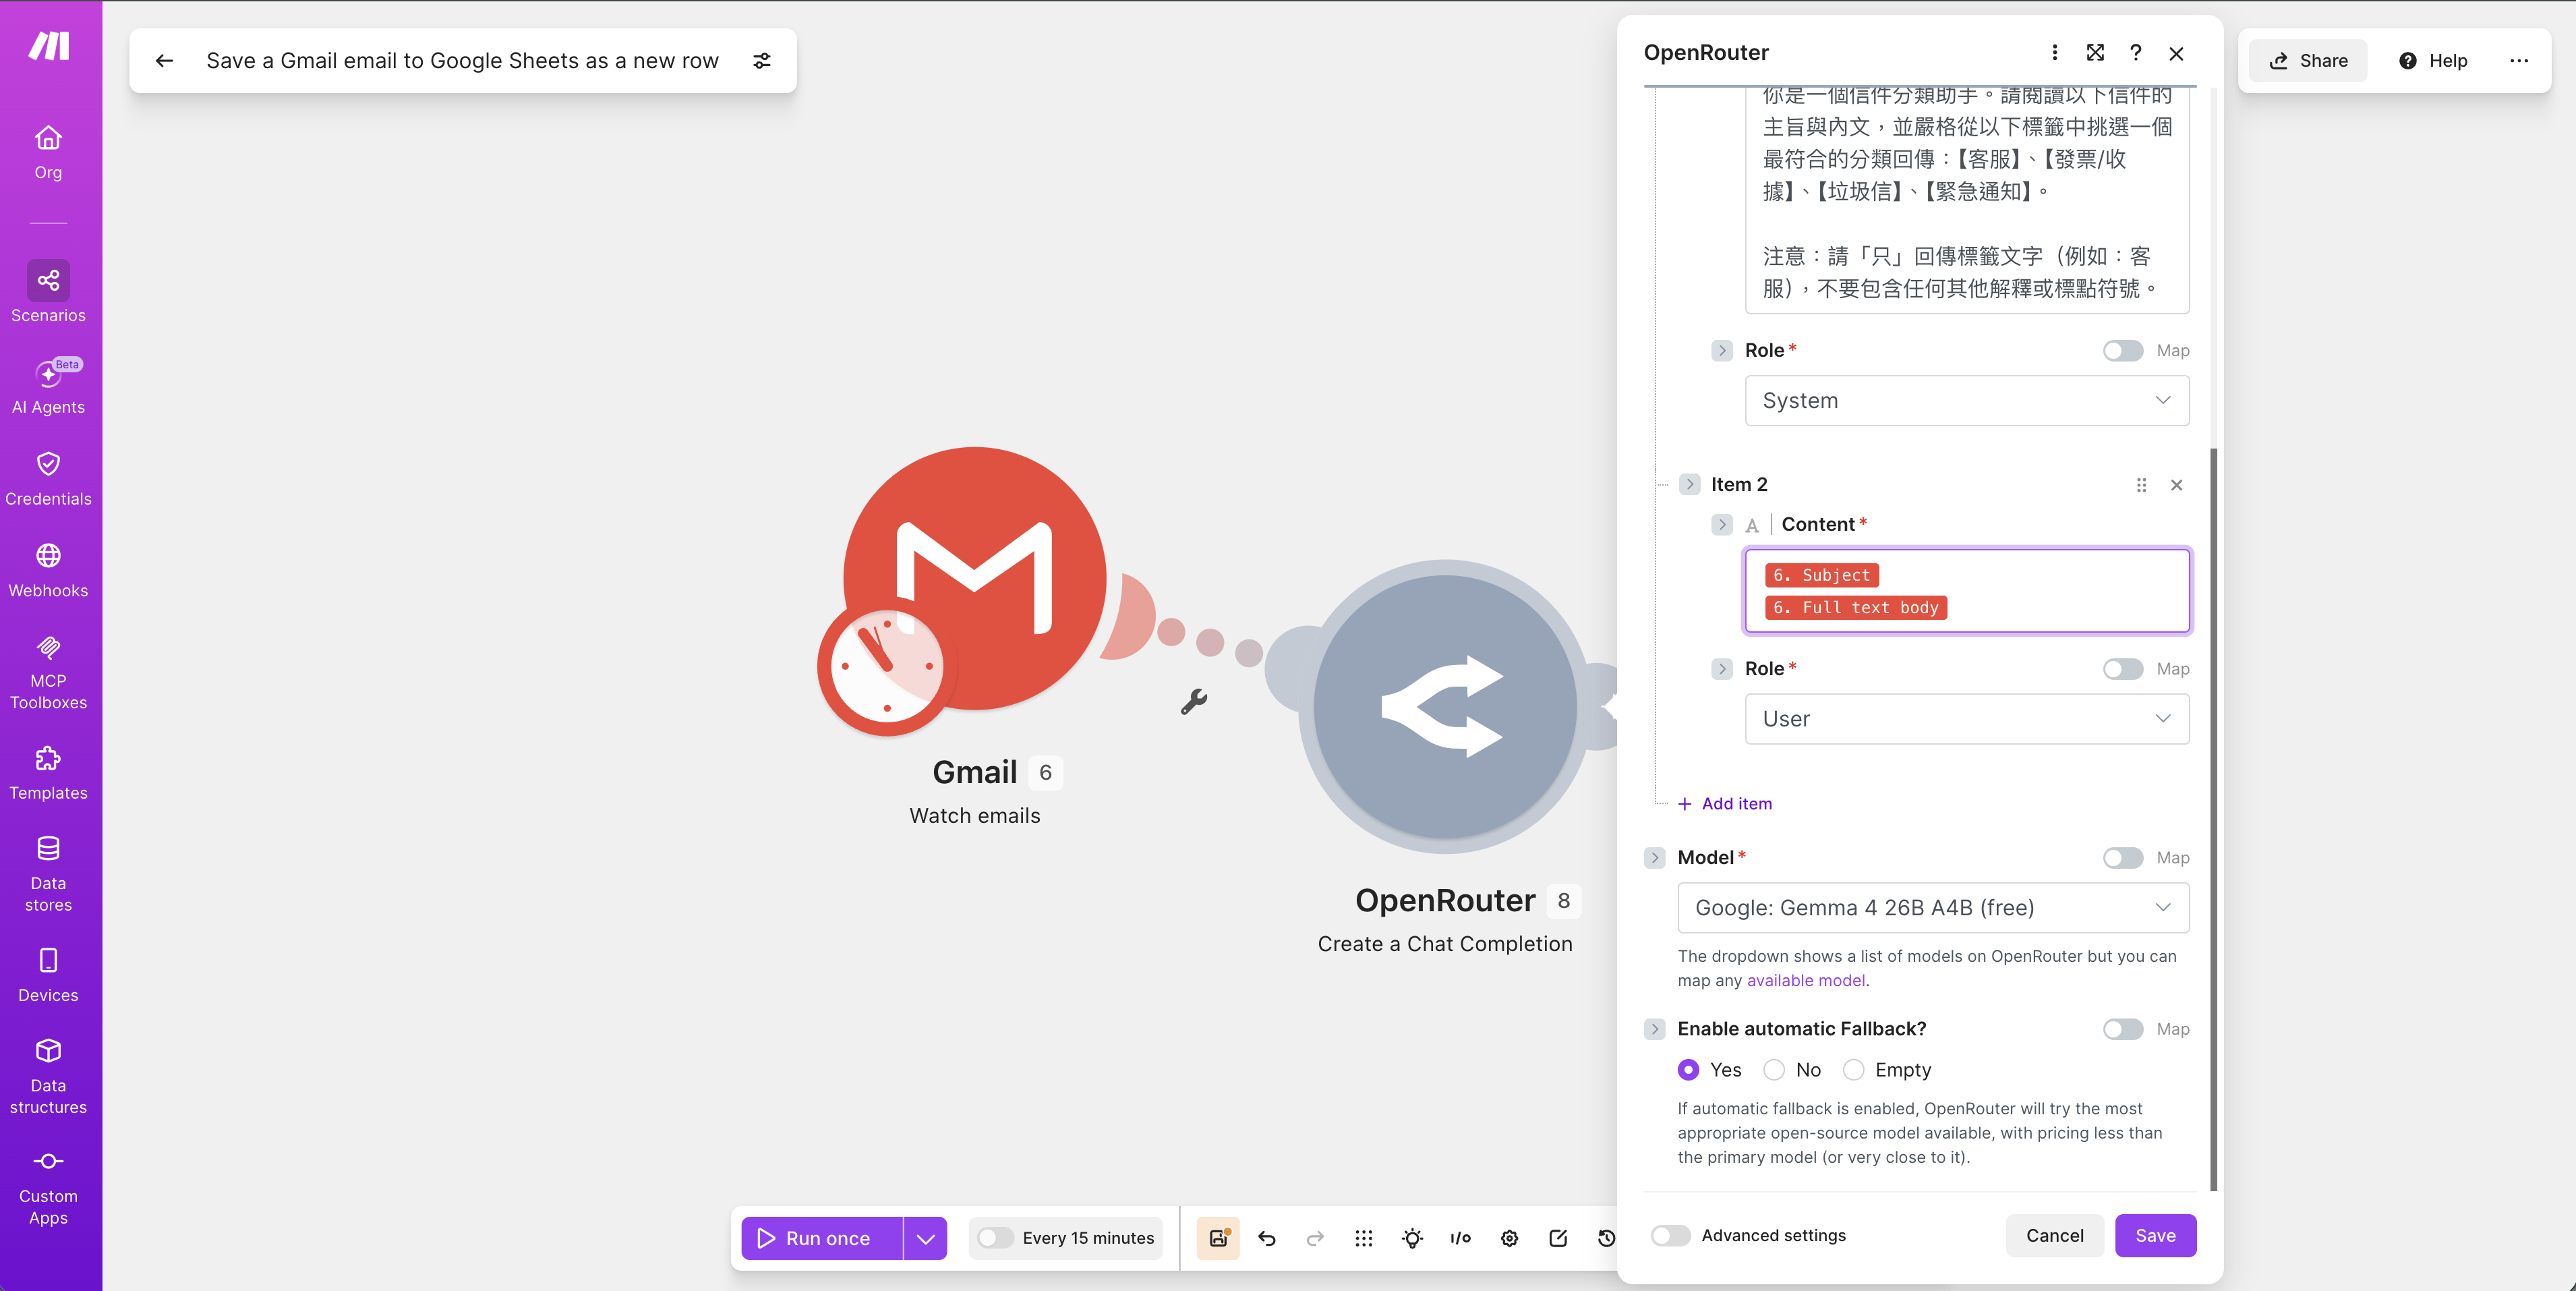
There’s usually an “Enable automatic Fallback?” option — set Yes so that if your chosen model is unavailable at the moment, OpenRouter auto-switches to a similar one and the flow won’t break.
Step 4: Write the “classification prompt” — the soul of this article
How accurately the AI classifies comes down to your instructions. In the Messages area, set two messages:
First: System — tell the AI its role and rules
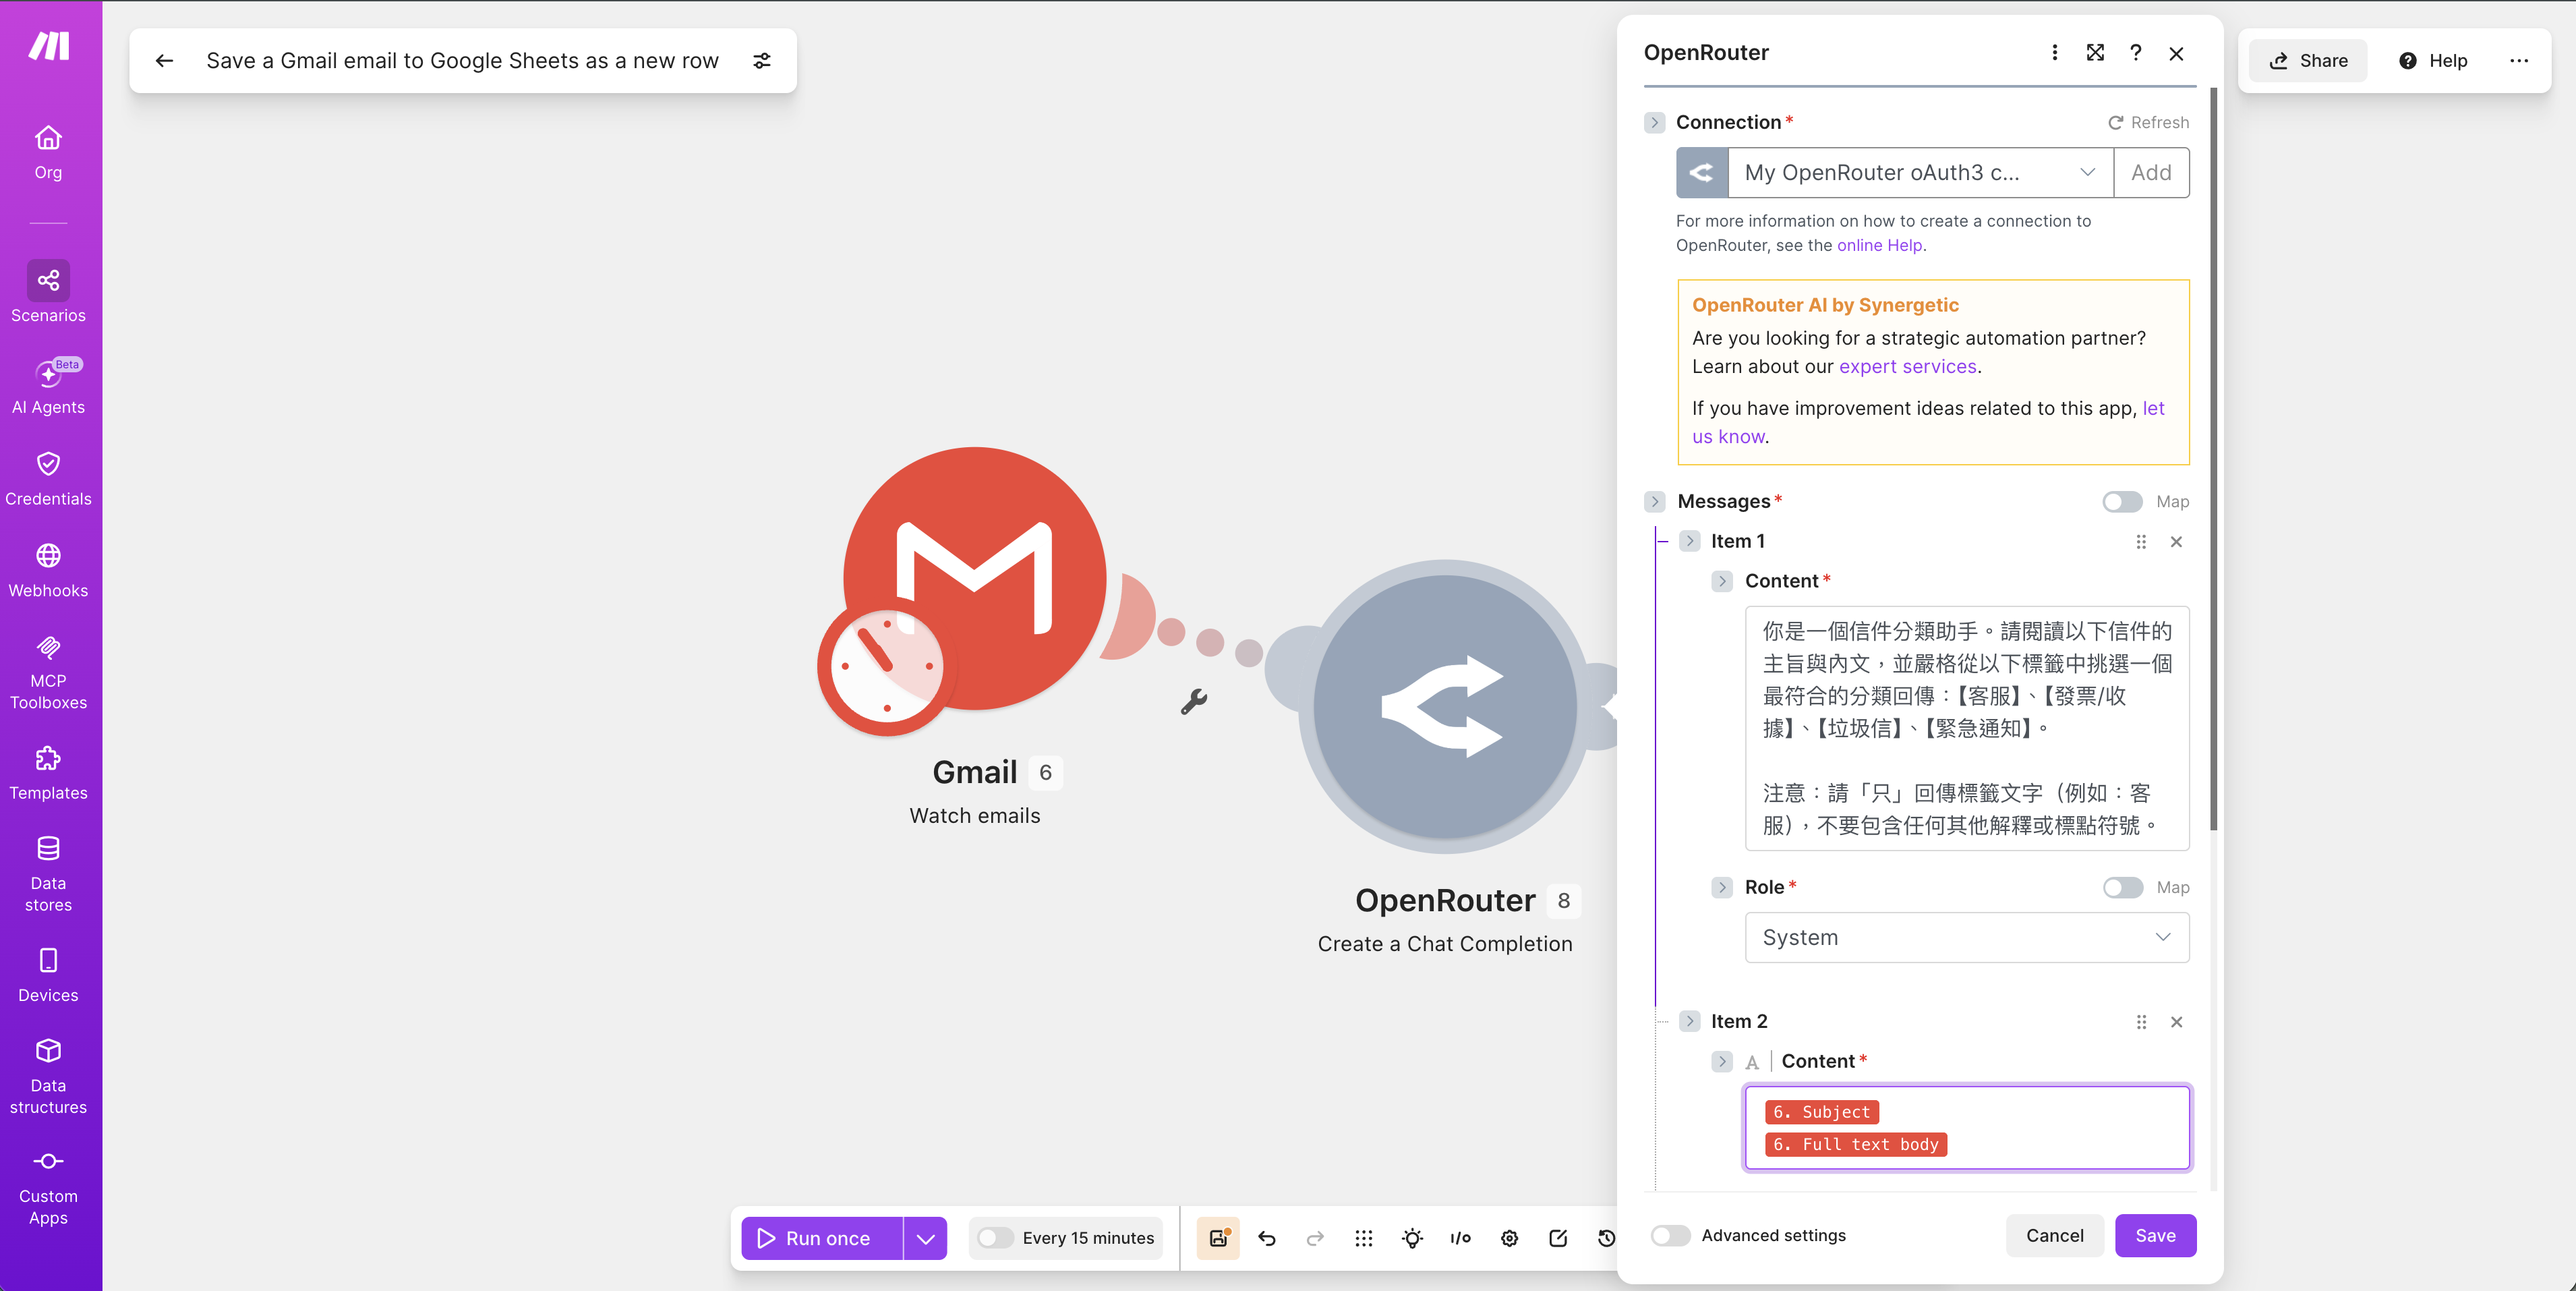
Set Role to System and spell out three things: who it is, which labels it may pick, and the output format. The example prompt reads (translated):
You are an email classification assistant. Read the subject and body below and strictly choose the single best-fitting label from these categories: [Support] [Sales/Procurement] [Spam] [Urgent]. Note: return ONLY the label text (e.g., Support), with no other explanation or punctuation.
Second: User — feed in the actual email content
Add a message with Role User, and use field mapping to connect the Gmail module’s output: drag in Subject and Full text.
🚨 The AI returns rambling text, not just the label?
Usually the System prompt didn’t nail down “return only the label, no explanation.” Make the rule blunter (like the example: “return ONLY,” “no other explanation or punctuation”) and add a sample output — it converges a lot.
Step 5: Write the label into Google Sheets
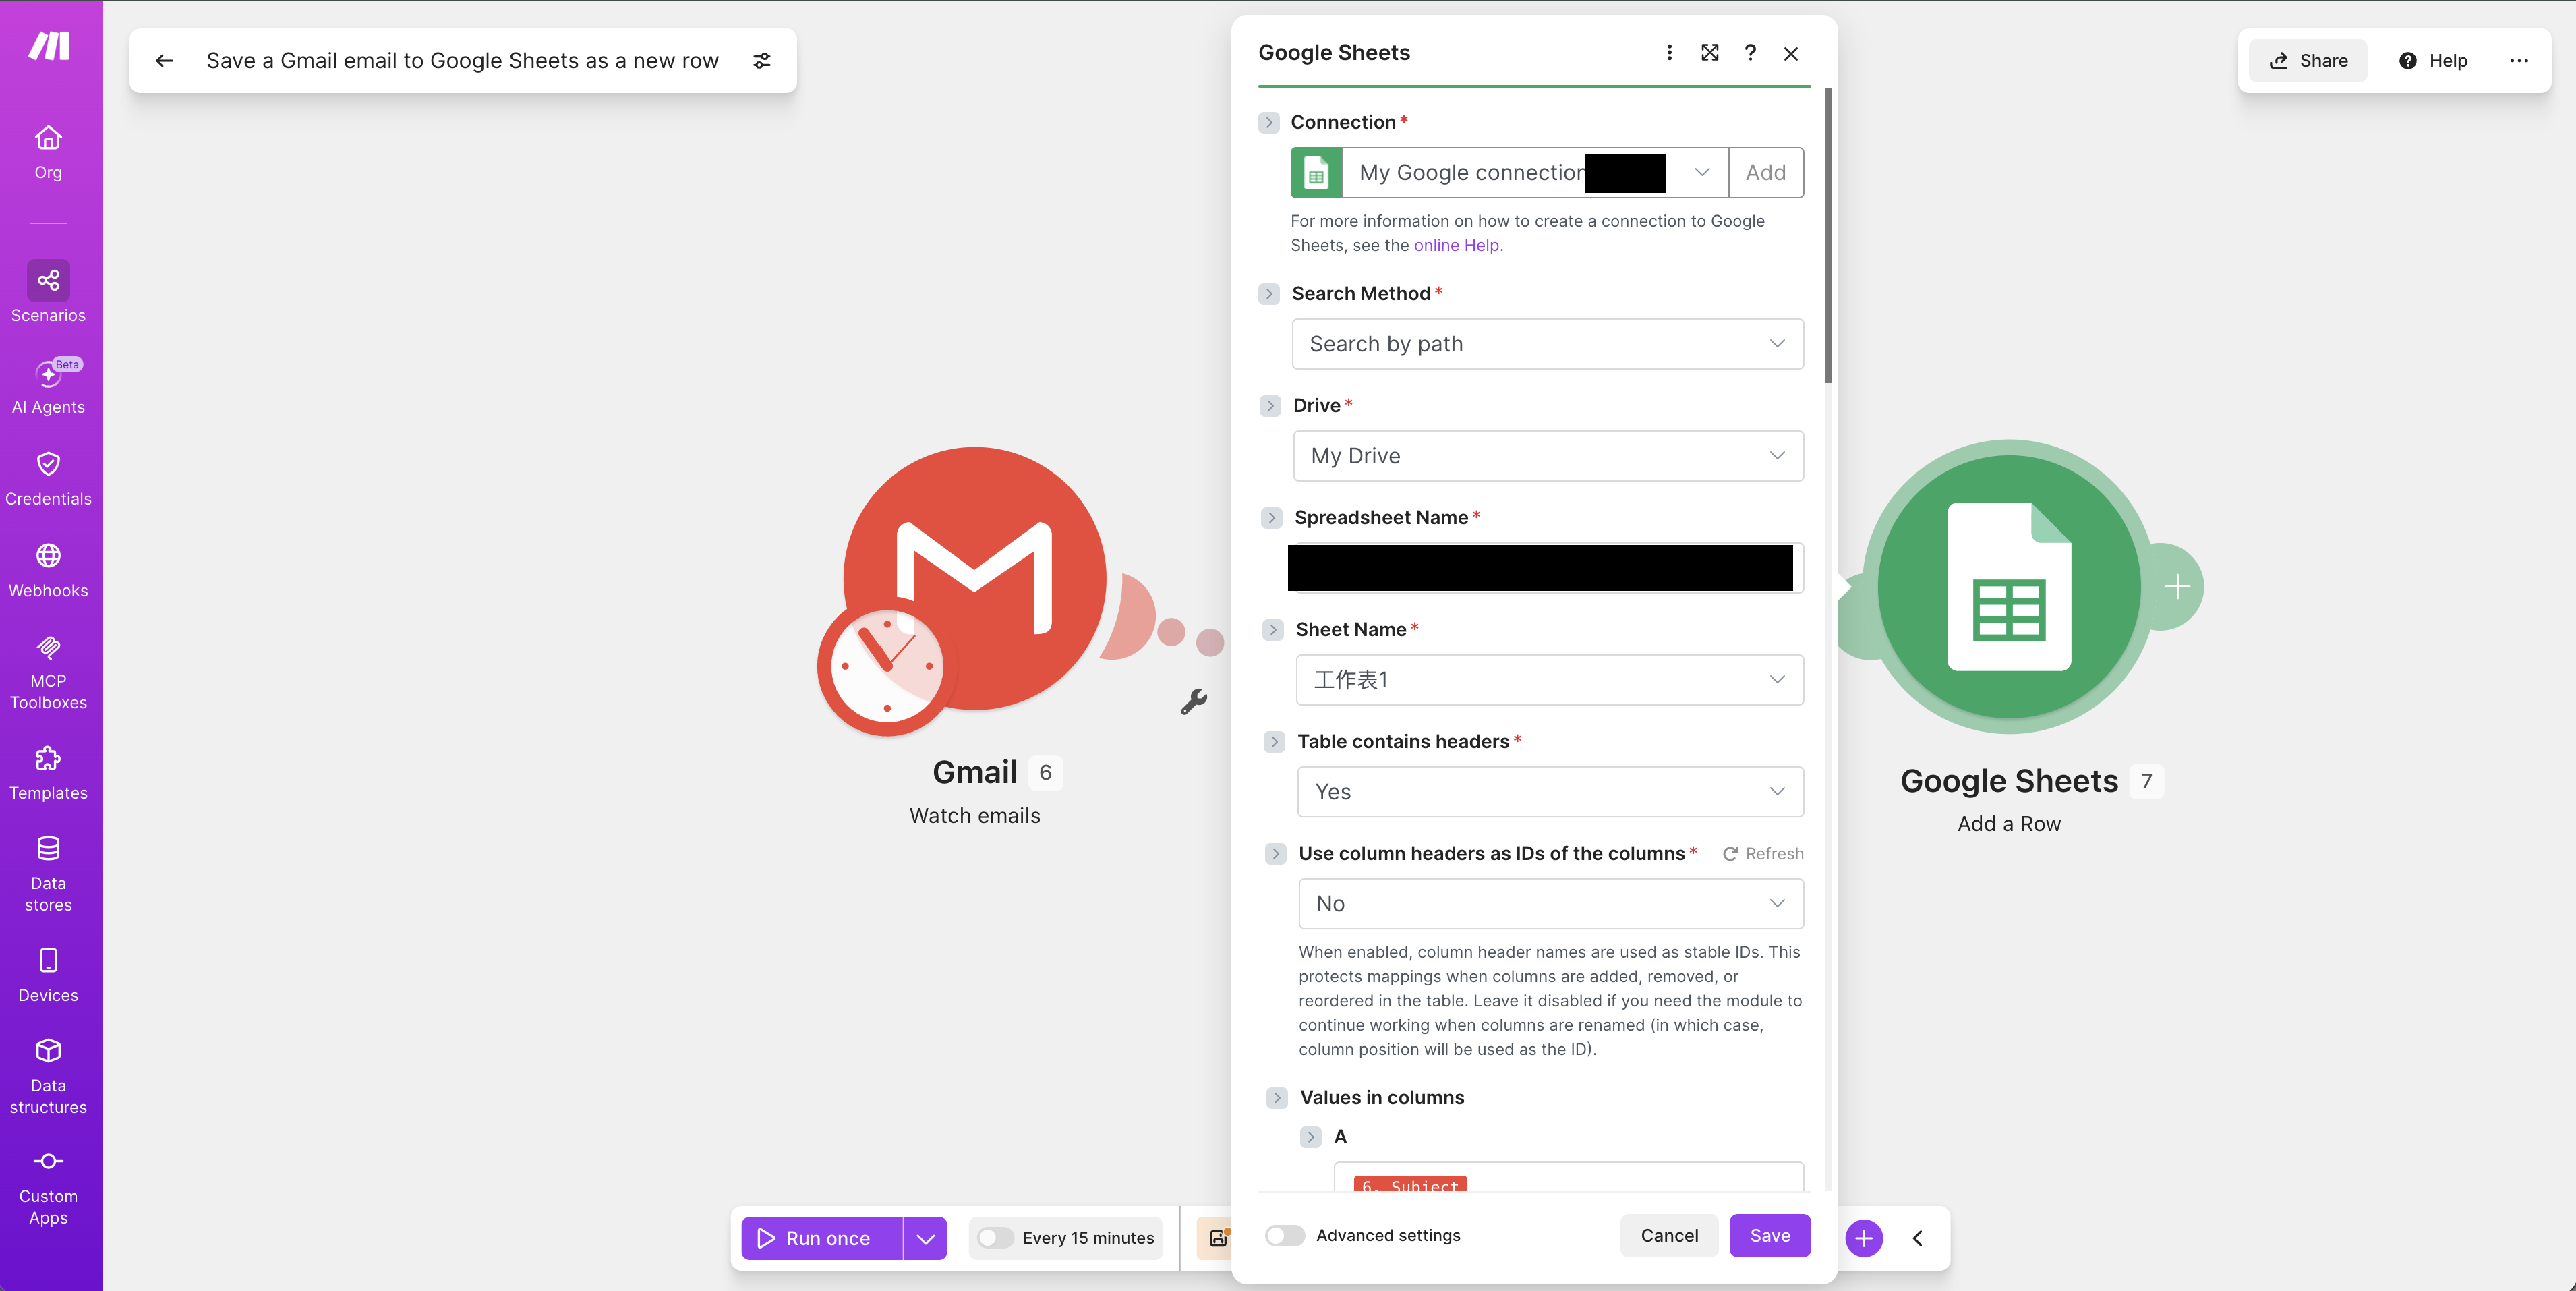
Finally, back to the Google Sheets “Add a Row” module. Besides the mapped subject, sender, and body, map one more column, “Category” — connect it to the OpenRouter module’s output (the text the AI returned, which is the label).
Step 6: Done! A three-stage AI pipeline
Your scenario is now three complete modules:
Gmail “Watch emails” → OpenRouter “Create a Chat Completion” → Google Sheets “Add a Row”
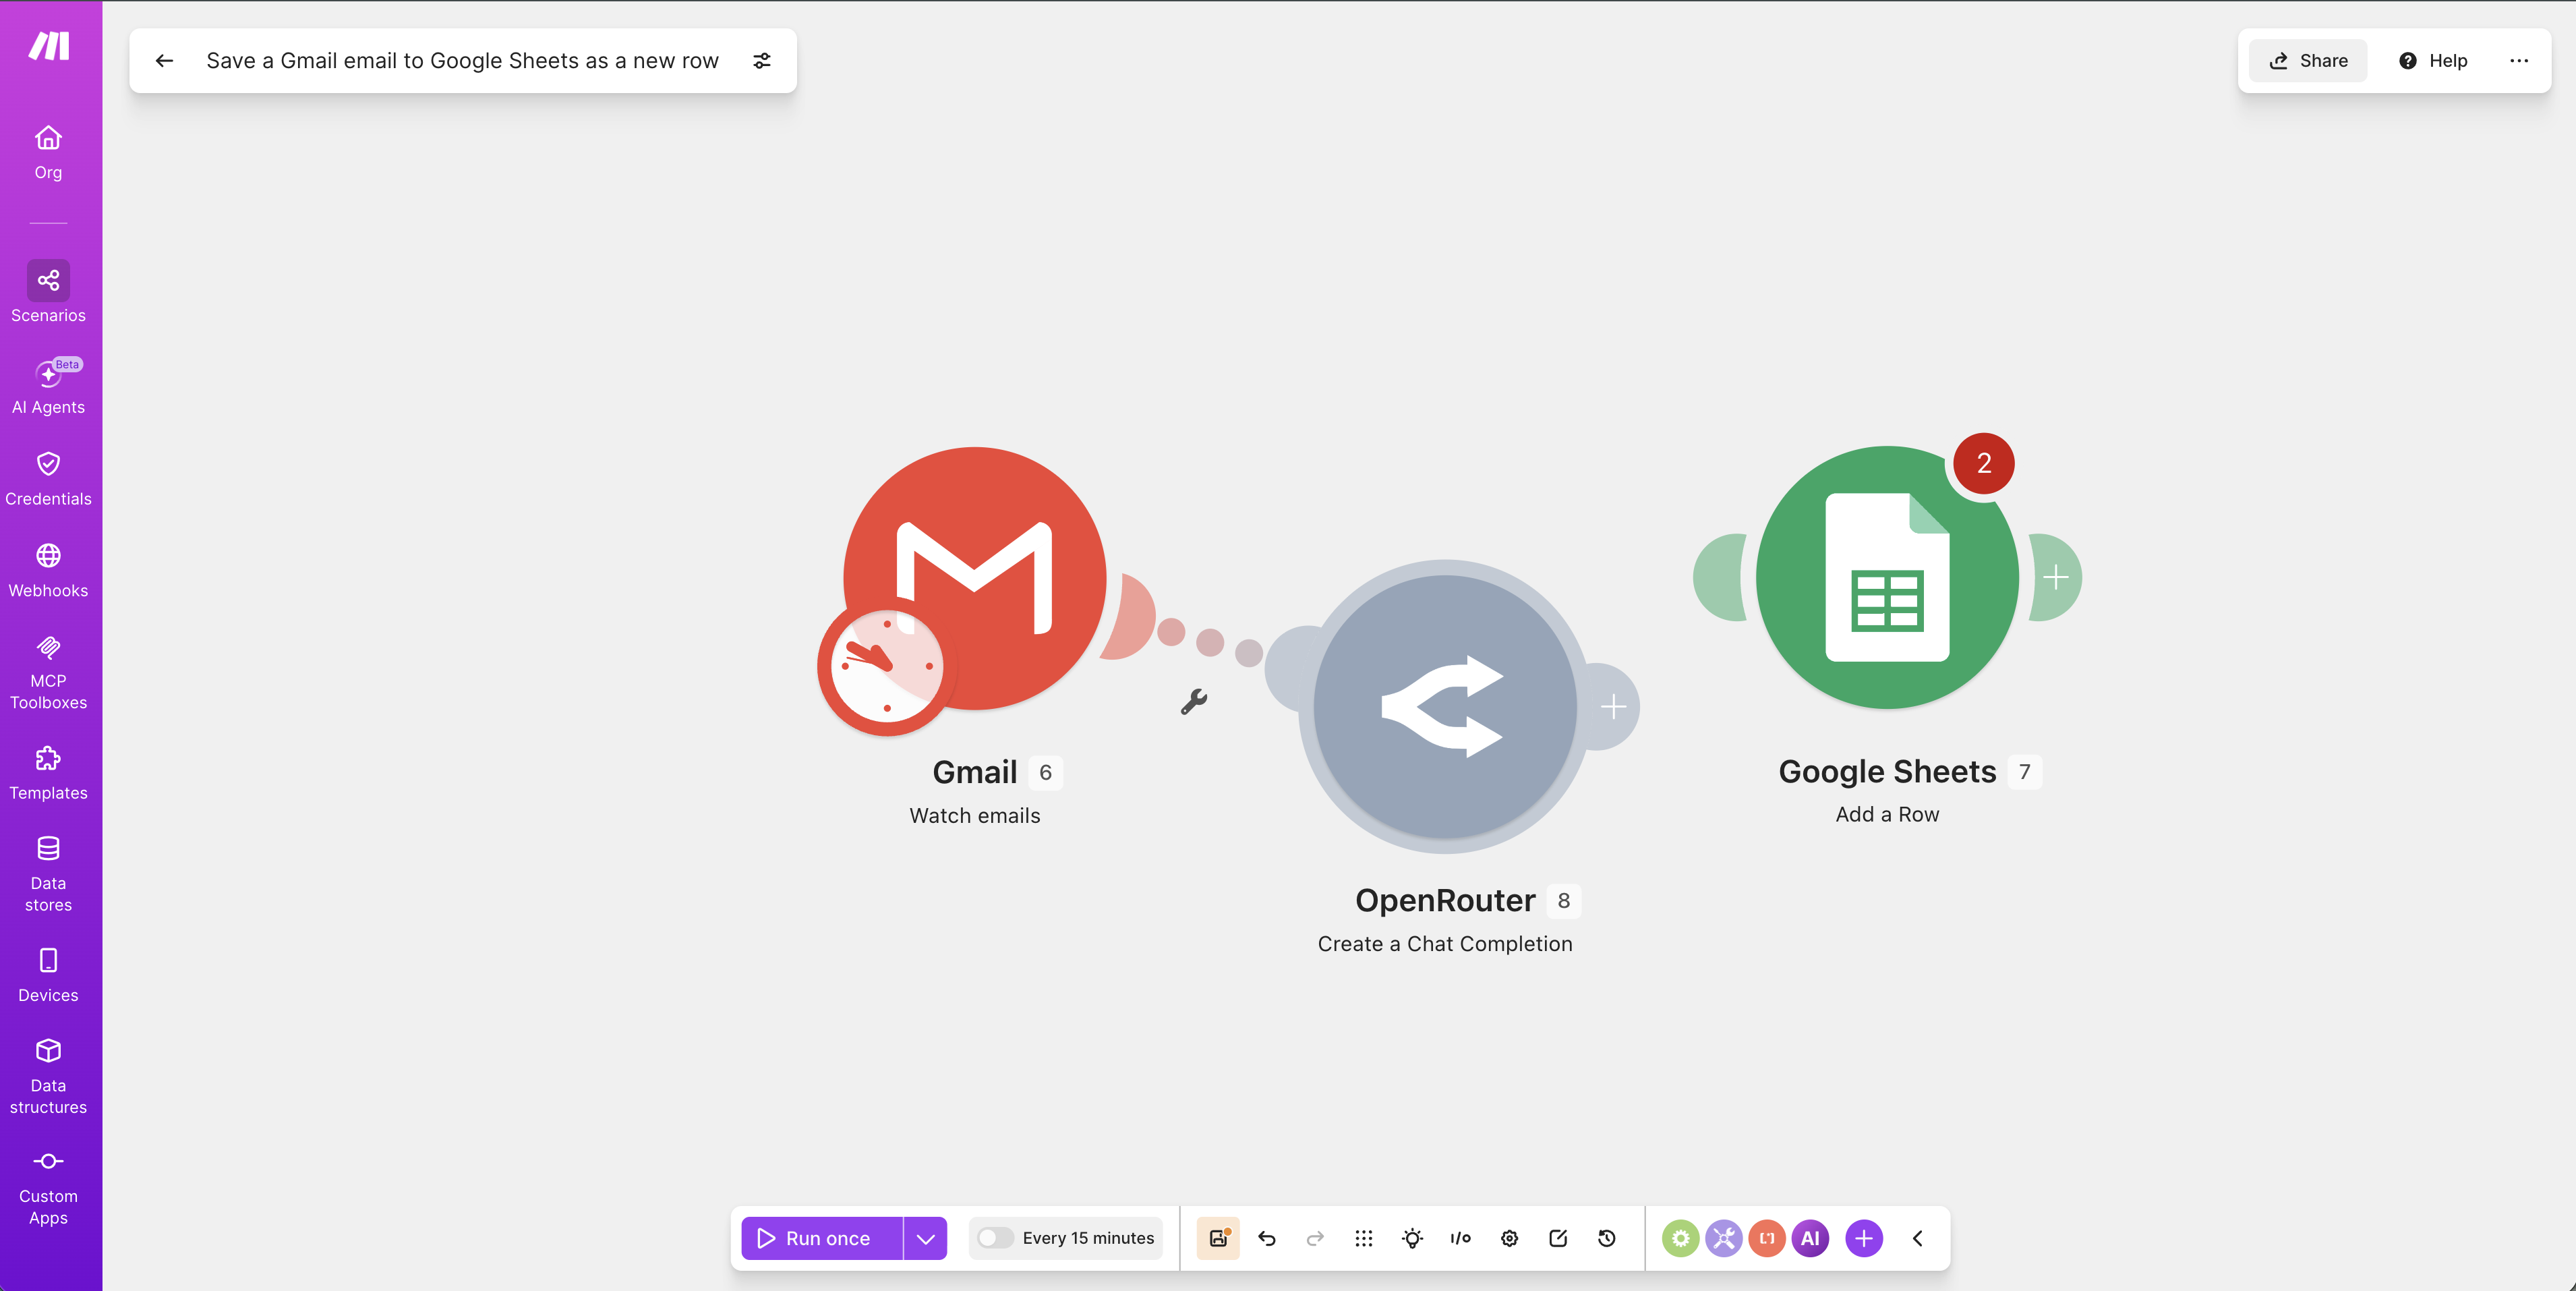
Click Run once to test (send yourself a test email) and check the sheet: does the new row have the “Category” column auto-filled? Once it’s right, enable the schedule, and this “AI auto-classify email” pipeline runs itself 24/7.
Want it more robust? Add a backup provider
If this flow is critical and can’t go down, wire in an Ollama cloud key as a fallback (see “Get an Ollama Cloud API Key”) — it auto-switches when OpenRouter is rate-limited, for another level of reliability.
這篇文章對你有幫助嗎?
💬 問答區
卡關了?直接在這裡問,其他讀者和作者都能幫忙解答。
載入中...
Found this useful? Share it with a friend who’s also getting their hands dirty
Share on LINE