Google Cloud: Create a Project, Enable APIs, Configure the OAuth Consent Screen
When tools like Make/n8n need sensitive Google permissions (read/write Gmail, Sheets, Drive), 'Sign in with Google' isn't enough — you must create your own Google Cloud project, enable the matching APIs, and set up the OAuth consent screen and client credentials. This breaks down that slightly daunting path step by step.
 卡住很正常——點段落旁的 😵 卡關 讓我們知道,或直接往下滾到問答區發問。
也可以用 👍 看懂 / 😢 看不懂 告訴我們哪裡寫得好、哪裡要改。
卡住很正常——點段落旁的 😵 卡關 讓我們知道,或直接往下滾到問答區發問。
也可以用 👍 看懂 / 😢 看不懂 告訴我們哪裡寫得好、哪裡要改。
In one line: In the Google Cloud Console, create a new project → enable the Gmail/Sheets/Drive APIs in the API Library → configure the OAuth consent screen (pick “External,” fill app name and contact email) → create a “Web application” OAuth client to get a Client ID/Secret — so external tools like Make are allowed to use your sensitive Google permissions.
Keywords: Google Cloud, GCP, project, API Library, Gmail API, Sheets API, Drive API, OAuth consent screen, OAuth client, Client ID, Client Secret
Why this step? (Understand before you dive in)
In the previous article, “Your First Make Automation,” we connected Gmail with just Sign in with Google. That’s usually enough for “read personal Gmail.”
But when the permissions you need are sensitive (letting automation “read, compose, even delete” your Gmail), or you want to avoid the limits of Make’s shared built-in connection, Google requires: this external app must access those APIs using “your own Google Cloud project + OAuth credentials.”
In other words, you open a proper “address plate” in Google Cloud for this integration before Google grants sensitive permissions.
There are quite a few steps, but the logic is clear, in three parts: ① create a project → ② enable APIs → ③ set up OAuth.
Part 1: Create a Google Cloud project
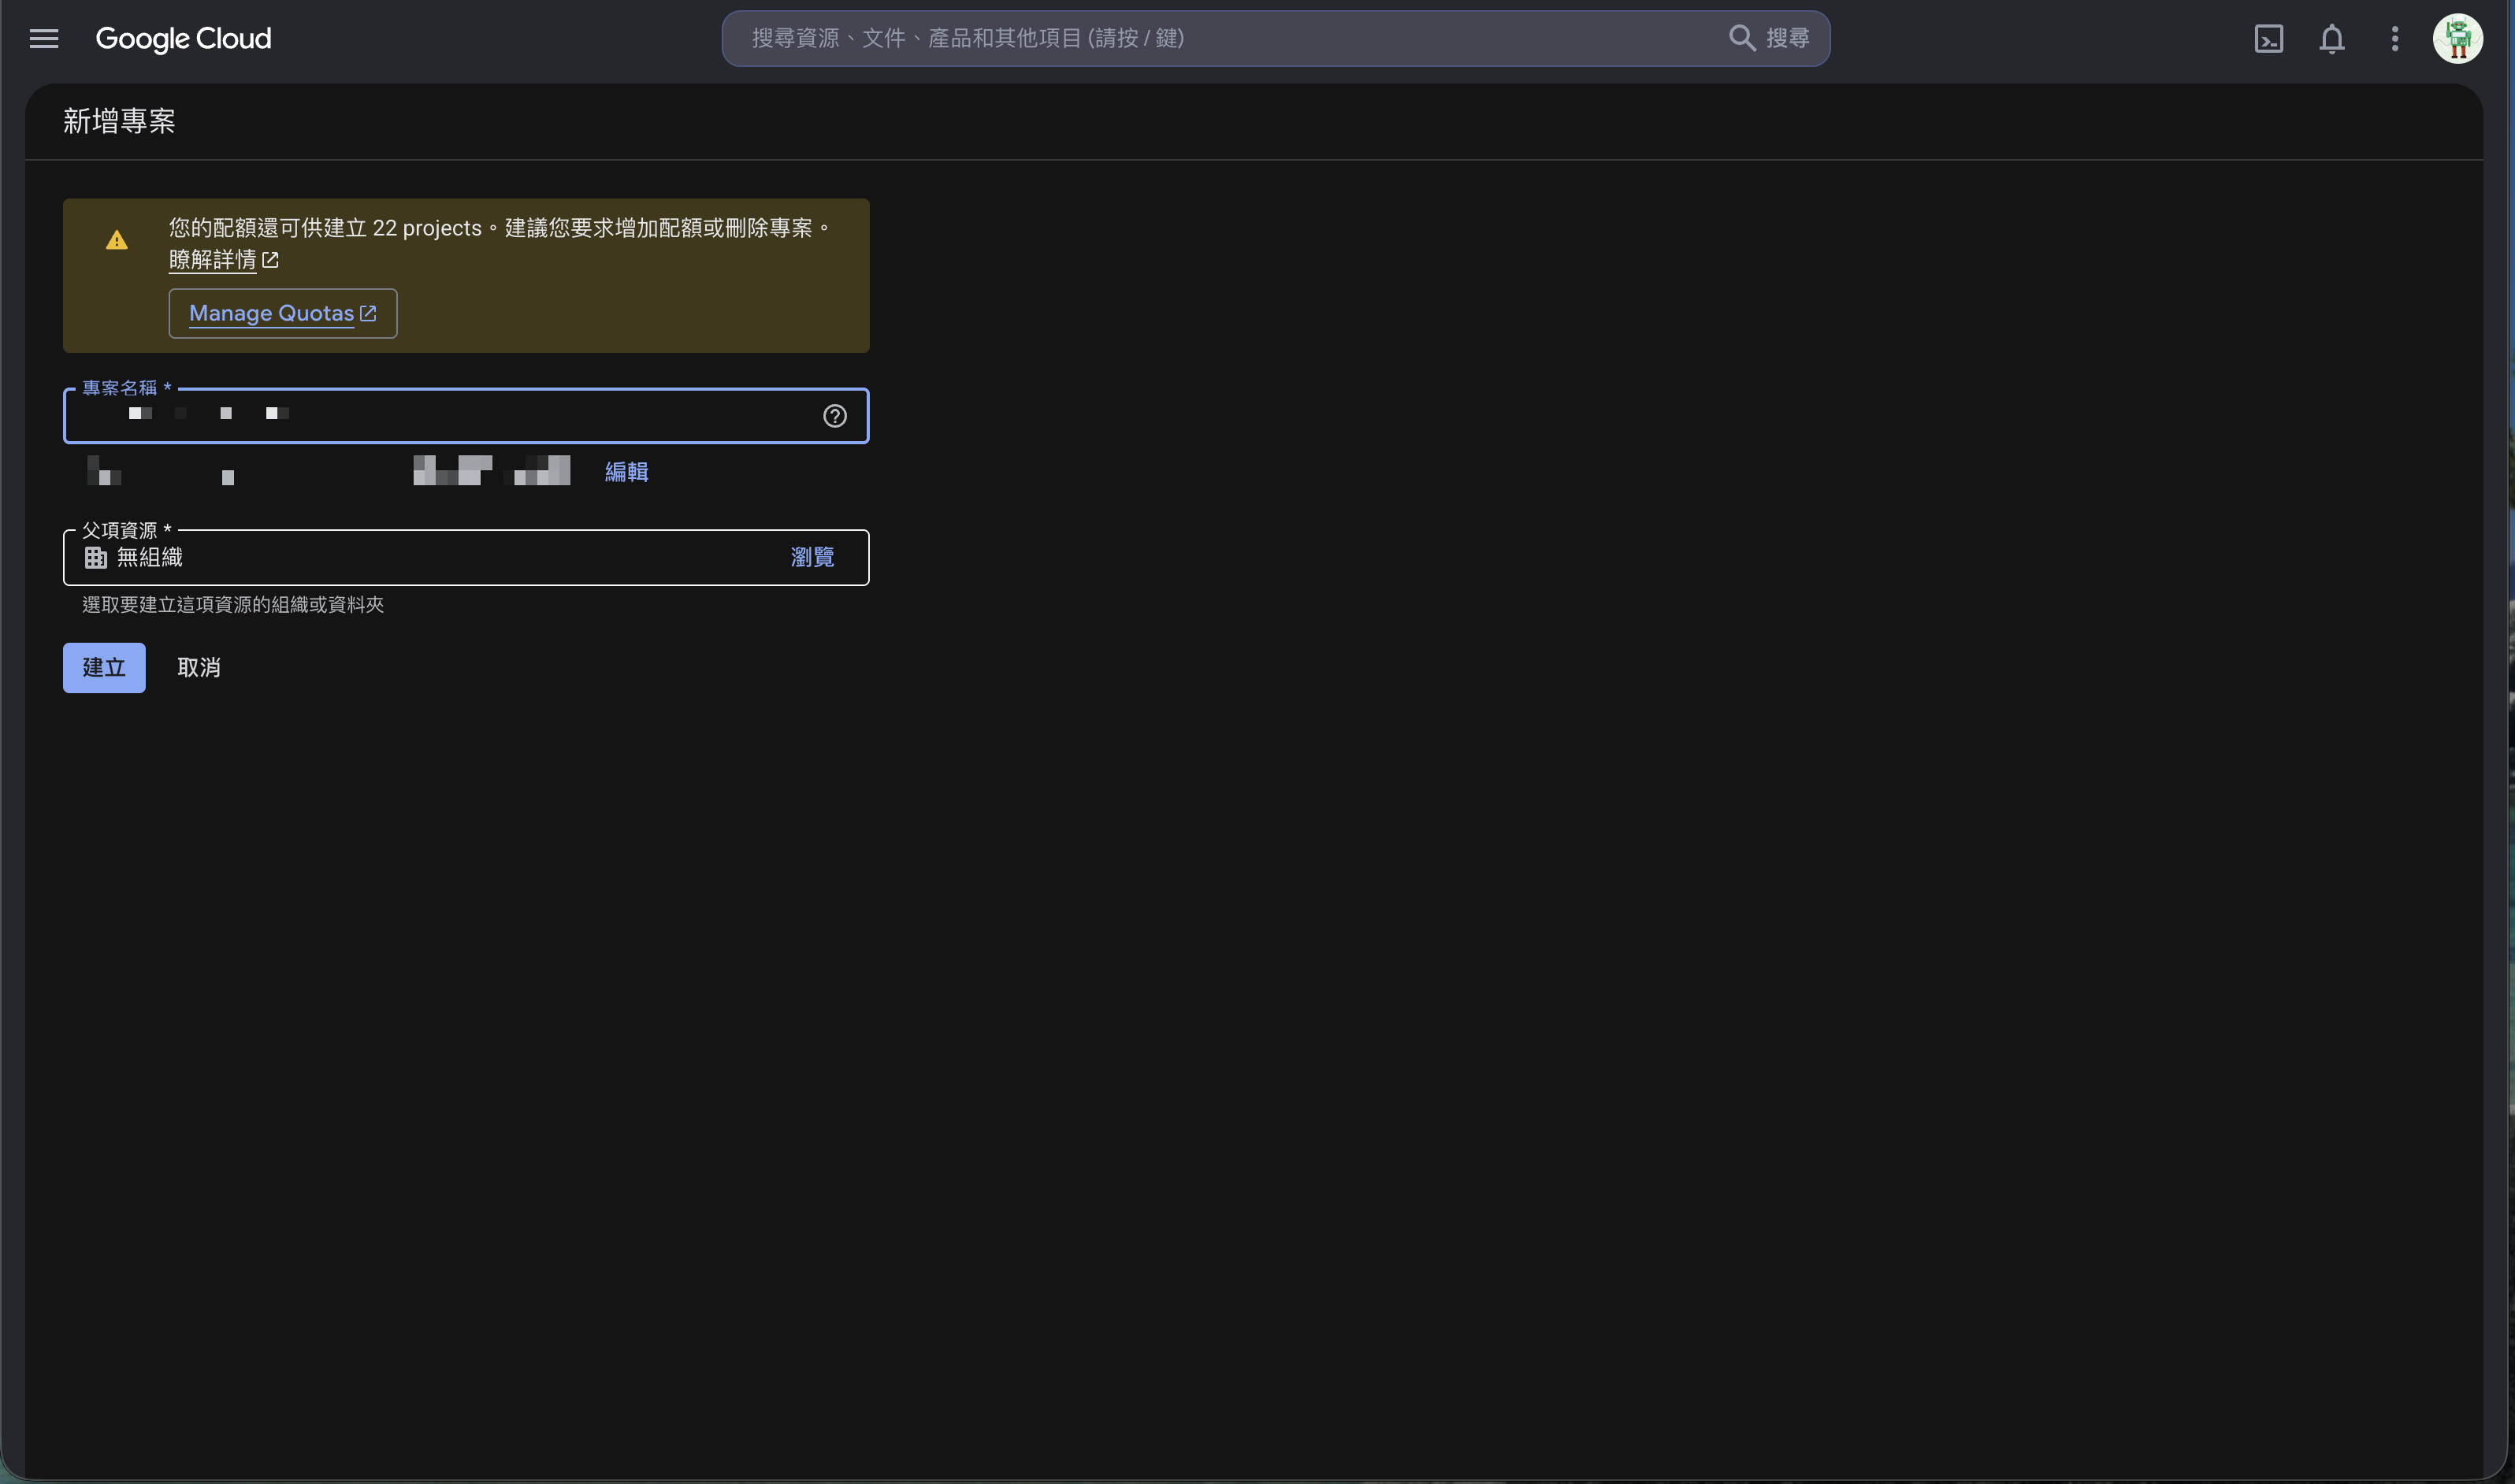
Step 1: New project
Open the Google Cloud Console, use the project menu at the top → New Project.
- Project name: pick a name you’ll recognize (e.g.,
my-project-make). The name can be changed later. - Project ID: auto-generated from the name and cannot be changed after creation; globally unique.
- Parent resource: for personal use, “No organization” is fine.
Fill it in and click Create.
🚨 After creating, remember to “switch” to it
The Console doesn’t always auto-switch to a new project. Use the project selector up top to confirm you’re working in the project you just created — otherwise the APIs you enable land in a different project and you’ve wasted the effort.
Part 2: Enable the APIs you need
A new project has no APIs enabled by default. For each feature you want, go to the API Library and “enable” the matching API.
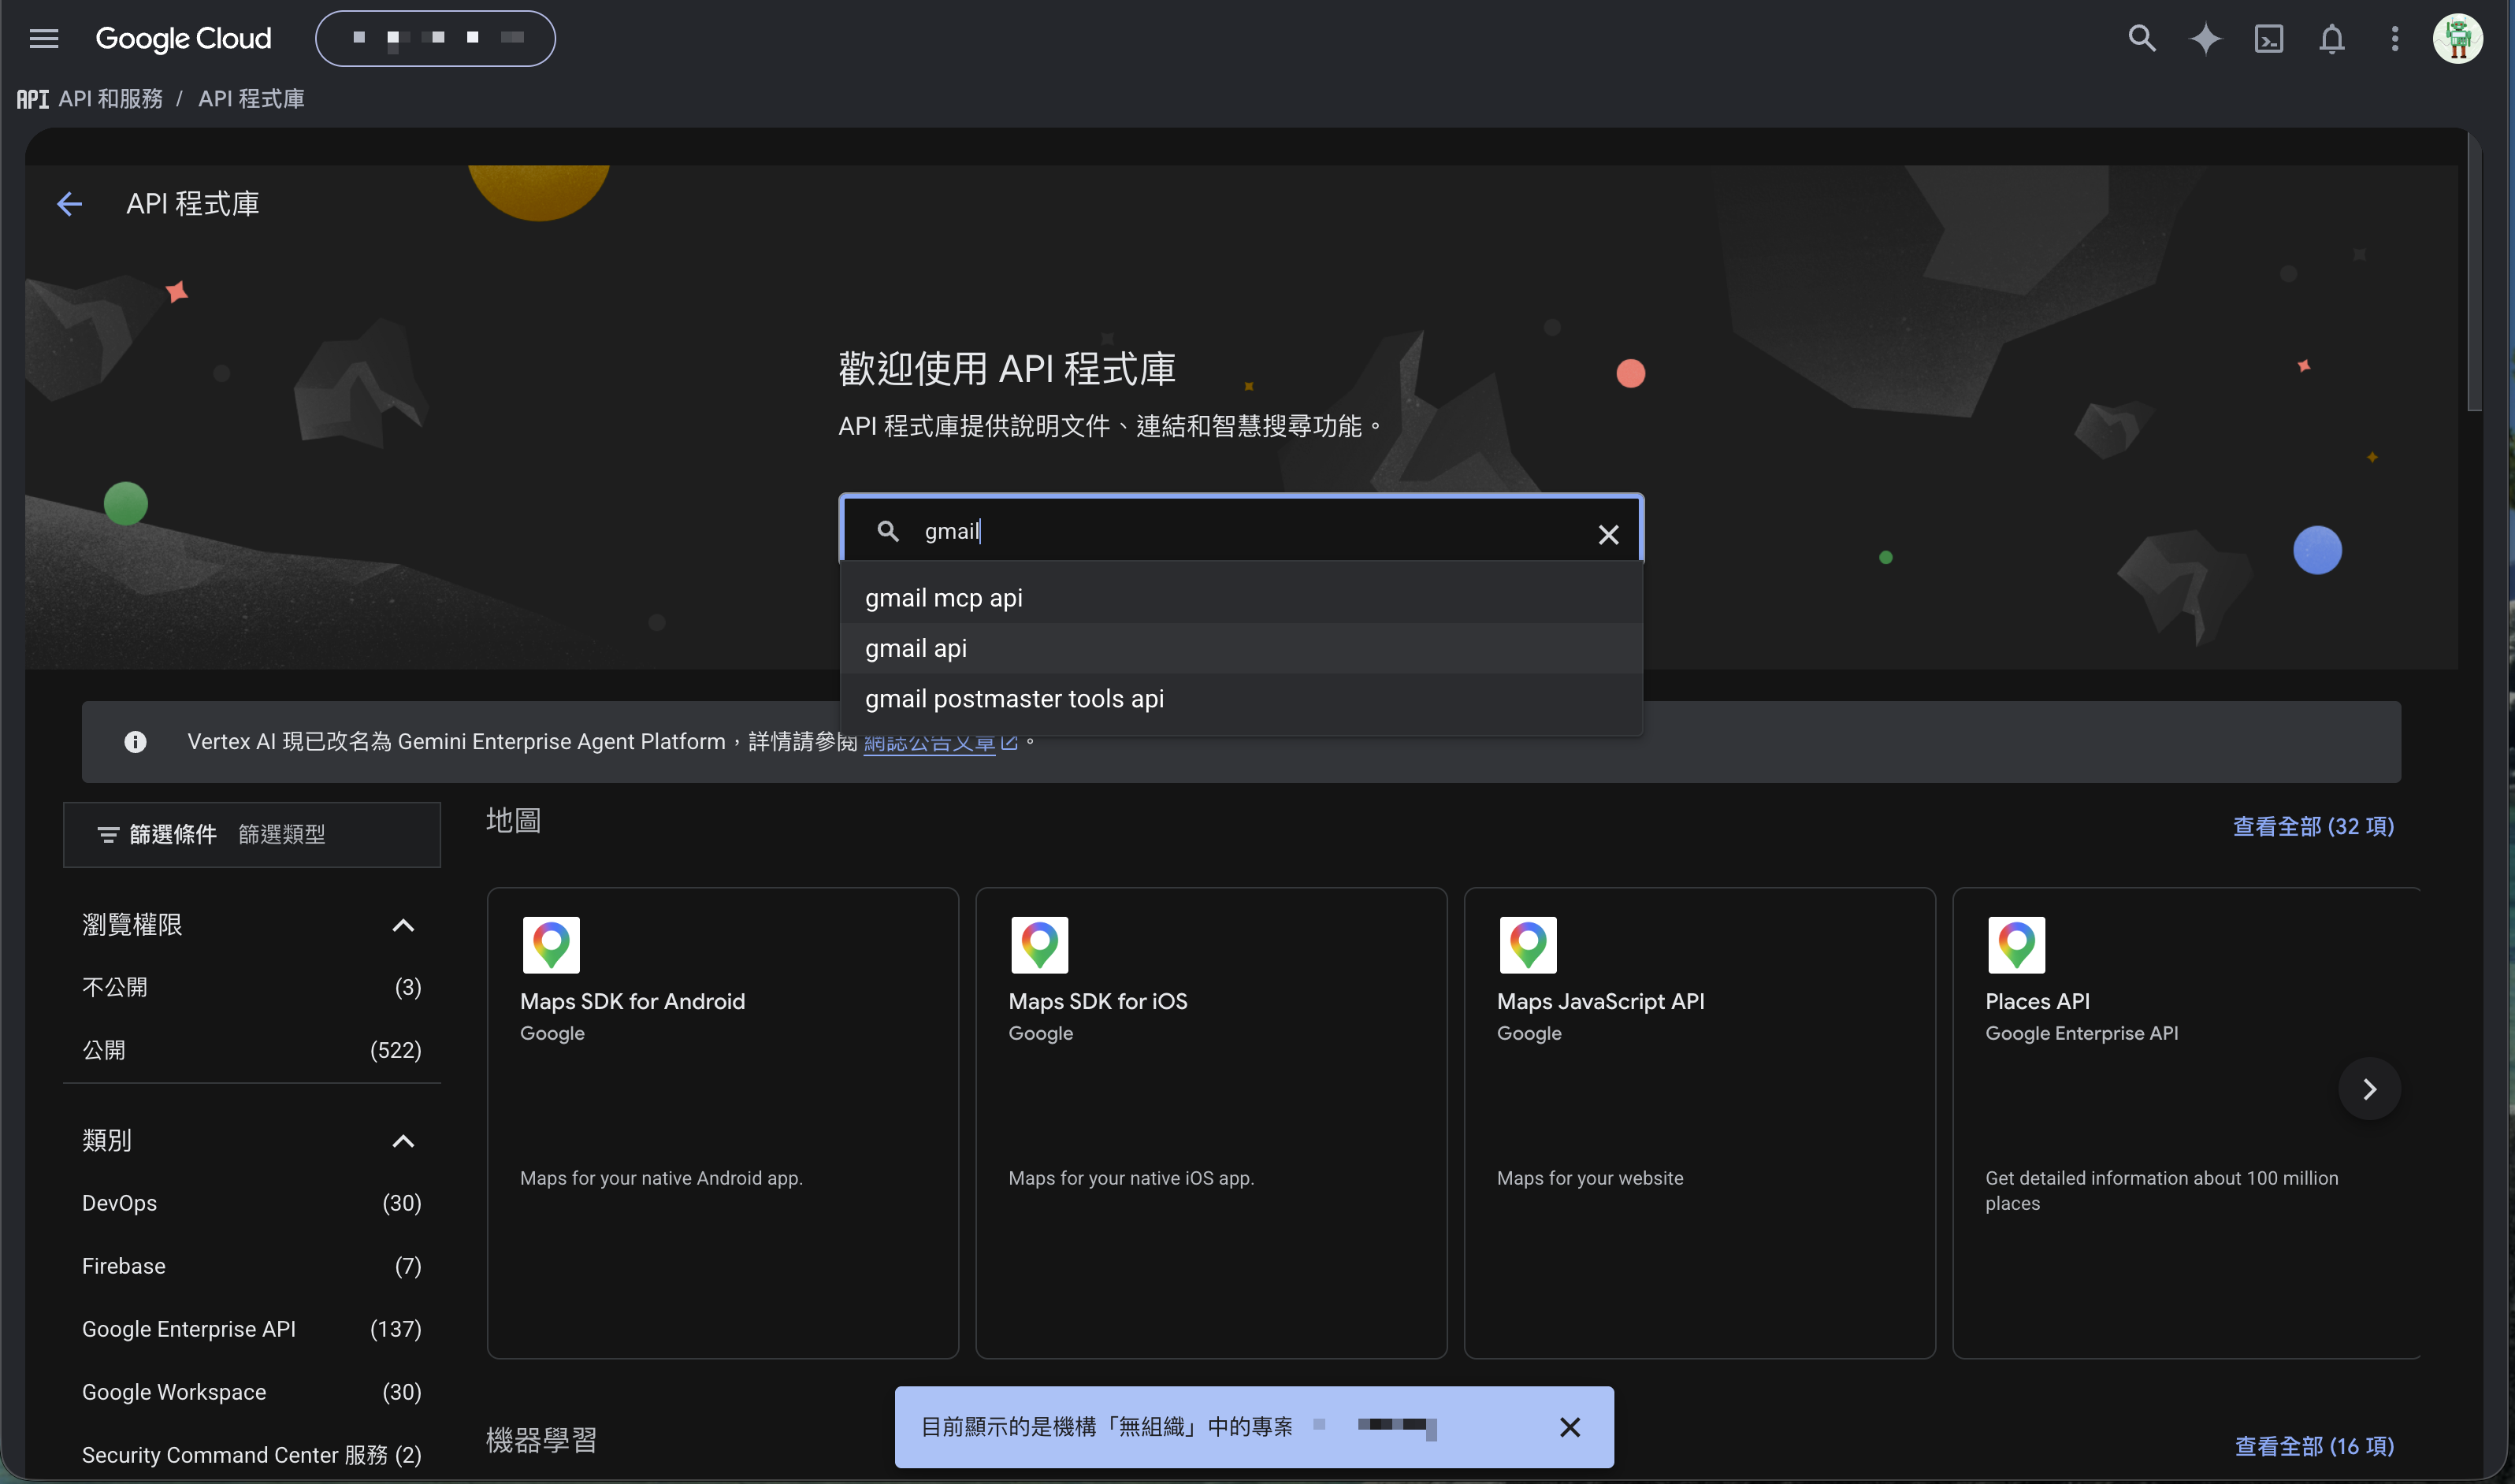
Step 2: Search the API Library
Left menu → APIs & Services → Library. Type the API name in the search box, e.g., gmail.
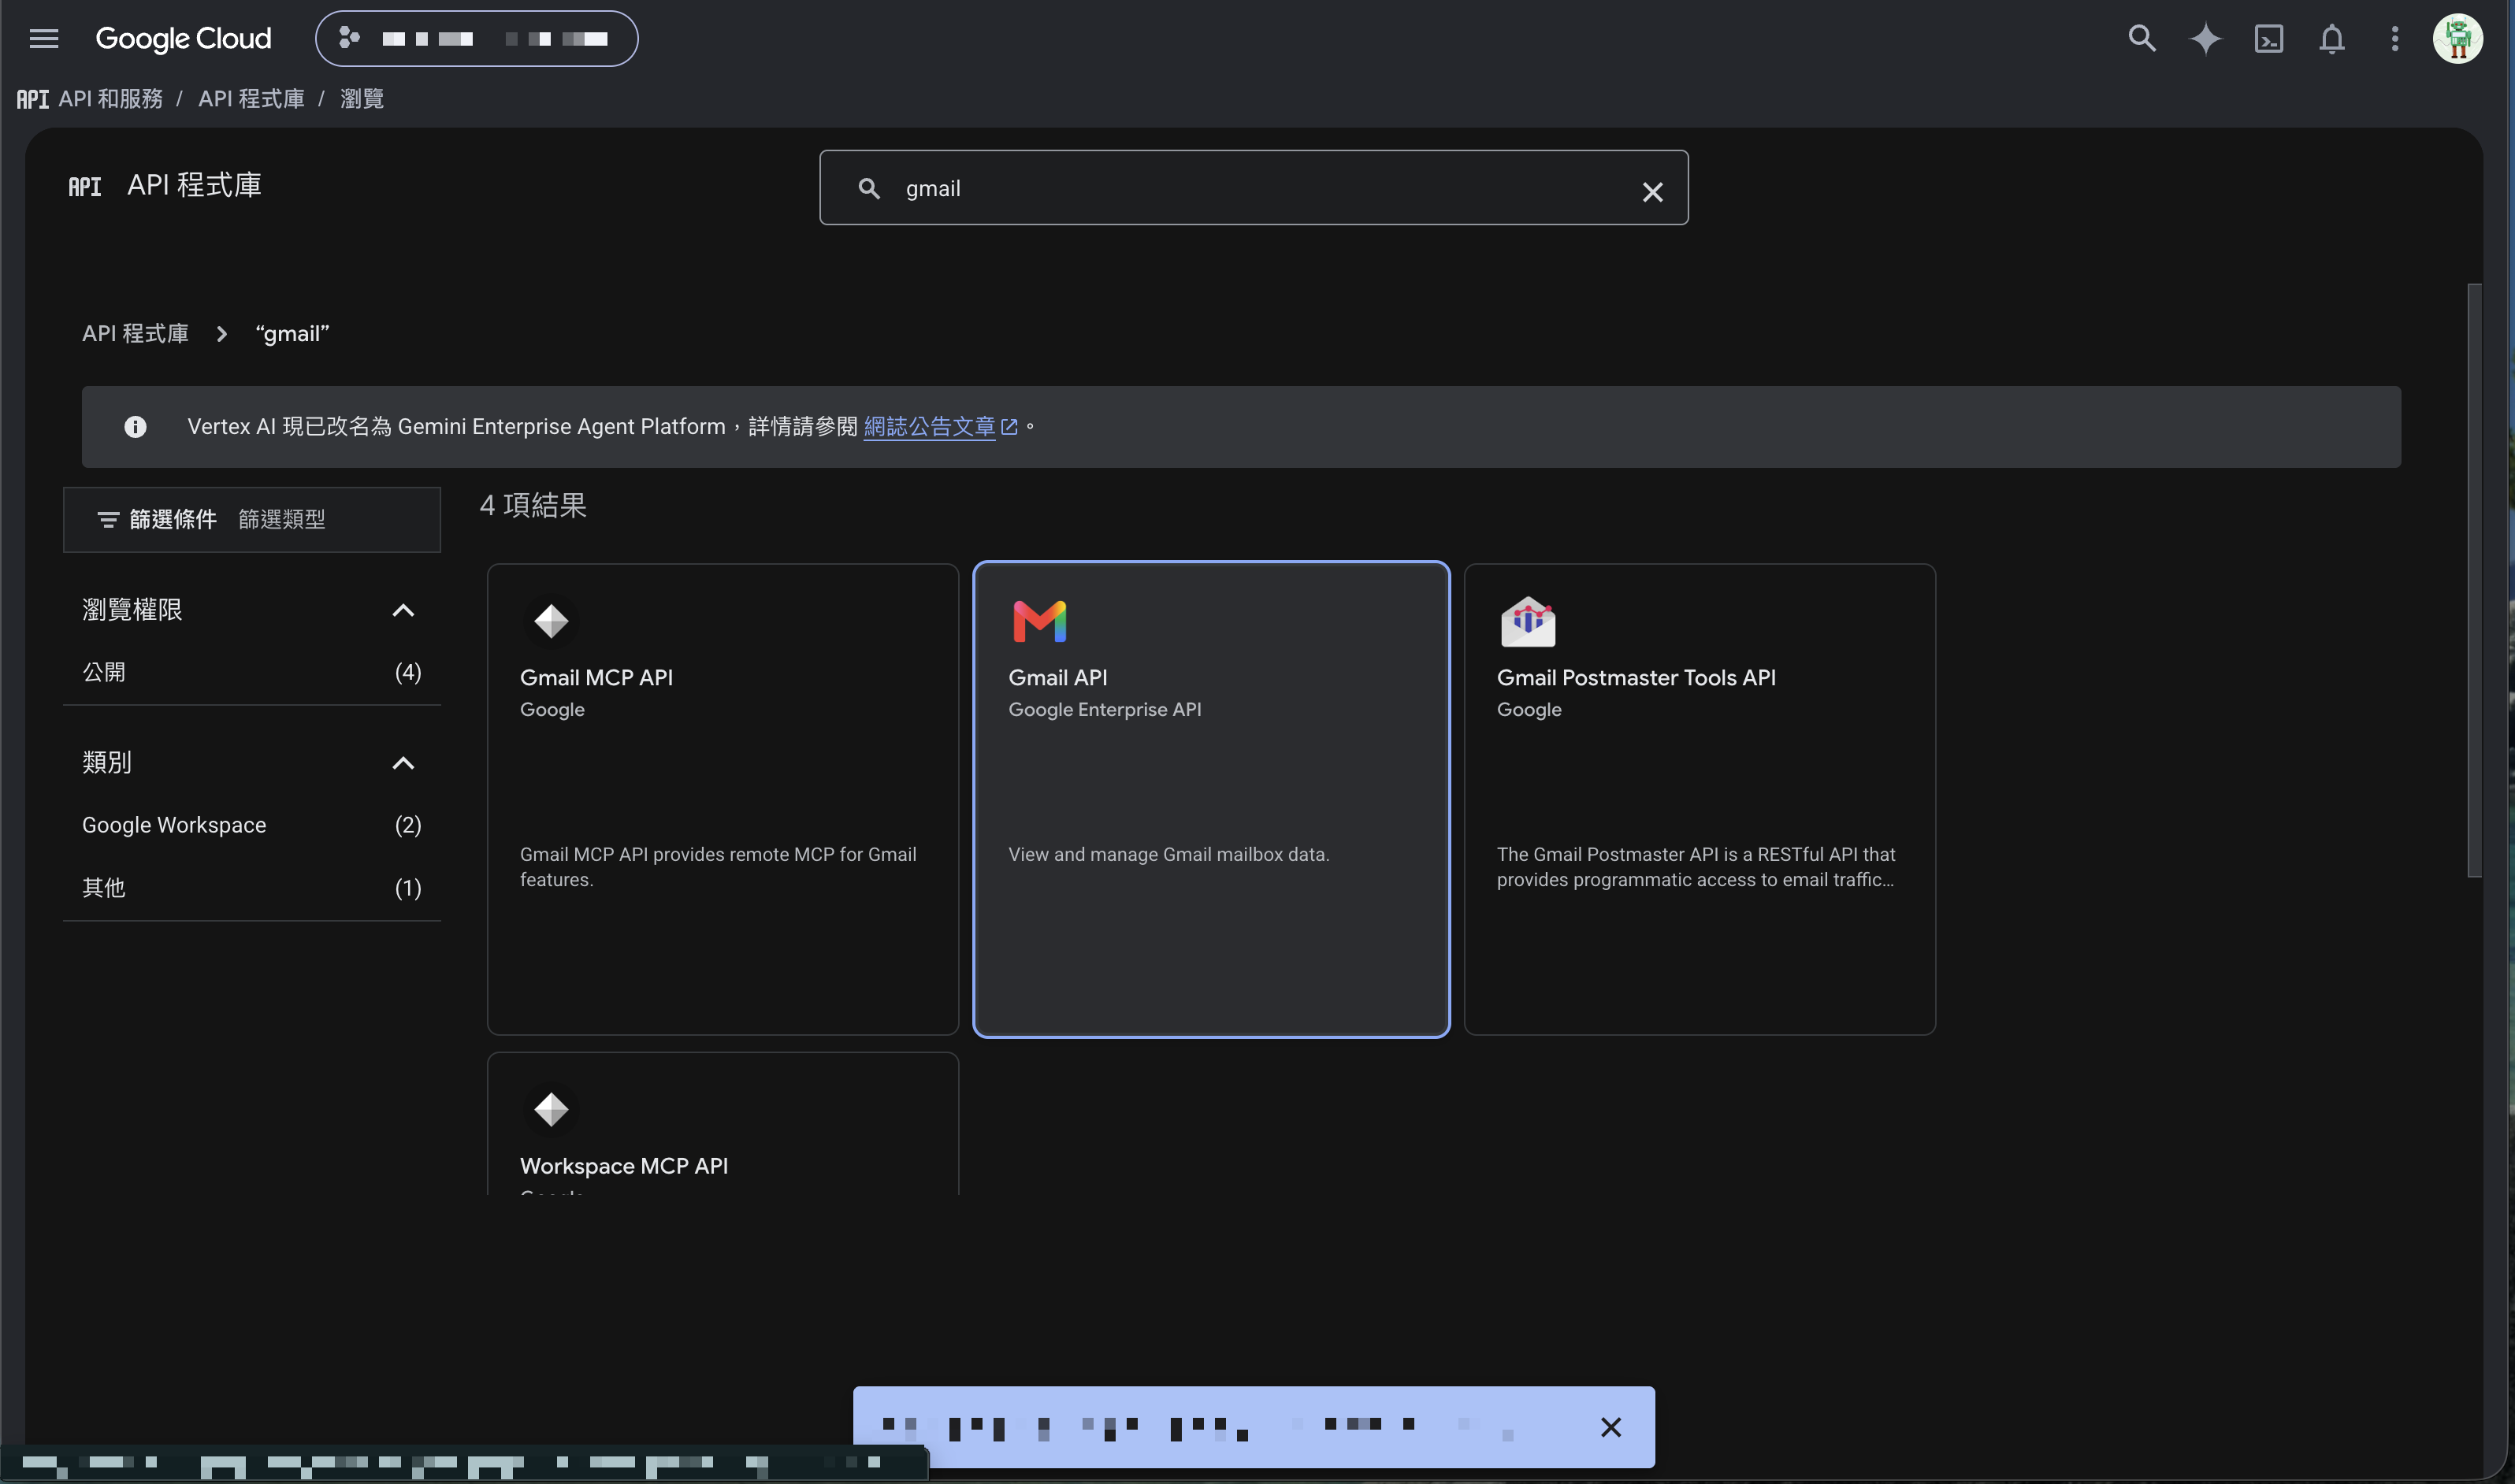
Step 3: Enable the Gmail API
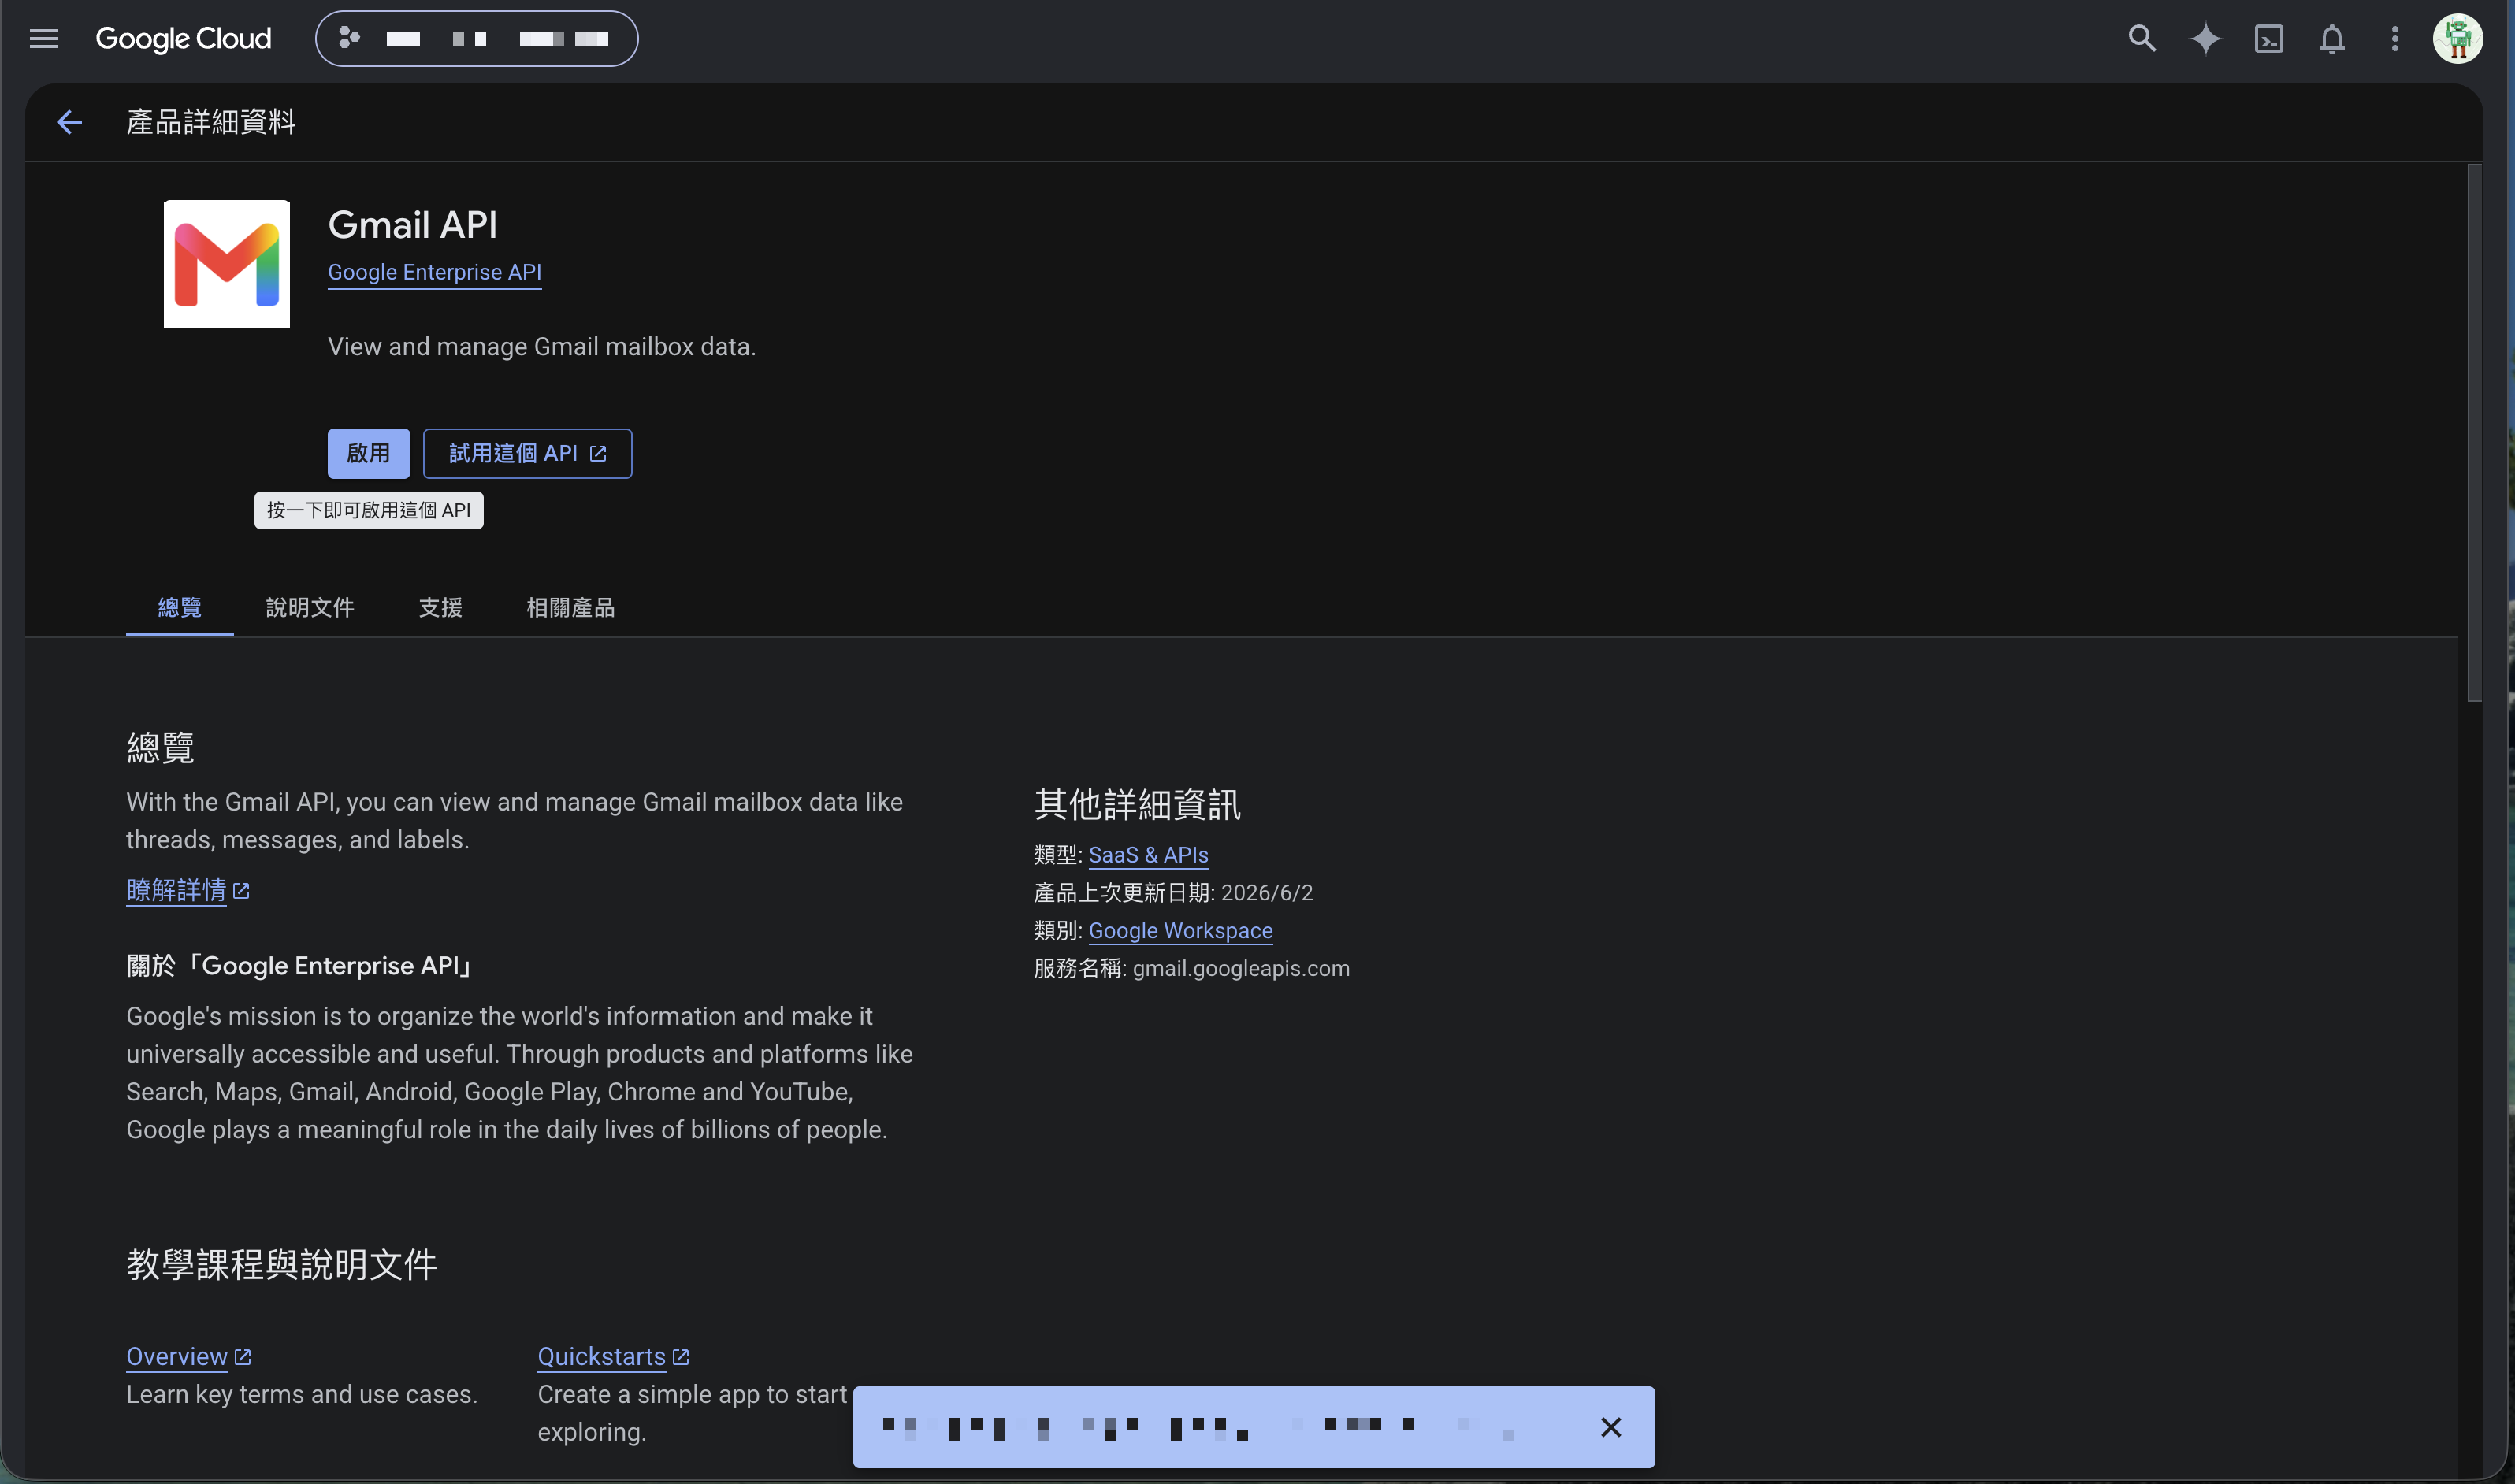
Open the Gmail API product page and click Enable.
After enabling, you land on the Gmail API management page, which also hints “you may need to create credentials to call this API” — those credentials are the OAuth client in Part 3.
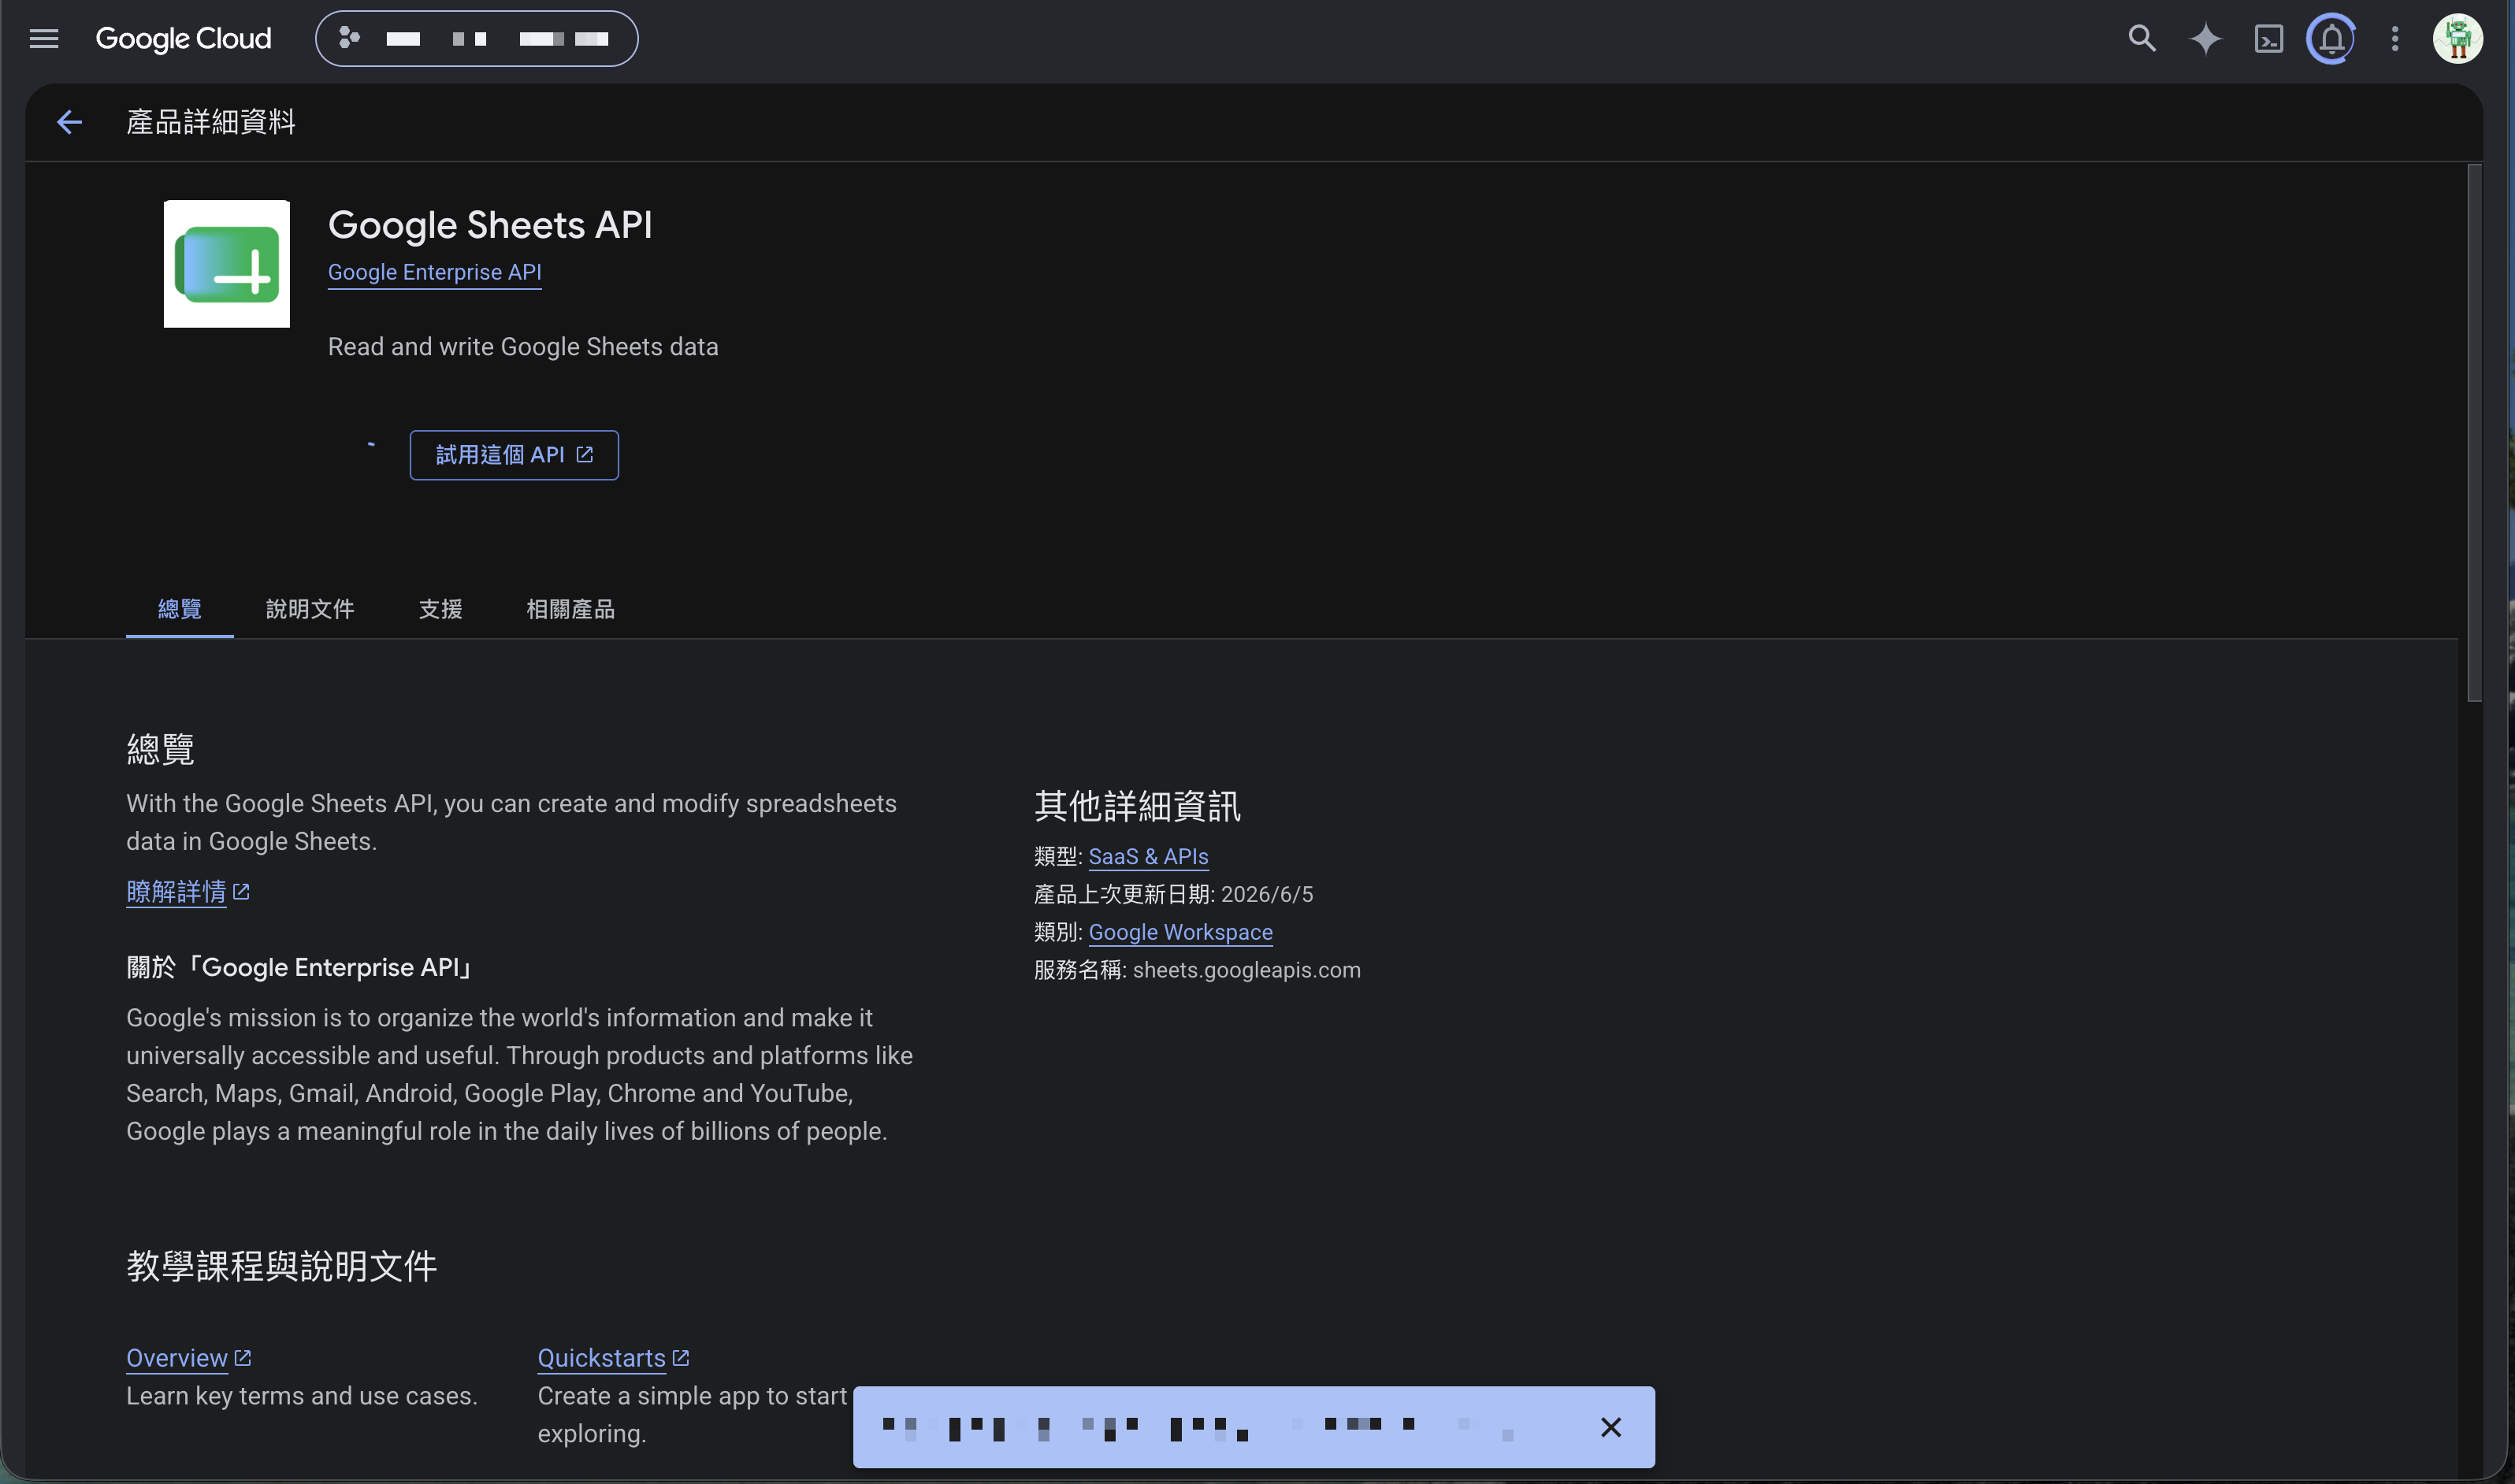
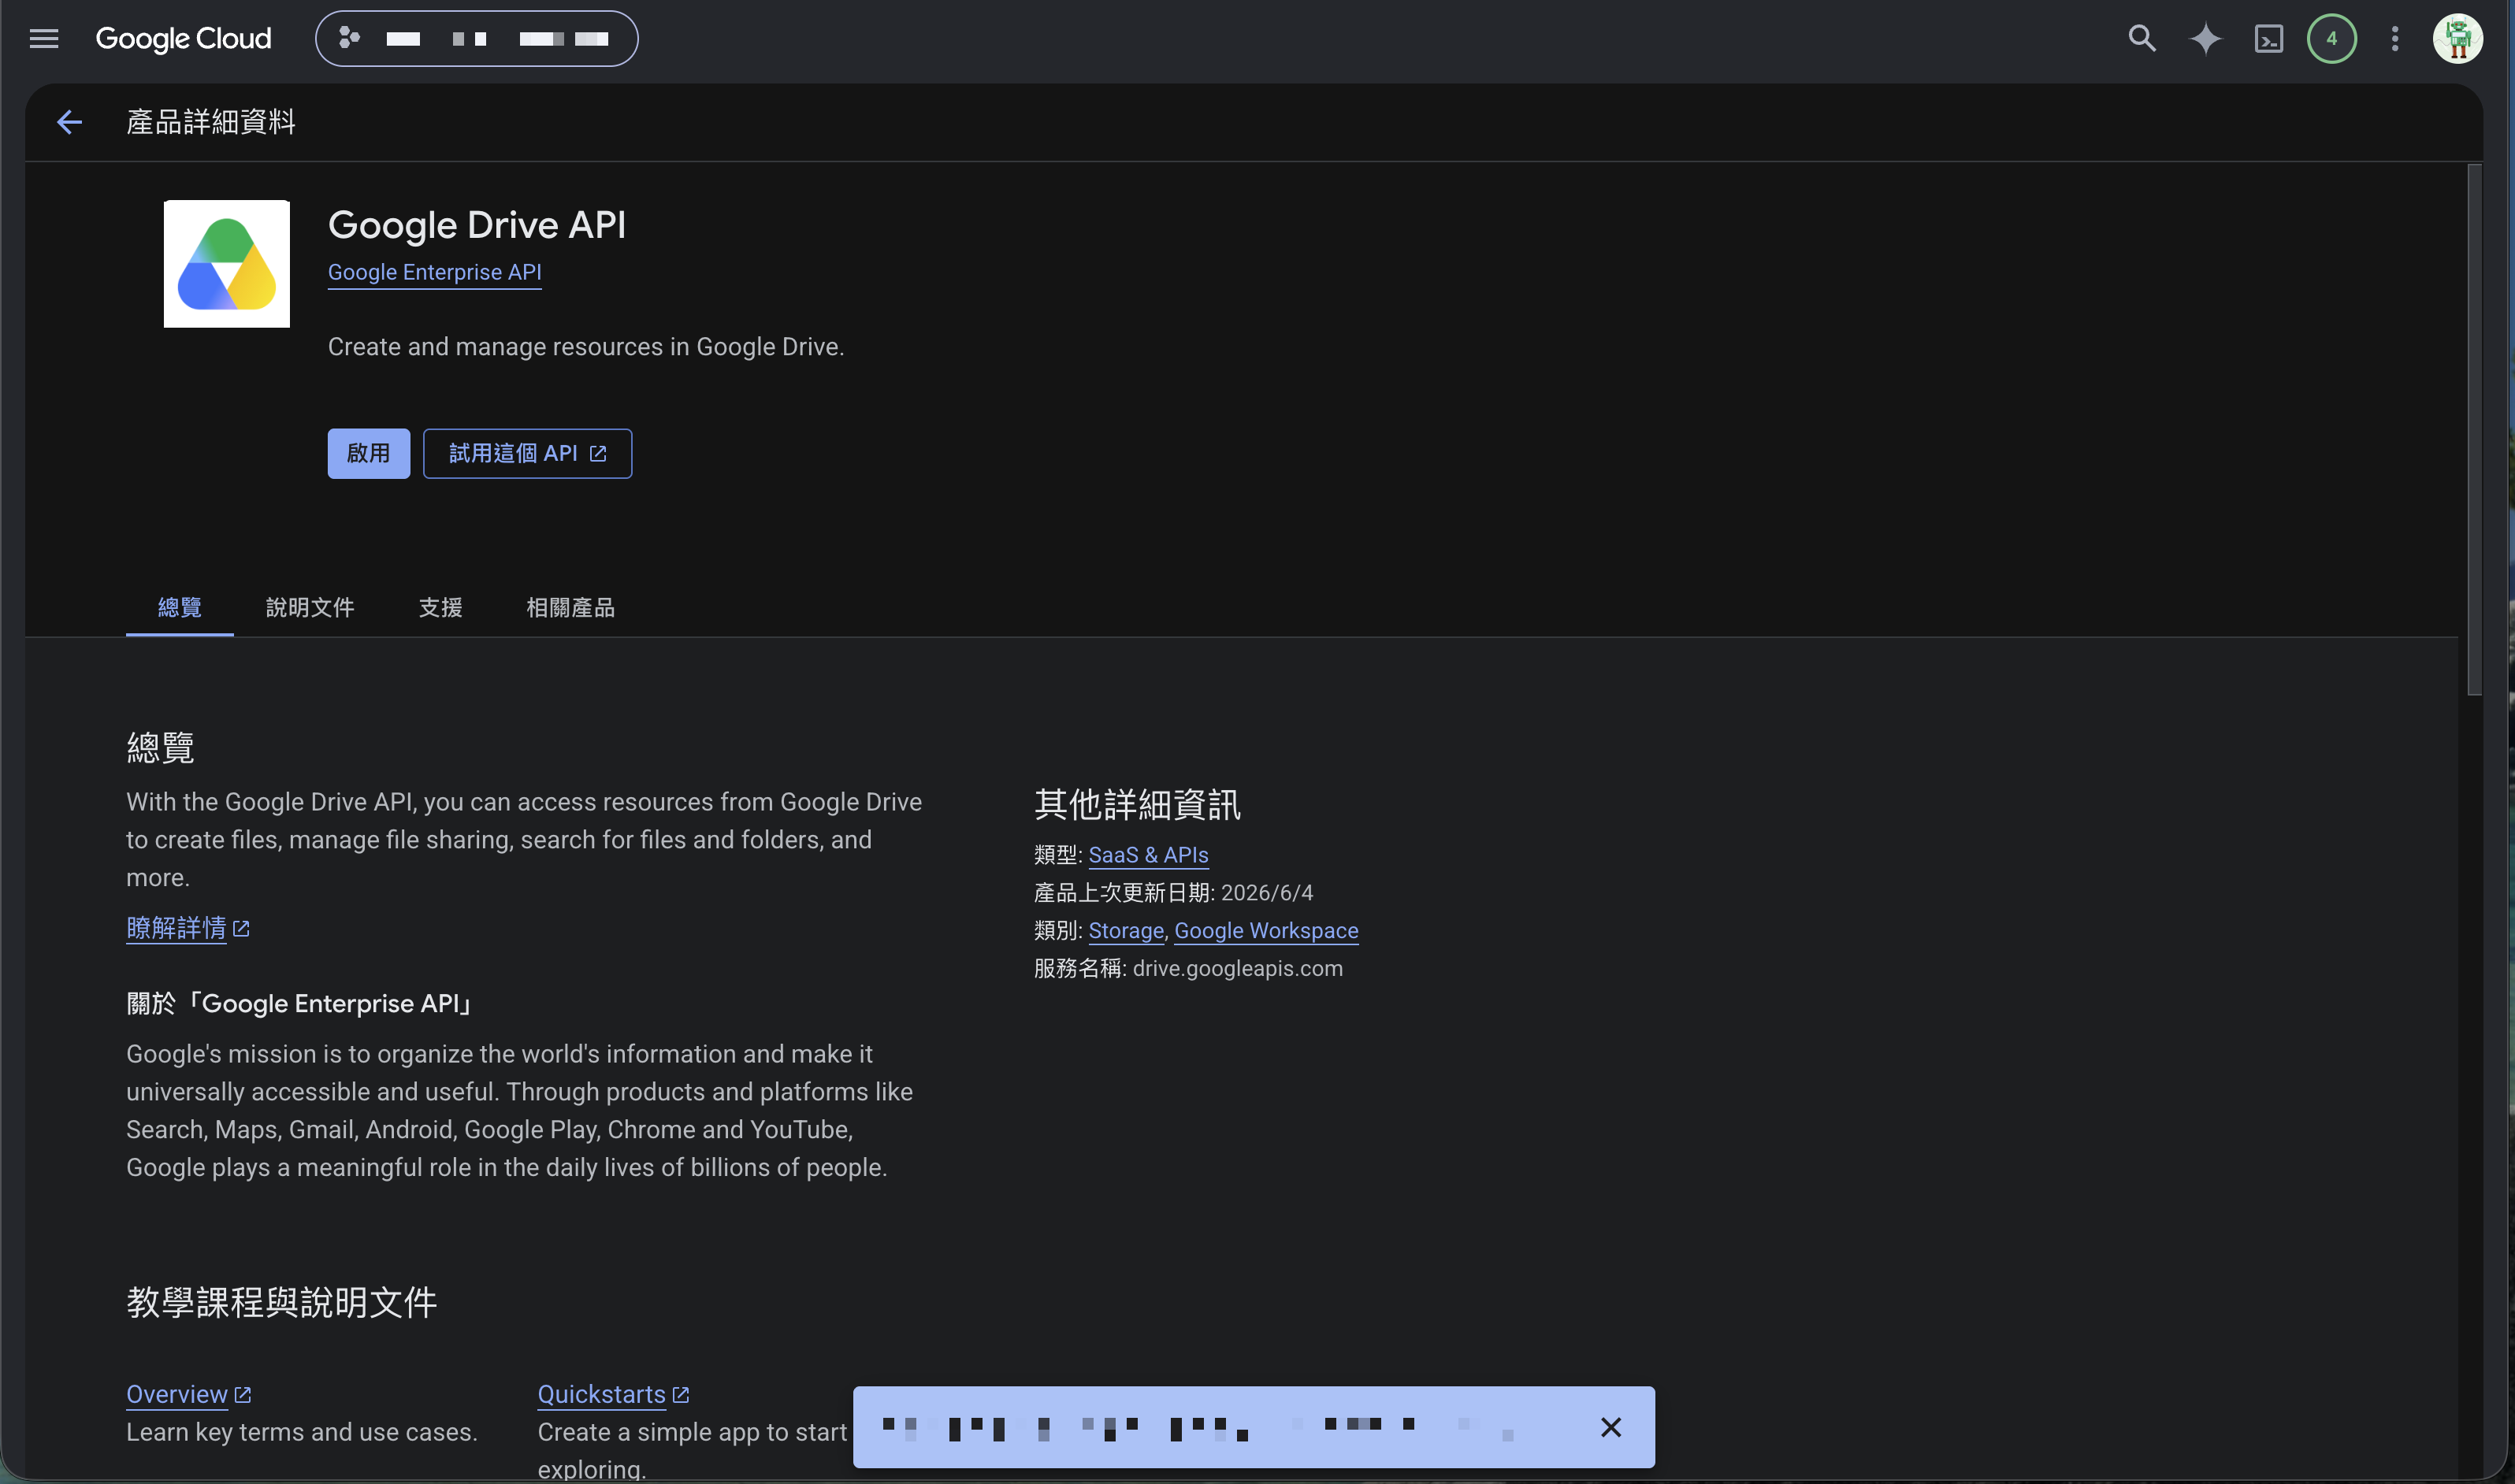
Step 4: Also enable Google Sheets API and Google Drive API
For a Gmail → Sheets automation, you’ll also use:
- Google Sheets API (read/write spreadsheets)
- Google Drive API (Sheets files live in Drive; used to find files)
Back in the Library, search each, open its page, and click Enable.
Part 3: Set up the OAuth consent screen and client
The final and most crucial part: tell Google “an app wants to access these APIs on behalf of a user.”
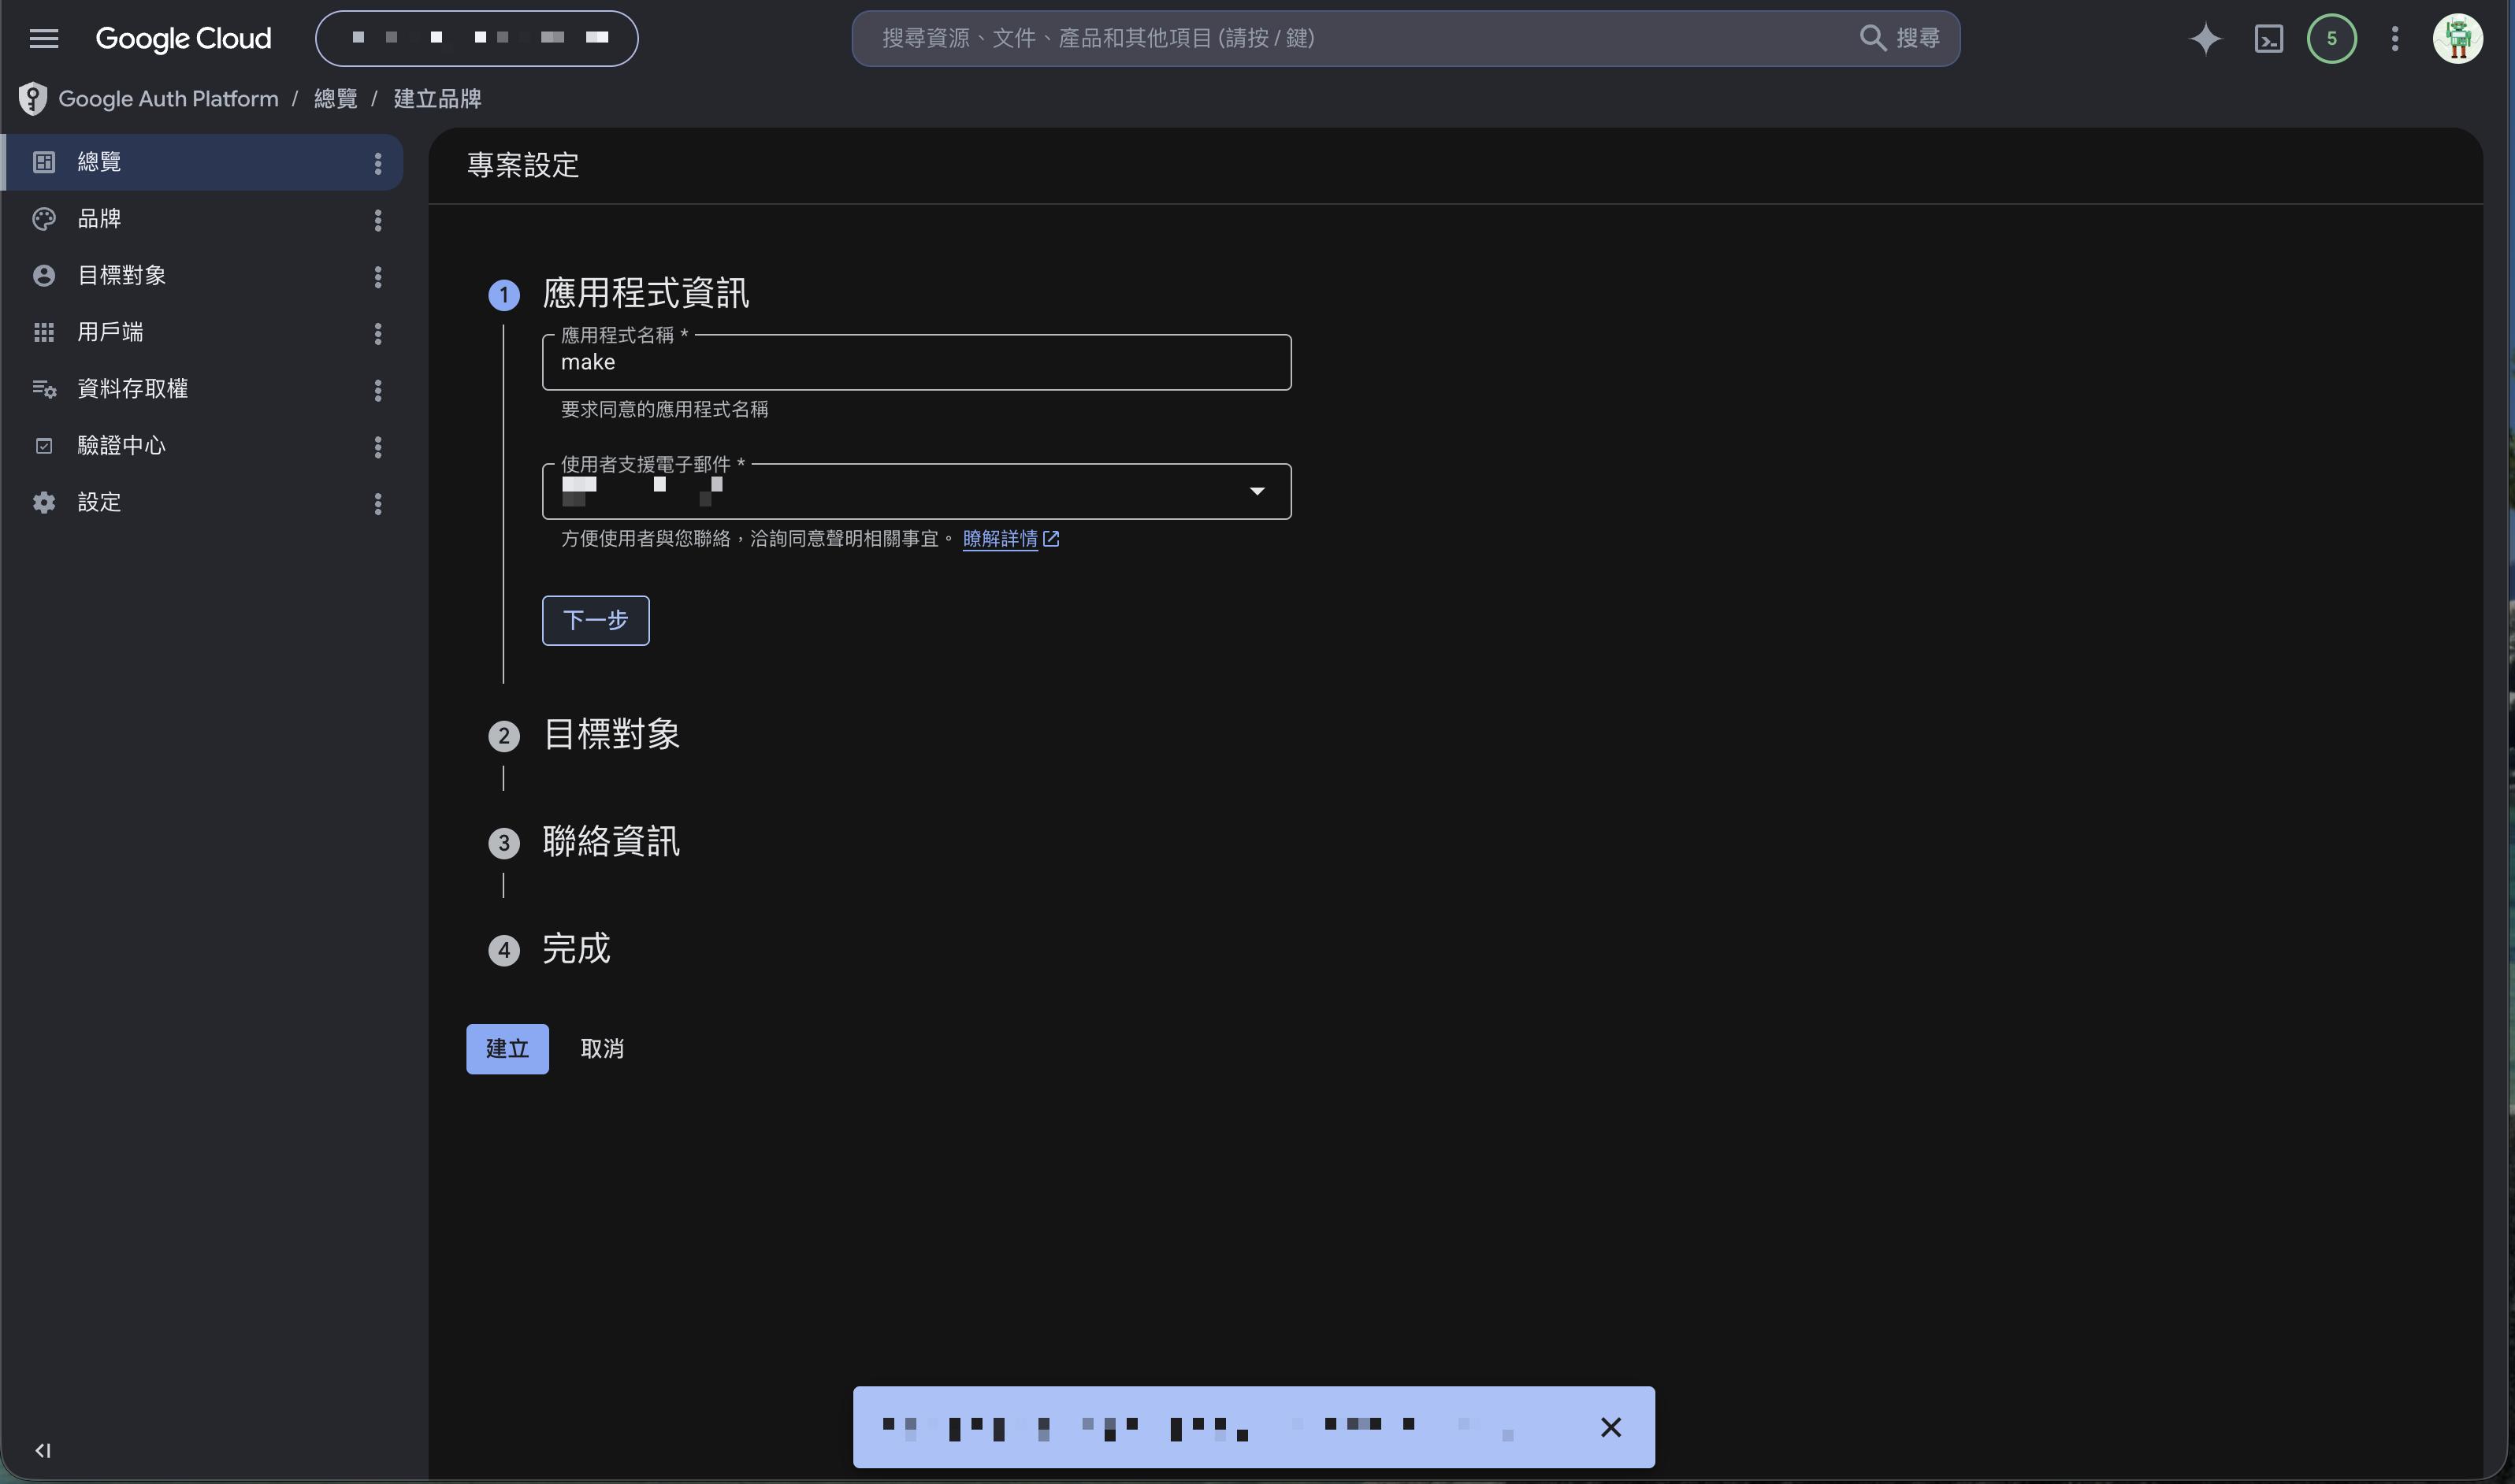
Step 5: Fill OAuth app info
Left → APIs & Services → OAuth consent screen (the new version is “Google Auth Platform”). Start configuring:
- App name: this app’s name (e.g.,
make), shown when users authorize. - User support email: pick your email.
Step 6: Choose “External” user type
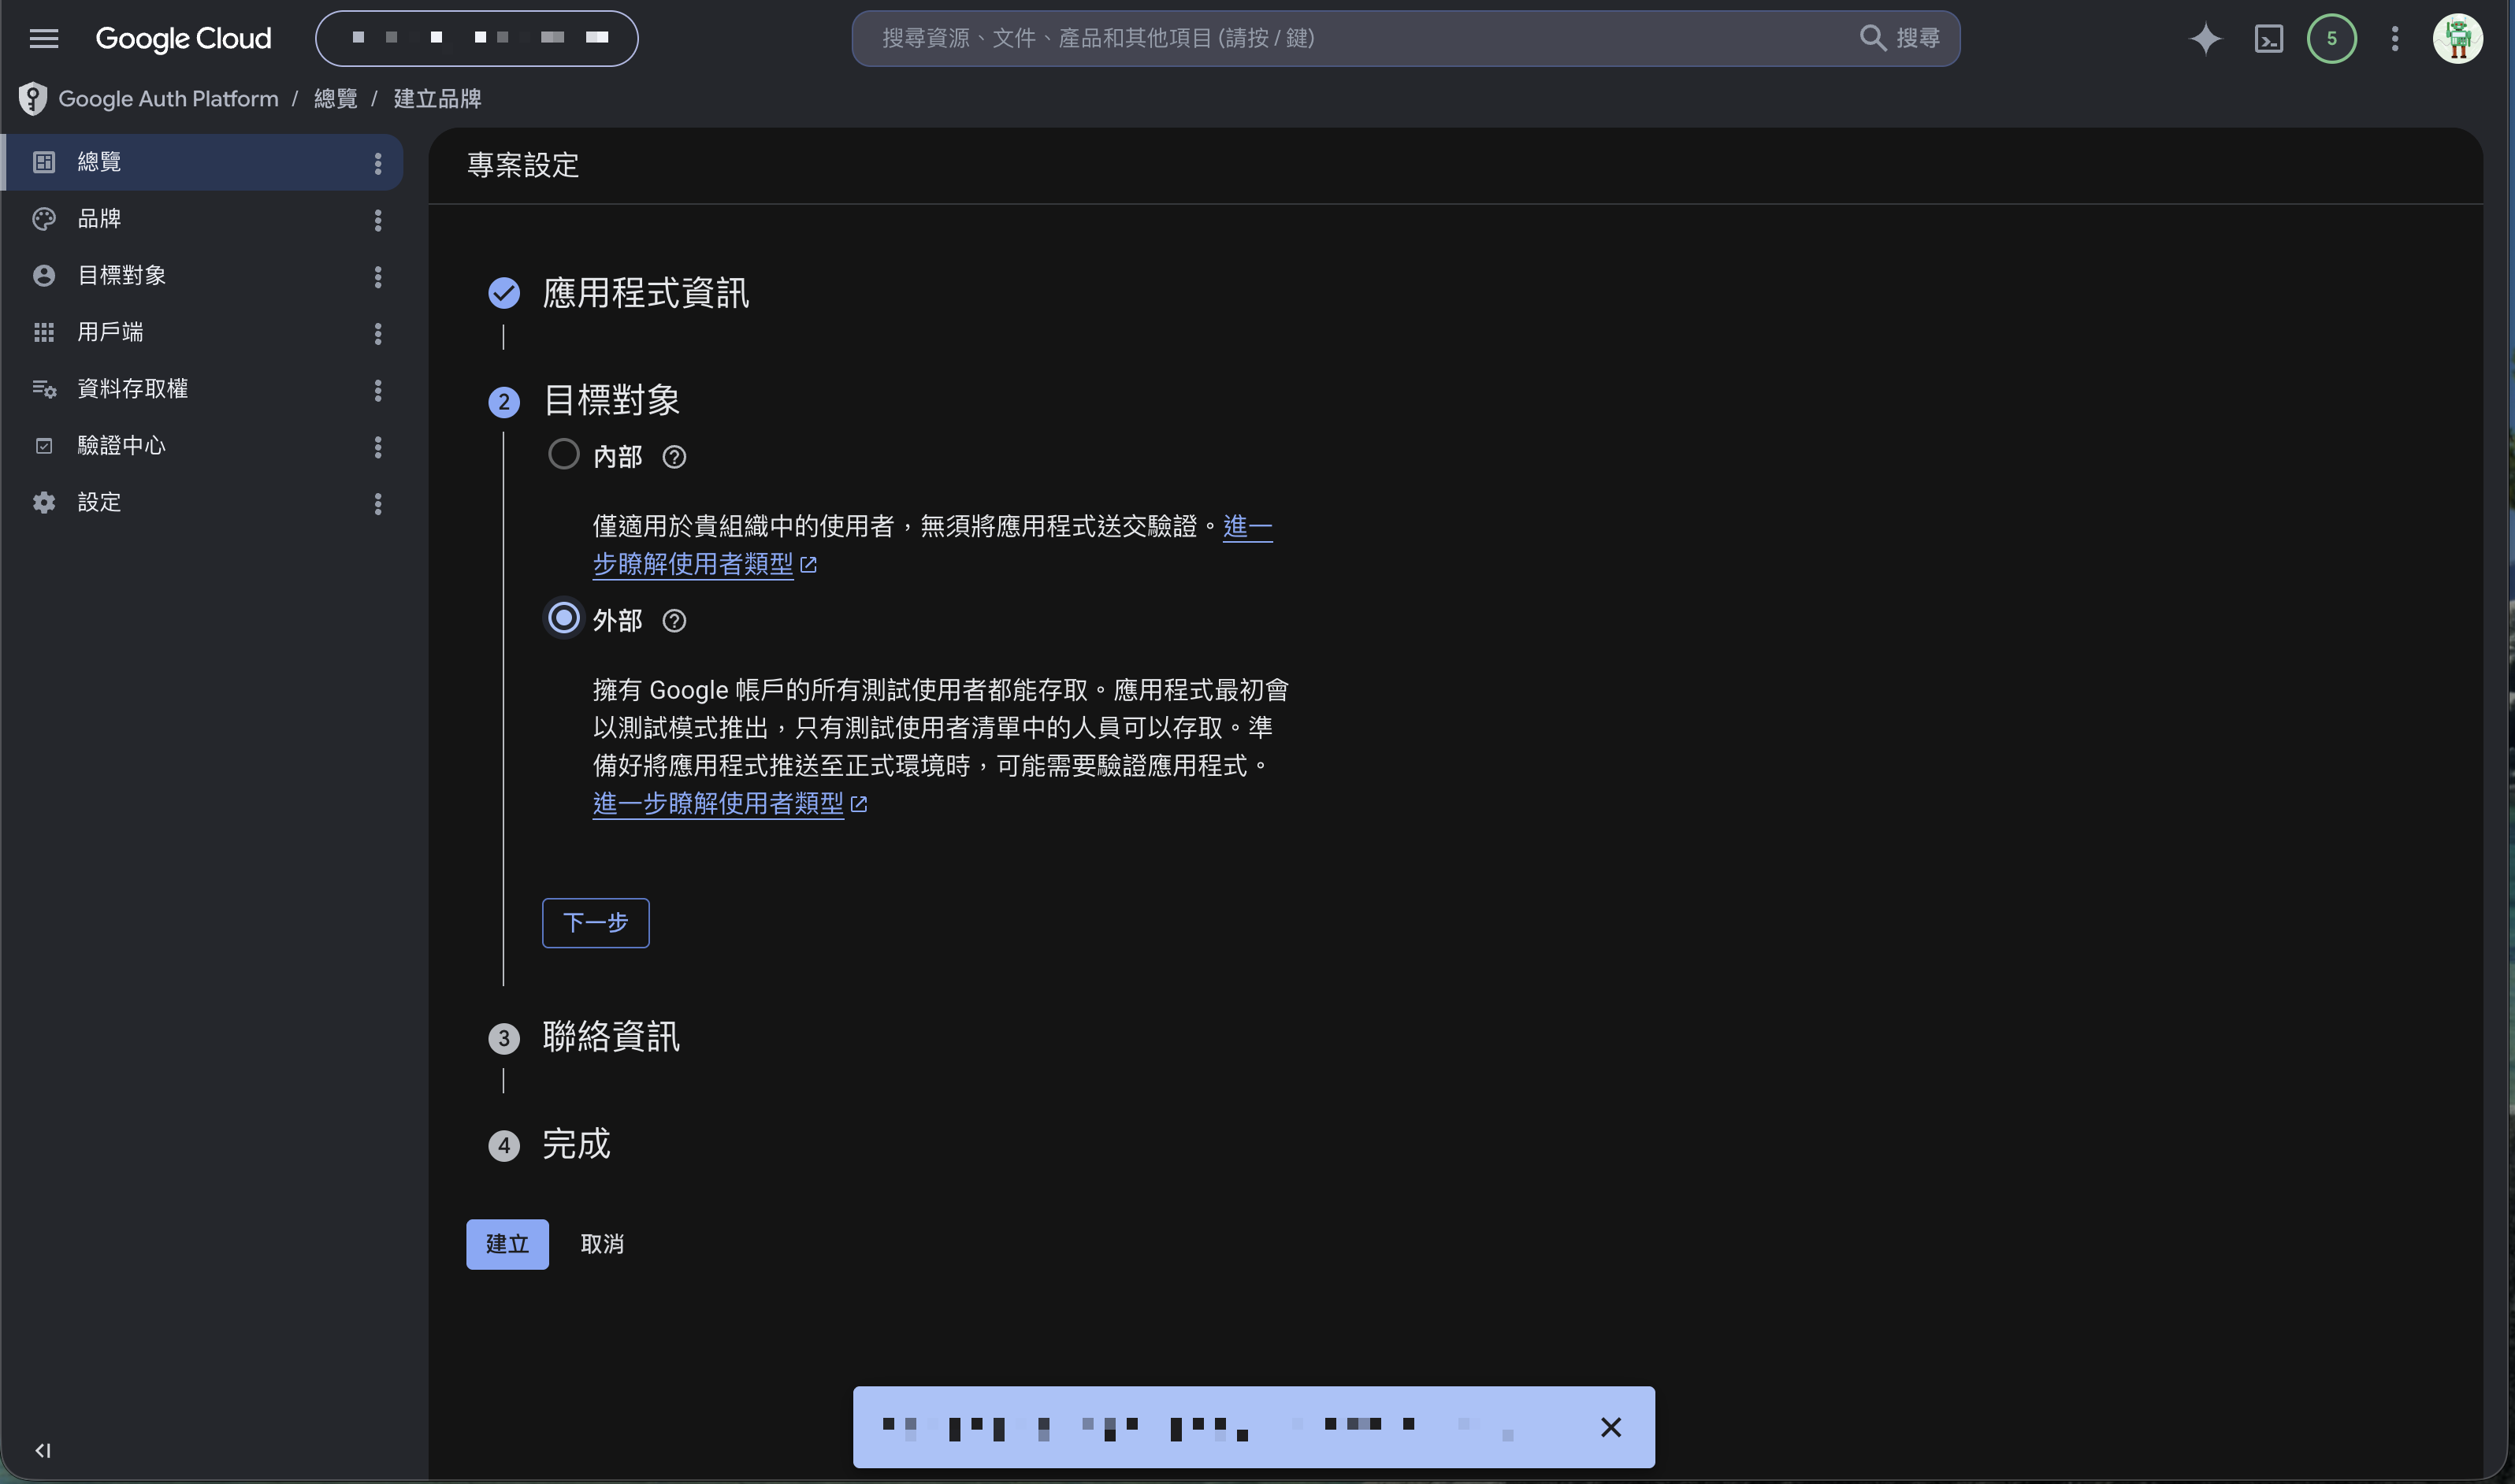
Next it asks for audience:
- Internal: only people inside your organization (Google Workspace).
- External: anyone with a Google account (including your personal account), but it starts in “testing mode” — only people you add to the “test users” list can access it.
For a personal account integrating with Make, choose External.
Step 7: Create the OAuth client (choose Web application)
With the consent screen set, create an OAuth client ID. It asks for the application type:
- Web application: services that run on the web and need a “redirect URL” to send you back, like Make or Notion ← choose this for Make.
- Desktop application: programs running locally on your computer (localhost).
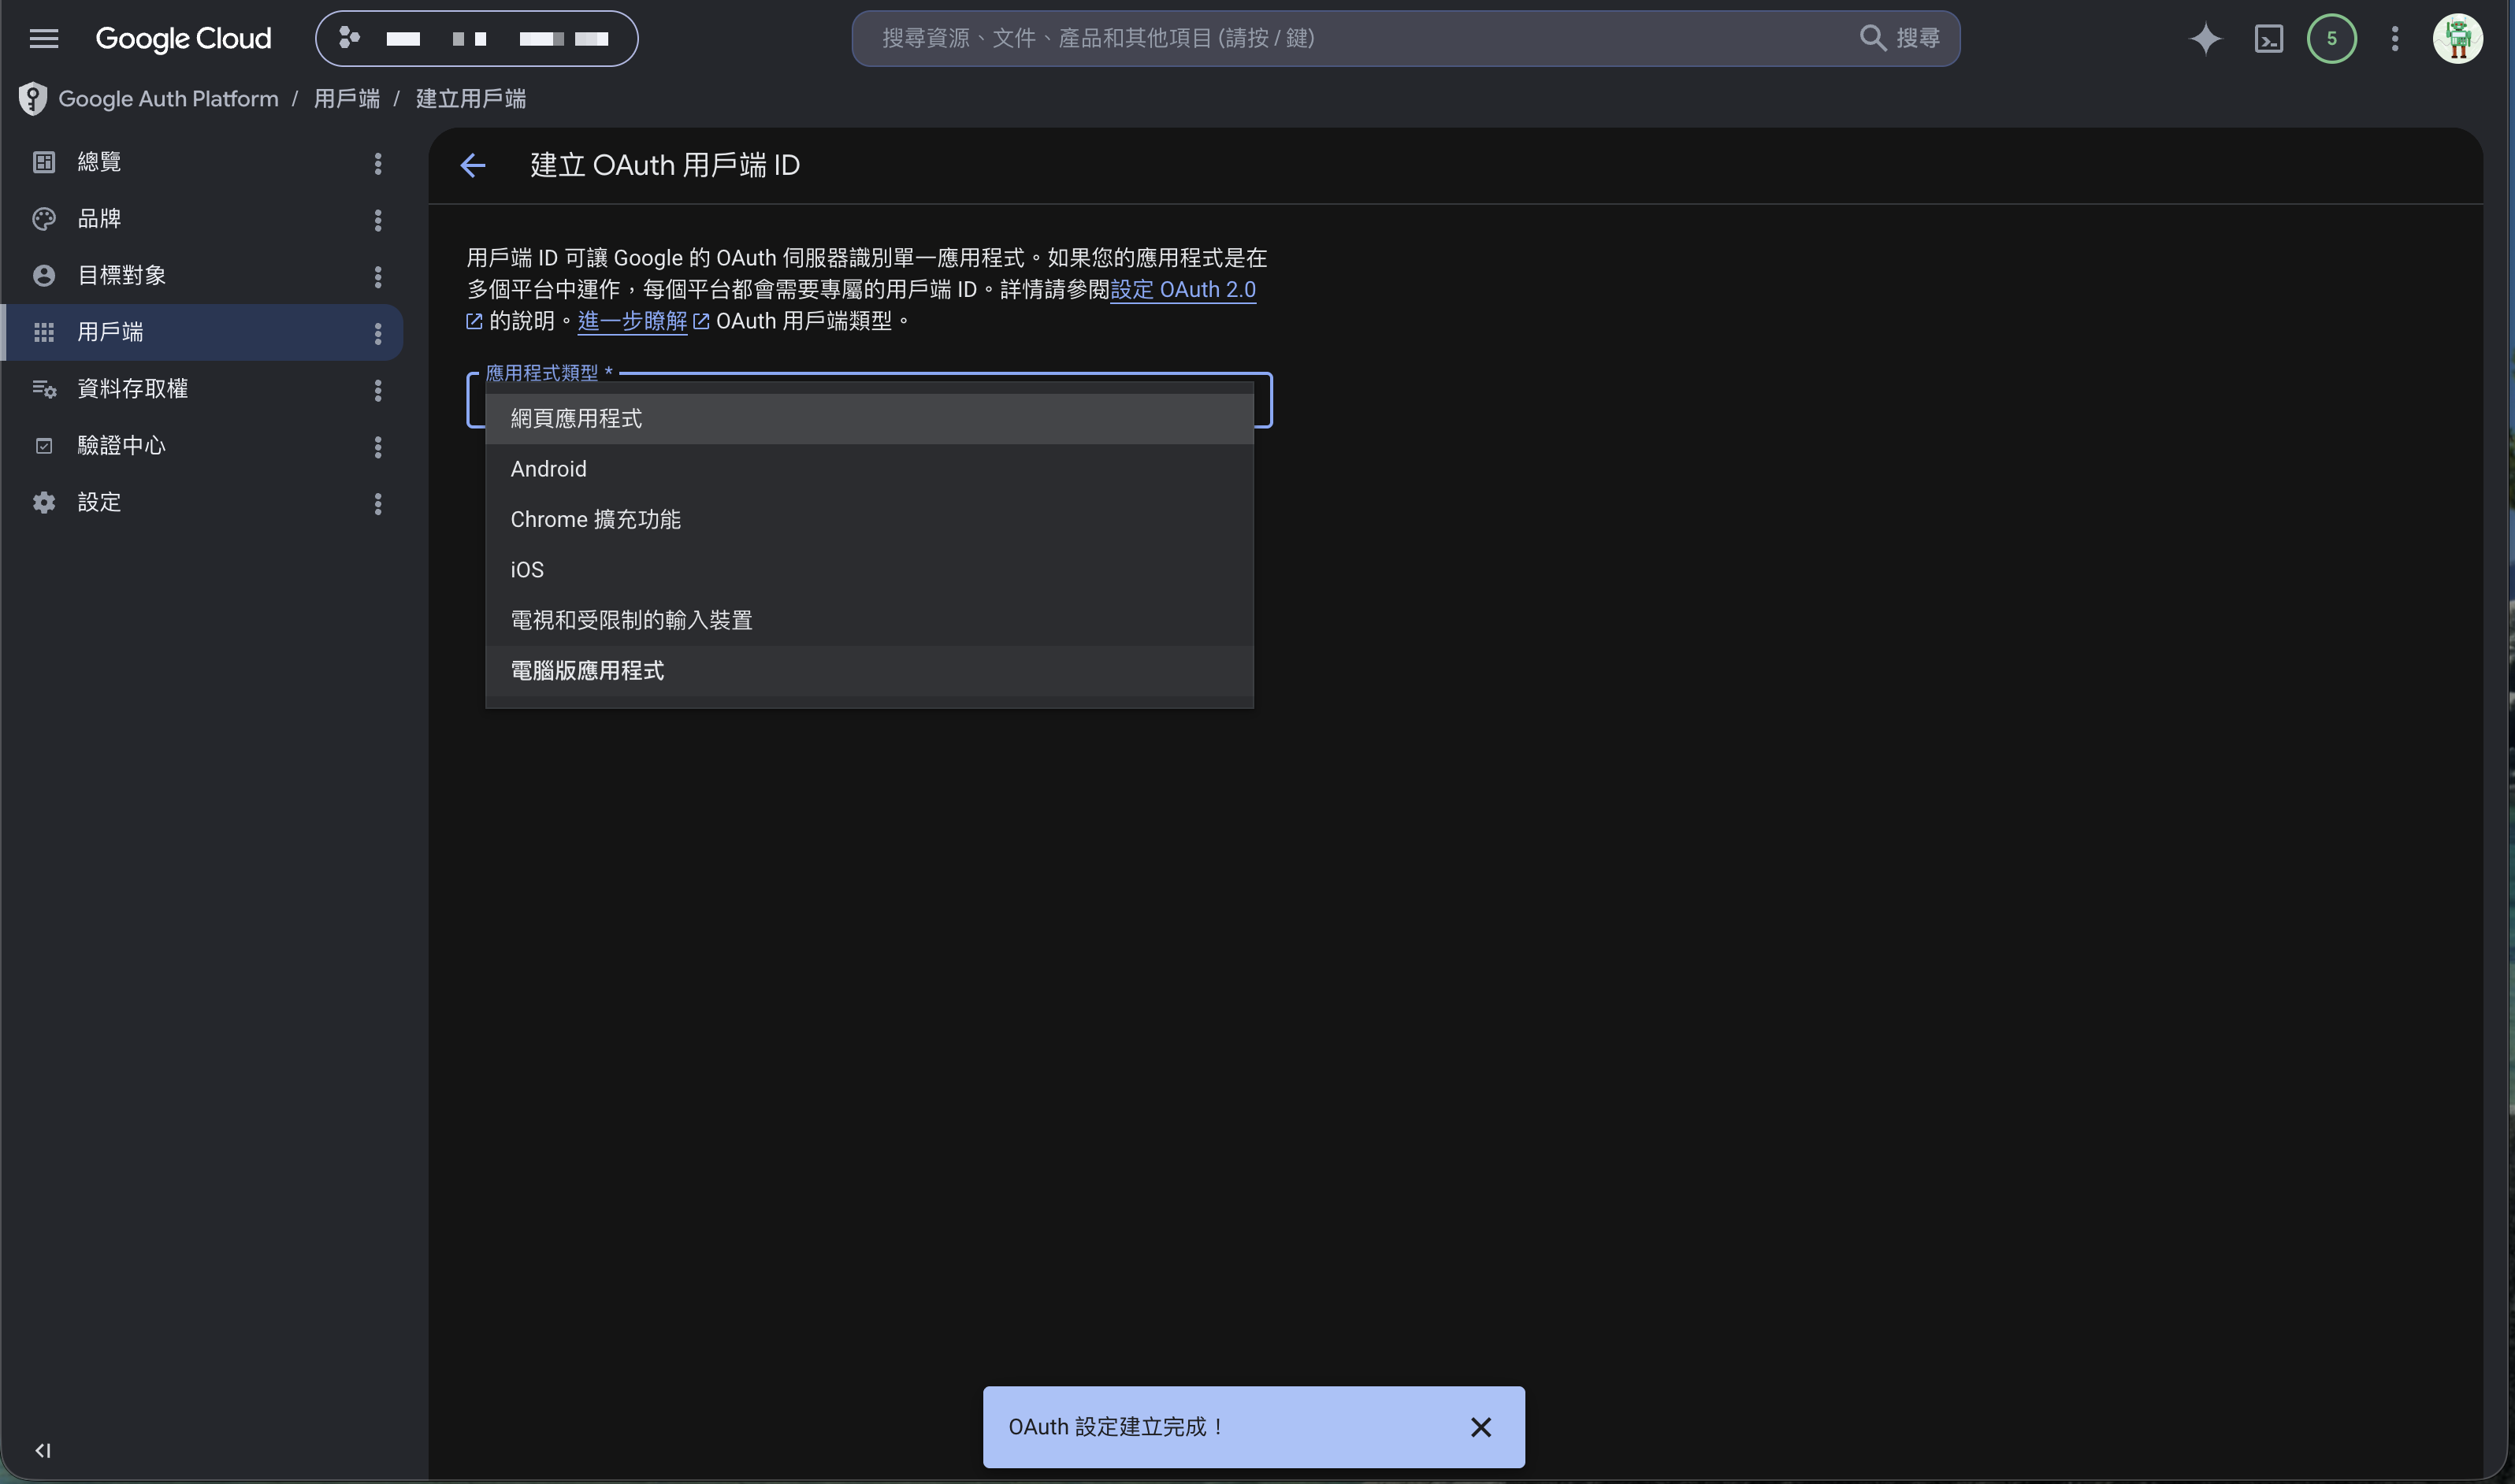
Pick “Web application” and name the client. Under Authorized redirect URIs, enter the callback URL Make gives you (e.g., https://www.make.com/oauth/cb/... — use exactly what Make’s connection screen shows).
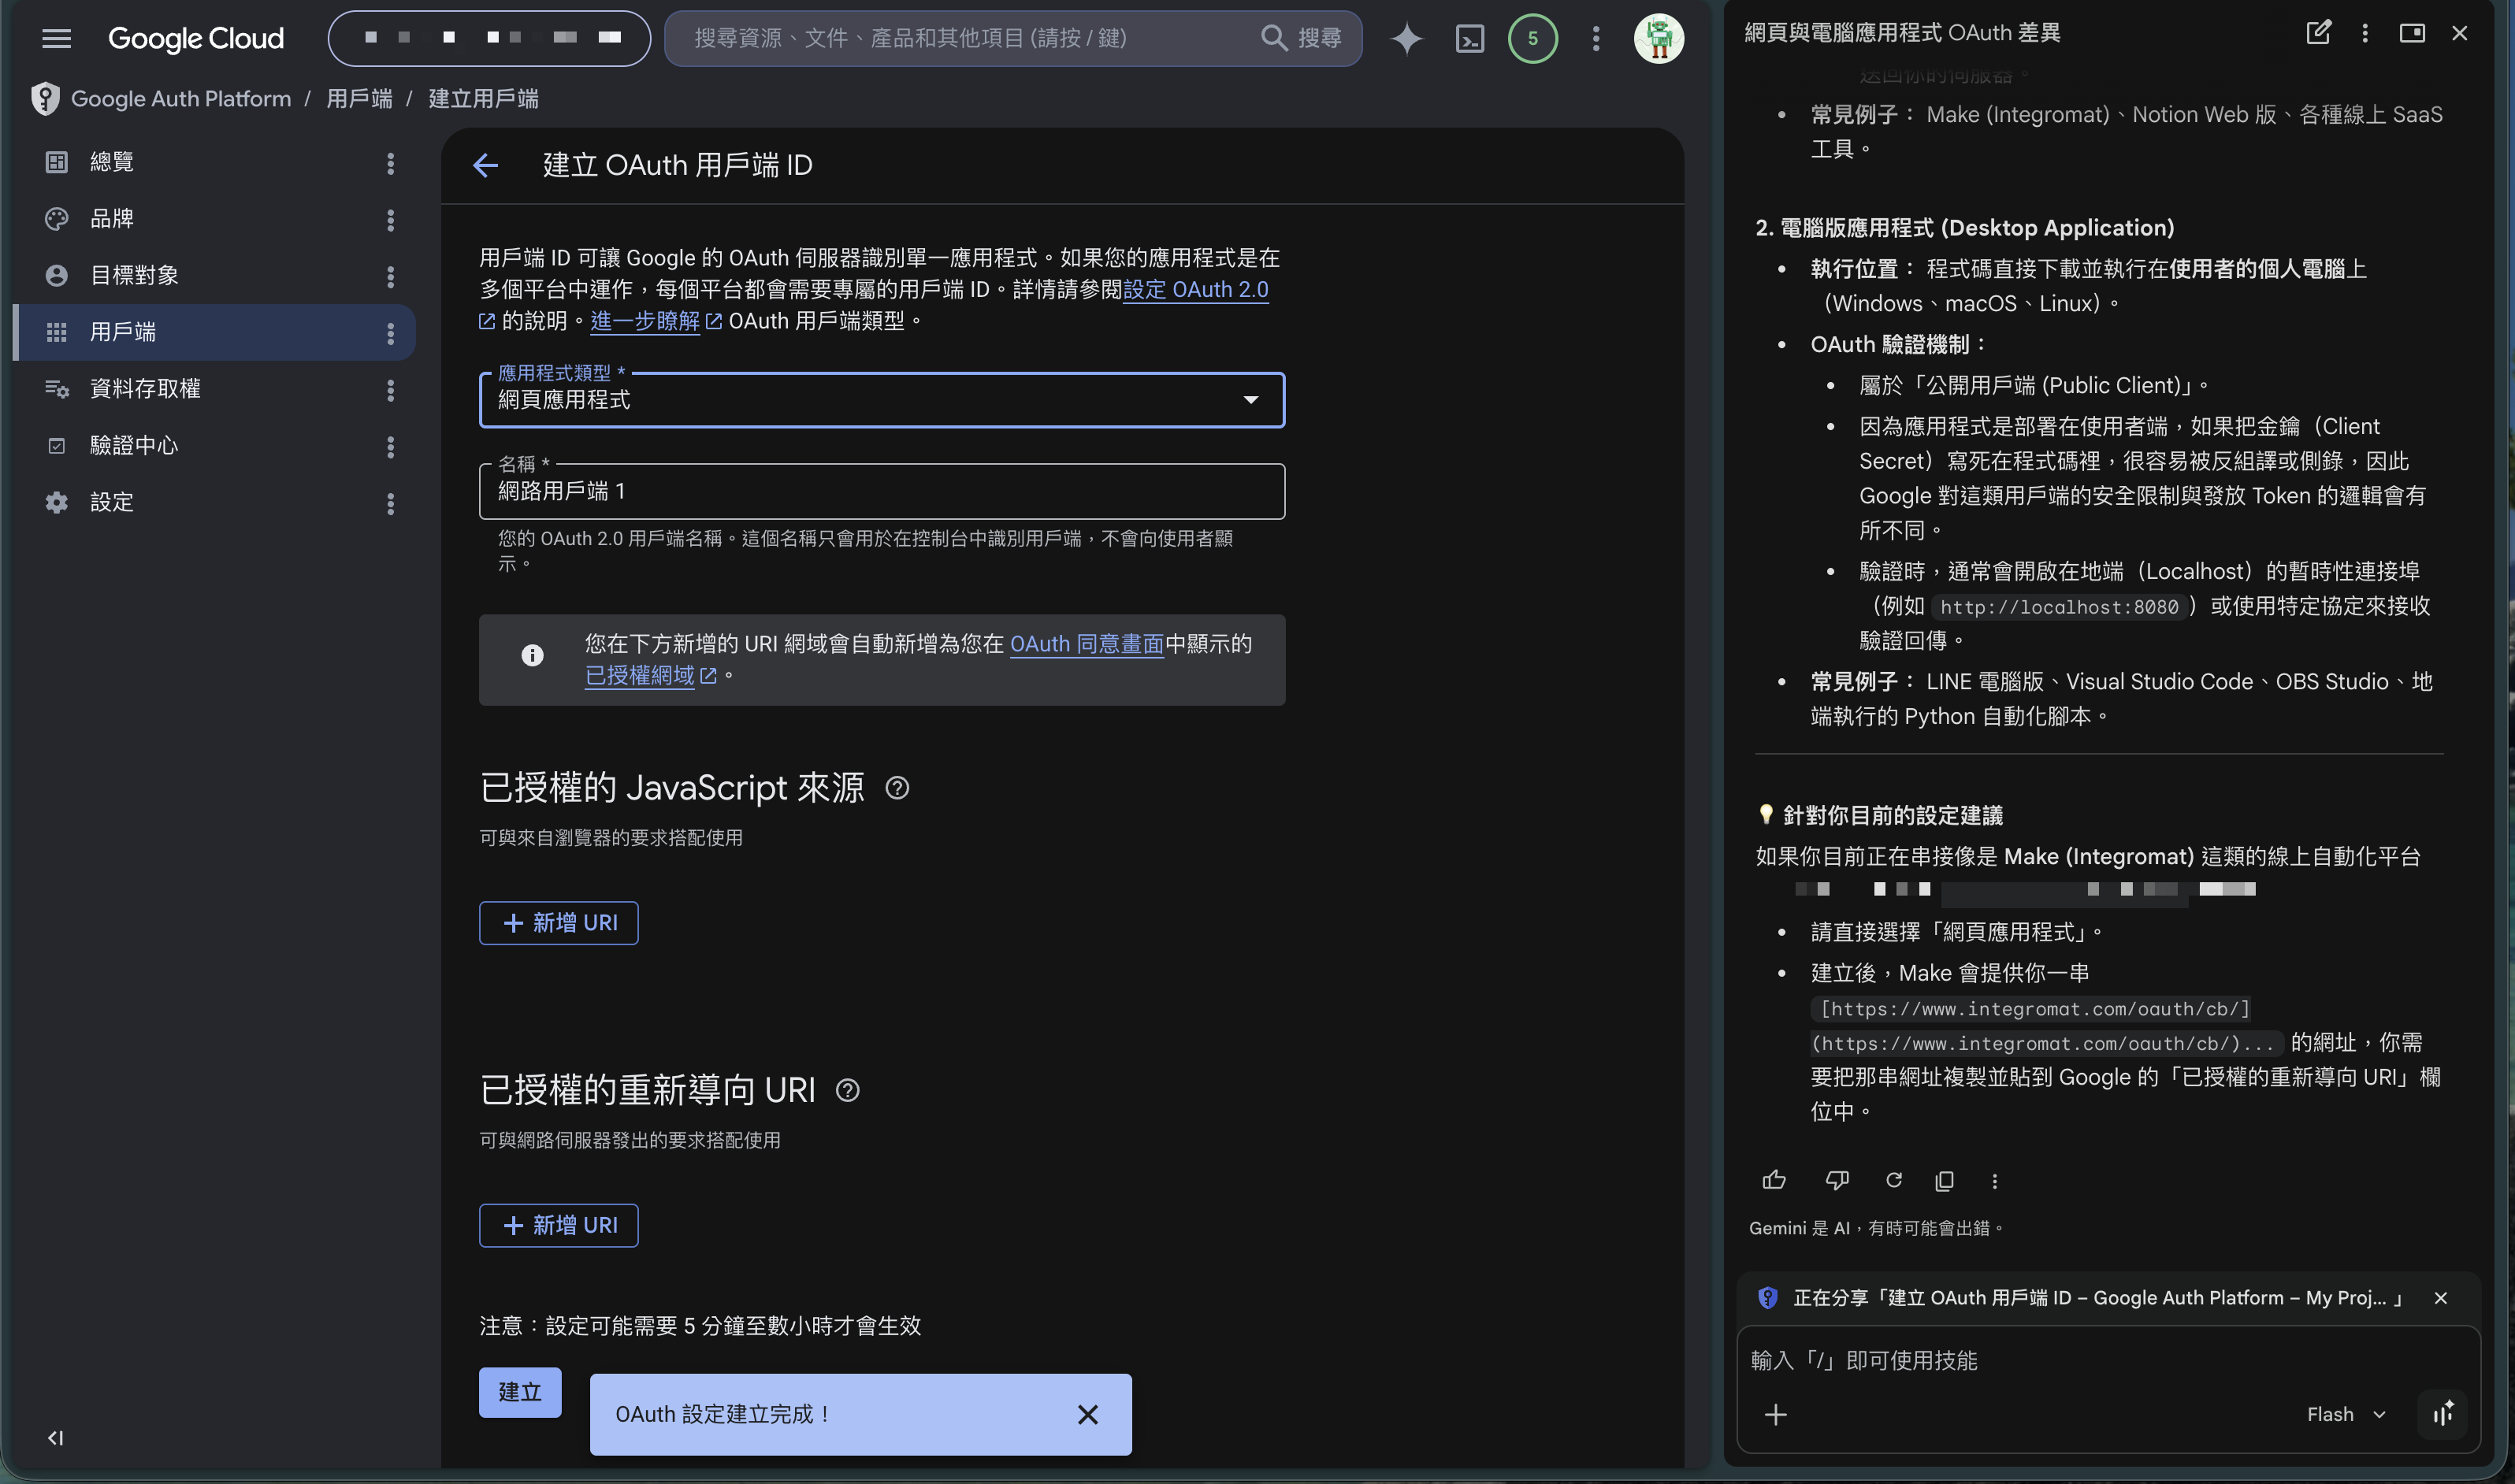
Step 8: Get the Client ID and Client Secret
Click Create, and Google issues a Client ID and Client Secret (also downloadable as JSON). Paste these two values back into Make’s connection settings, and the integration is wired.
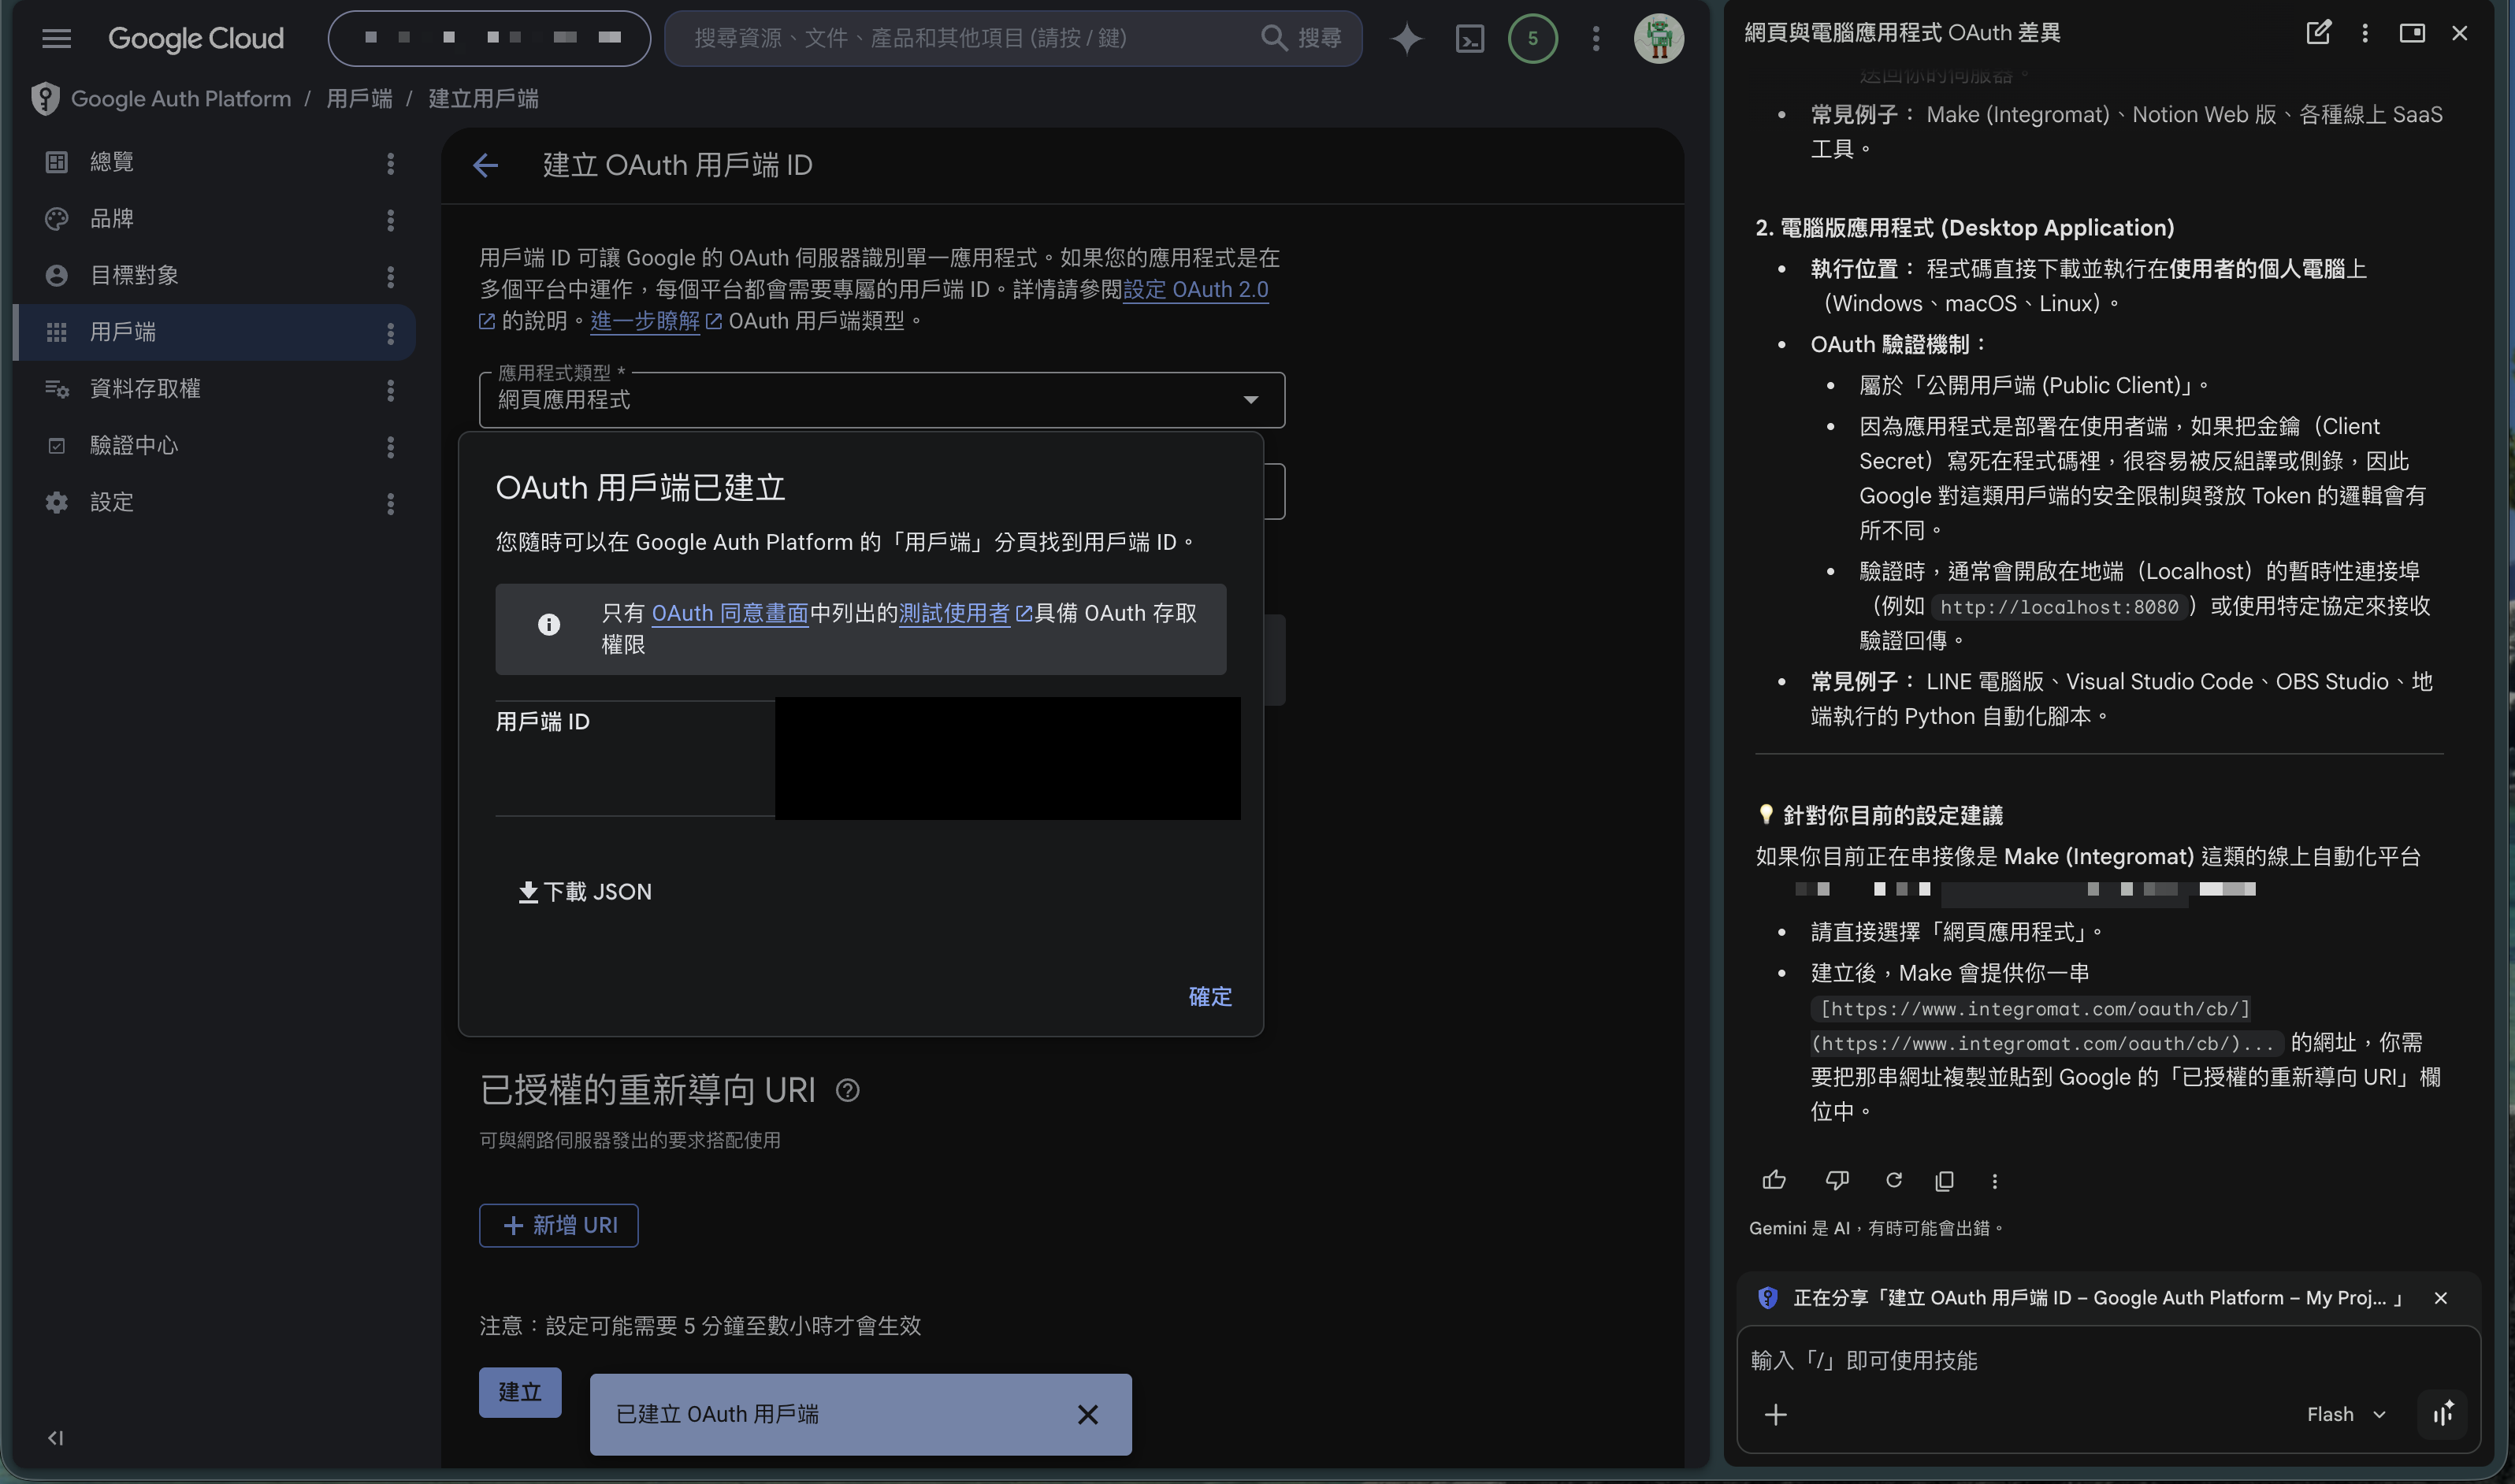
🚨 Configured but it fails immediately? Might not have propagated
Google sometimes warns “settings may take 5 minutes to a few hours to take effect.” If you integrate right after creating and hit an error, wait a bit and retry — it’s not necessarily a misconfiguration.
Done! Back to your automation
Three parts complete, you now have: a Google Cloud project, enabled Gmail/Sheets/Drive APIs, and an OAuth client credential. Paste the Client ID/Secret back into Make’s (or n8n’s) Google connection, and the sensitive permission that was stuck now goes through.
Return to “Your First Make Automation” to finish the Gmail → Sheets flow, or continue to “Auto-Classify Gmail with an LLM in Make” to add AI.
這篇文章對你有幫助嗎?
💬 問答區
卡關了?直接在這裡問,其他讀者和作者都能幫忙解答。
載入中...
Found this useful? Share it with a friend who’s also getting their hands dirty
Share on LINE