Connect ChatGPT to GitHub: How to Set It Up, and What the Free Tier Actually Did
Find GitHub in ChatGPT's Plugins page, install it, and finish the authorization — three minutes end to end. But what can it do once connected? Tested 2026-07-21 on the free tier: connecting and reading works; getting it to actually create a repo and push files did not. Here are the steps and the honest results.
 卡住很正常——點段落旁的 😵 卡關 讓我們知道,或直接往下滾到問答區發問。
也可以用 👍 看懂 / 😢 看不懂 告訴我們哪裡寫得好、哪裡要改。
卡住很正常——點段落旁的 😵 卡關 讓我們知道,或直接往下滾到問答區發問。
也可以用 👍 看懂 / 😢 看不懂 告訴我們哪裡寫得好、哪裡要改。
In one line: On chatgpt.com/plugins, click Plugins in the sidebar → find GitHub under Featured → open it and click Install → confirm in the “Connect to GitHub” popup. Setup is quick, but on the free tier the connector did not actually carry out GitHub tasks in testing — whether this is useful to you depends on your plan and what you want done.
Keywords: ChatGPT, GitHub, plugins, connector, authorization, Skills, Codex, free tier
The conclusion first, to save you three minutes
Most people connect GitHub hoping for one thing: “I ask the AI to build something, and it puts it on GitHub for me.”
Here’s what a test on 2026-07-21 found:
- ✅ The free ChatGPT tier can install and authorize the connector. The flow is smooth and takes under three minutes.
- ❌ But asking the free-tier model to actually execute GitHub tasks — create a repo, push the files — did not complete successfully. Reliable use requires a paid plan.
- 📌 ChatGPT’s own description of the connector tells you the intent: “Triage PRs, issues, CI, and publish flows.” That’s built for people who already have a repo and need to keep up with it — not for people who want one conjured from nothing.
If your goal is “one sentence, one new repo,” read Connect Grok to GitHub instead — tested the same day, and the free tier completed the whole run. This article sets up the ChatGPT route and explains what it’s genuinely good at.
Before you start
- A GitHub account (Sign up for GitHub if you don’t have one)
- A ChatGPT account (the free tier is enough for the setup steps in this article)
Step 1: Find “Plugins” in the sidebar
Log in to chatgpt.com and look at the left sidebar. Below New chat, Library, and Projects there’s Plugins (some interfaces label it Apps or Connectors). Click it.
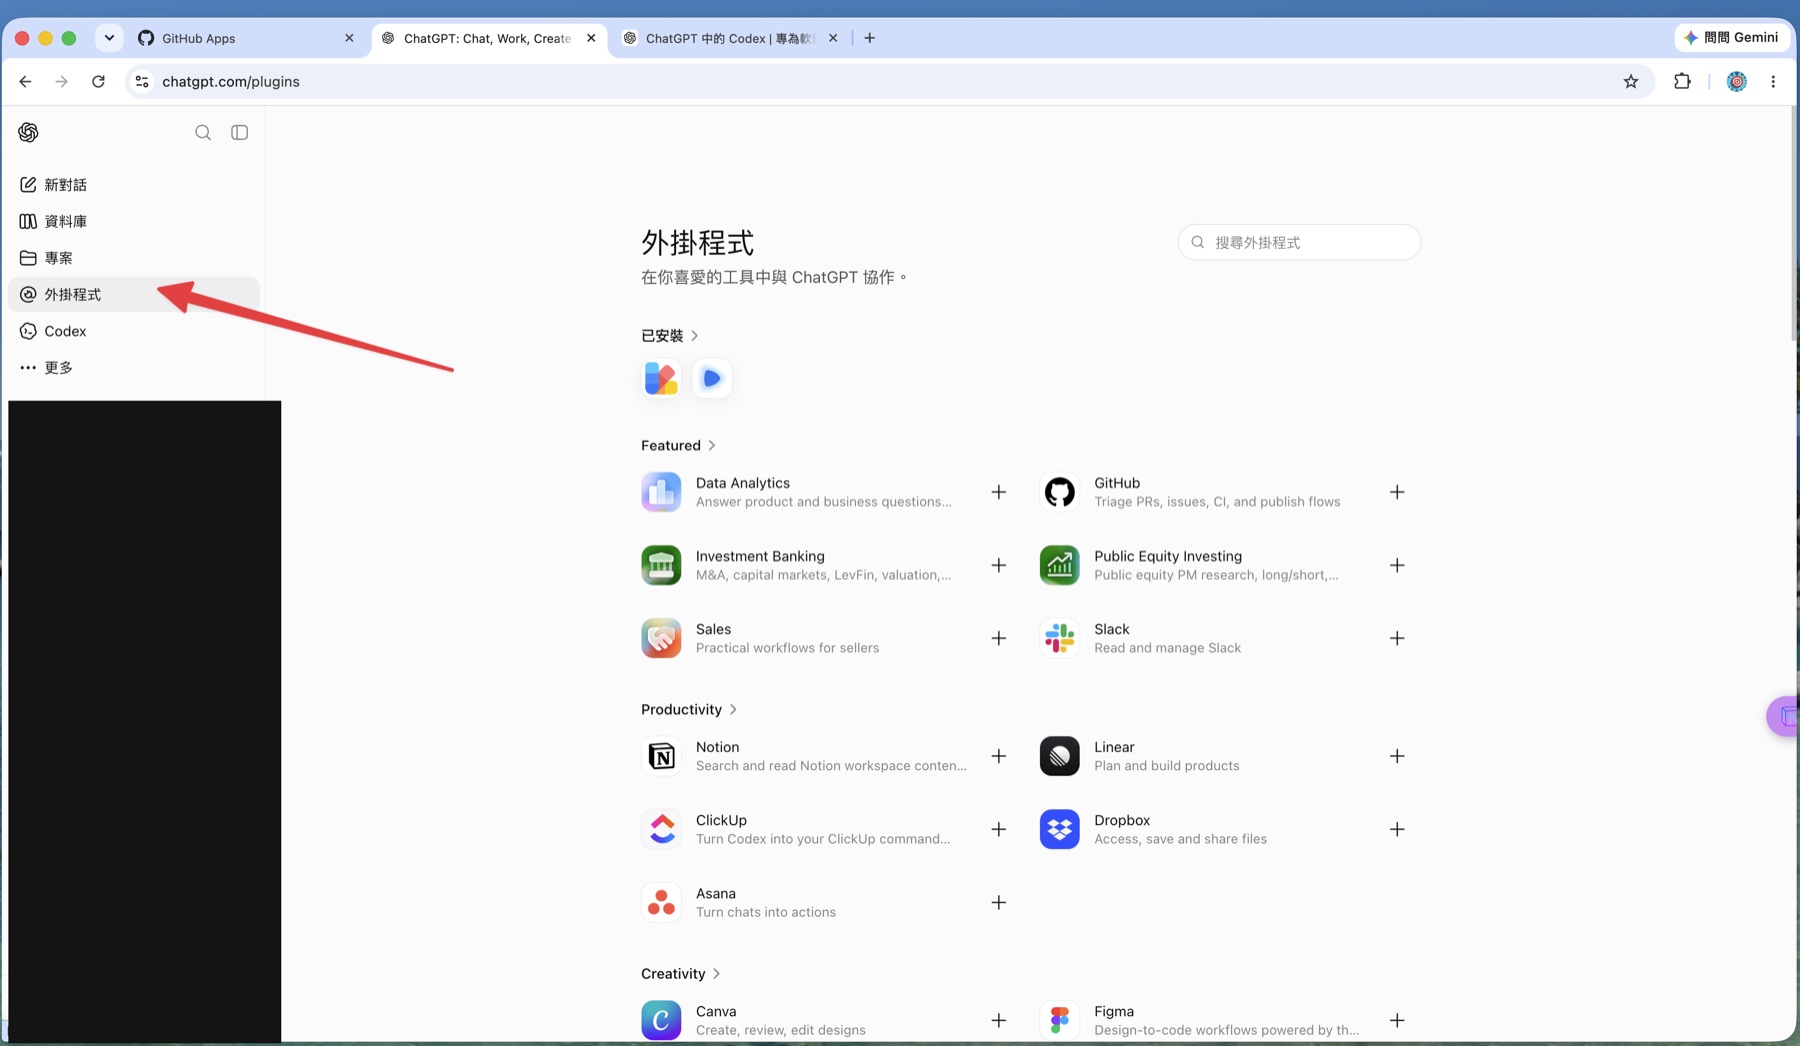
Inside you’ll see an Installed section and category lists: Featured, Productivity, Creativity, and so on.
Step 2: Find GitHub under Featured
GitHub sits first in the right-hand column of Featured, subtitled Triage PRs, issues, CI, and publish flows.
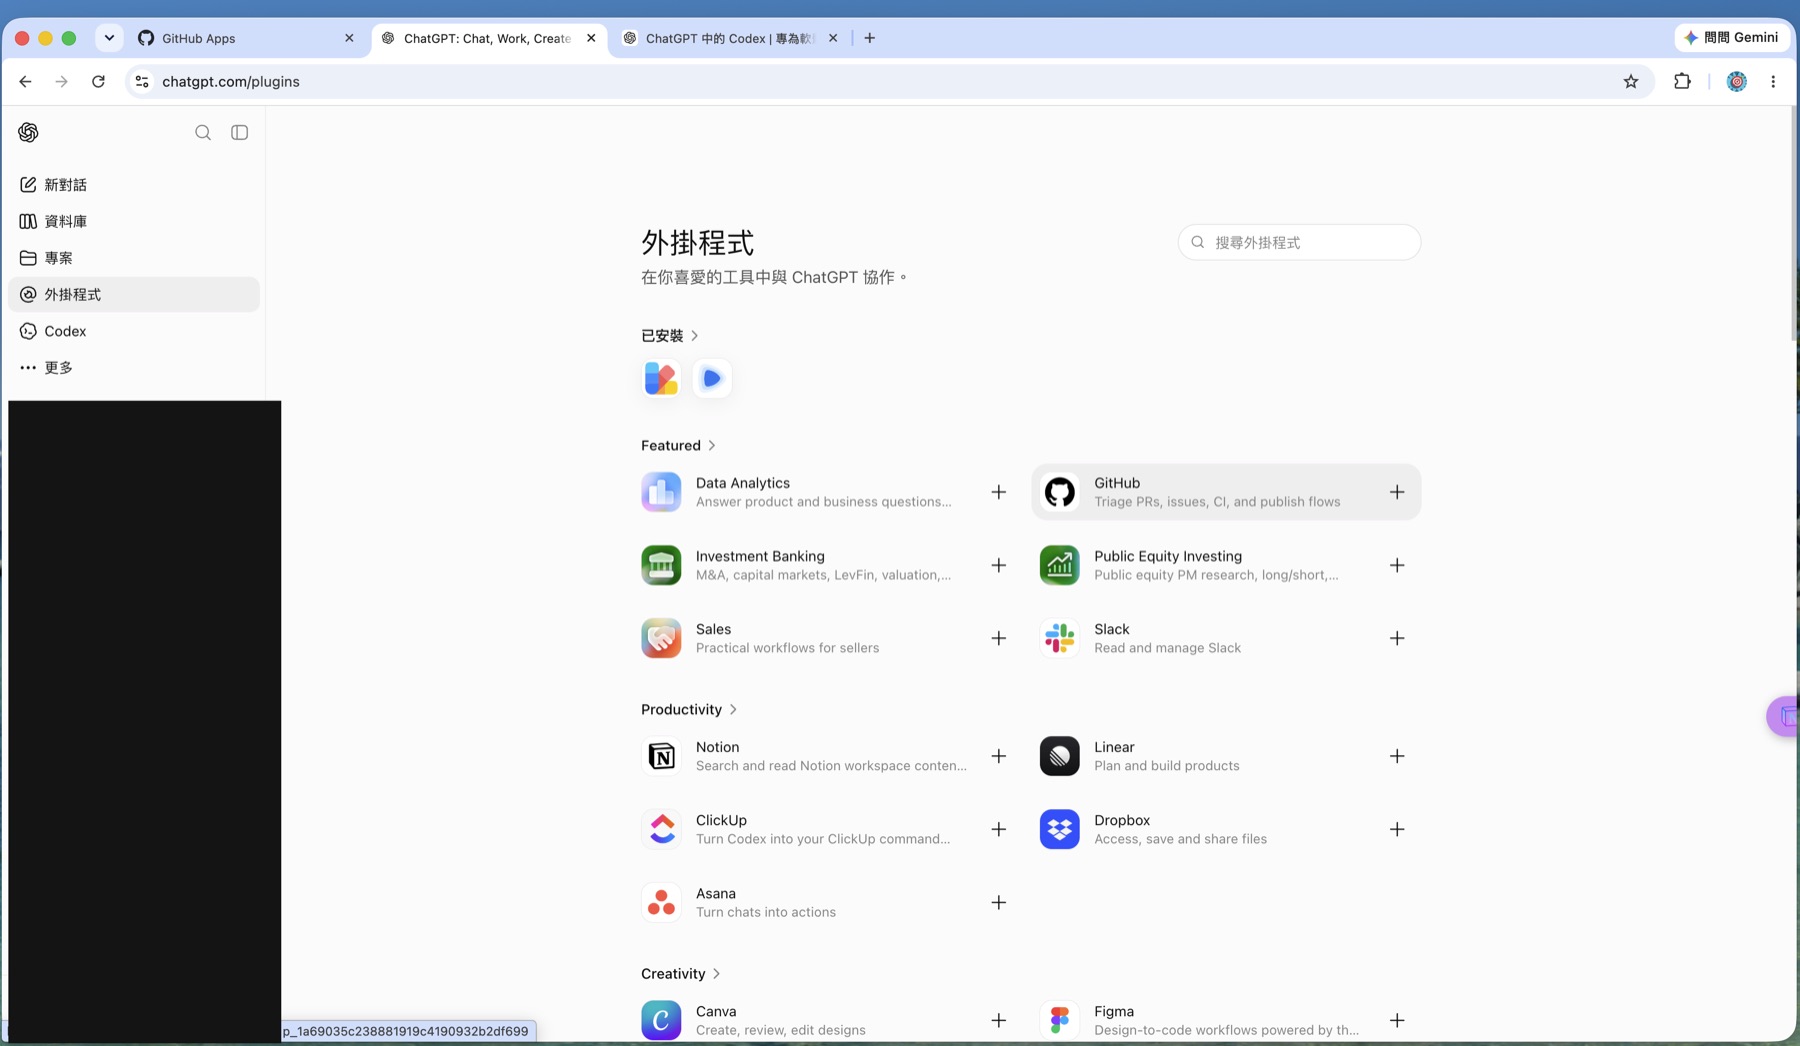
Click the card itself (not the + on the right) to open its detail page.
Step 3: Read what the detail page is telling you
The page describes the connector’s scope clearly, and it’s worth pausing on:
- Official description: use GitHub to inspect repositories, review pull requests, address feedback, debug failing Actions checks, and prepare code changes for review through a connector-first workflow with targeted CLI fallbacks.
- Apps: GitHub and GitHub Enterprise.
- Four Skills: Review Follow-up, CI Debug, GitHub, and Publish Changes.
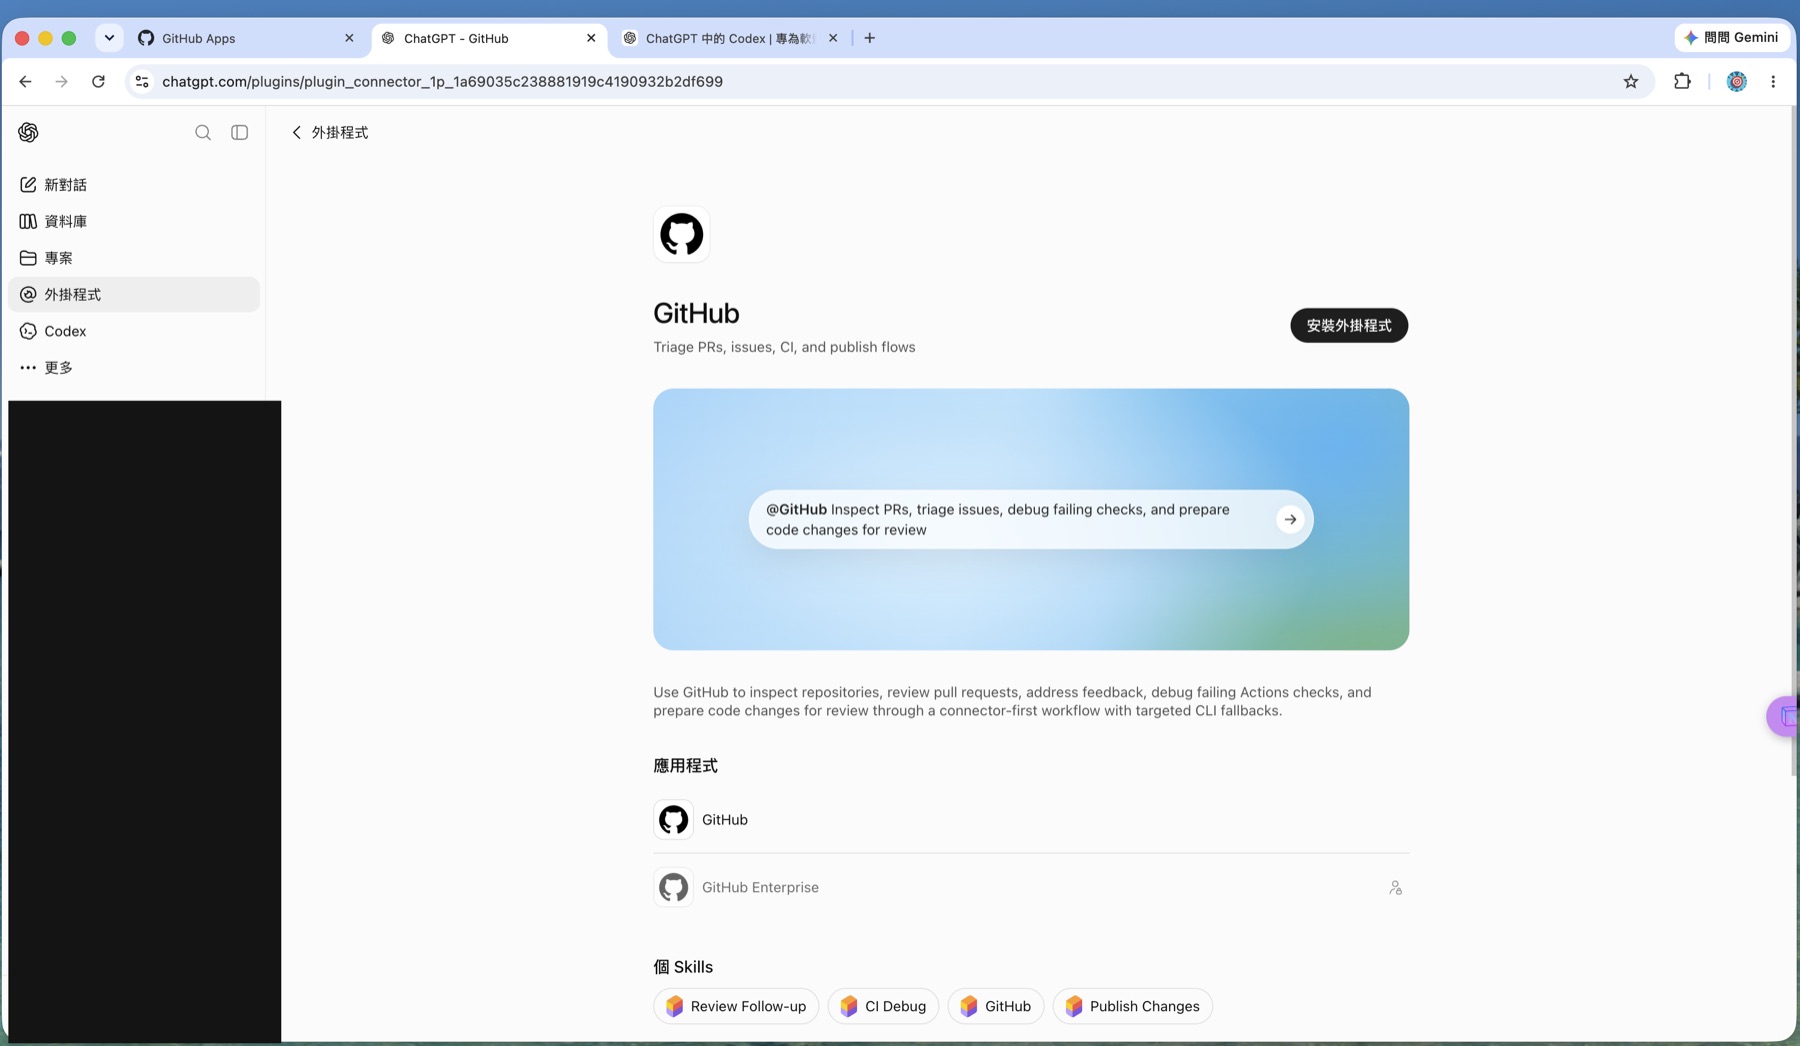
Those four Skill names are the positioning statement: every one of them assumes a project that’s already running. None of them is called “Create Repository.”
If you want it, click Install in the top right.
Step 4: Complete the “Connect to GitHub” authorization
Installing opens the Connect to GitHub popup, with the developer listed as OpenAI. The three notices, in plain English:
| What the popup says | What it means |
|---|---|
| Permissions are always respected | ChatGPT only uses the permissions you explicitly grant, and you can disable or revoke them at any time |
| Everything stays under your control | Your data isn’t used to train models; data from GitHub is used only to give you the answers you asked for |
| Connectors can introduce risk | The connector respects your permissions, but external sites may try to steal your data — a nod to prompt-injection style risks |
Below that, Google suggests enabling multi-factor authentication (MFA) on your Google or ChatGPT account. A connector opens a door to an external service, so this suggestion is worth taking.
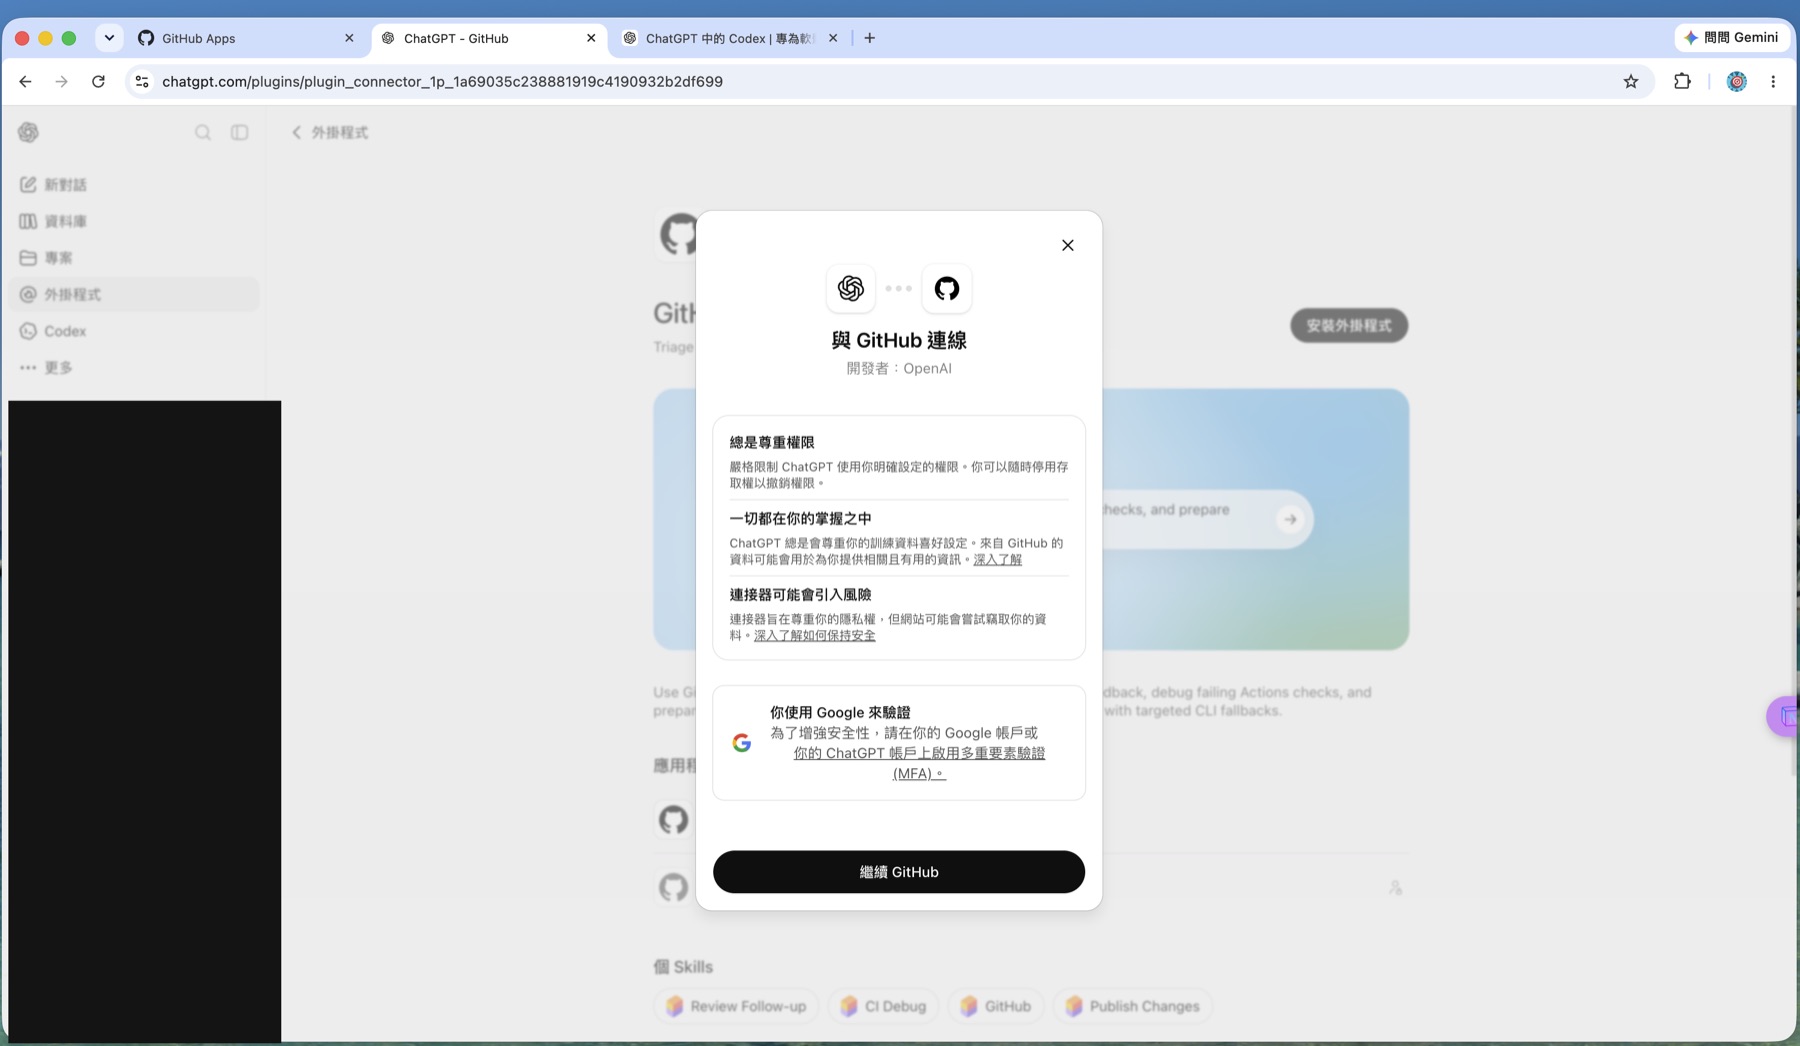
Click Continue to GitHub and finish authorizing on GitHub’s side (it will ask which repositories to expose and may require email verification). You’re returned to ChatGPT with the connector under Installed.
🚨 Common mistakes and judgment calls
Expecting it to create a repo from scratch
This is the big expectation gap. The connector is designed for triage and review: read the repo, follow PRs, work out why CI is red, prepare changes for review. “Create a new repo and push files to it” isn’t in its advertised capabilities, and none of the four Skills covers it.
If that’s what you want: take the Grok route (which the free tier completed in testing), or use Codex inside the ChatGPT ecosystem — a separate sidebar entry and a different coding-agent path, requiring the corresponding paid plan.
Pushing through on a free-tier model
In testing, the free-tier model did not complete GitHub tasks. Installing the connector ≠ finishing the job — whether it can actually act depends on your model and plan. If you conclude you need it, it’s a paid capability; decide accordingly.
Granting access to every repo at once
GitHub’s authorization page lets you pick all repos or specific ones. If work projects and client code live in the same account, tick one test repo first. To revoke: GitHub → Settings → Applications → Installed GitHub Apps.
So which route should you take?
| What you want | Go with |
|---|---|
| One sentence → a website/tool published to GitHub | Grok’s connector (tested walkthrough) |
| Follow PR progress, debug failing CI, triage issues | ChatGPT’s GitHub connector (this article) |
| Heavy coding work on an existing project | Codex or a dedicated coding agent, on a paid plan |
| Just publishing a static site you already built | No AI connector needed — see GitHub Pages deployment |
What to do next
- Work out which row you’re in (the table above). Don’t connect things because connecting is fun — every connector is another slice of exposed permission.
- If the goal is “get the AI to publish for me”: try Grok + GitHub today; the free tier runs a full experiment in about ten minutes.
- If you already have a live project: connect ChatGPT, point it at a real PR, and ask “what does this PR change and what’s risky about it.” Let the answer decide whether it stays.
- Understand the shared machinery: read the MCP protocol. Once that clicks, “connecting an AI to tools” stops being vendor-specific magic.
這篇文章對你有幫助嗎?
💬 問答區
卡關了?直接在這裡問,其他讀者和作者都能幫忙解答。
載入中...
Found this useful? Share it with a friend who’s also getting their hands dirty
Share on LINE