Deploy a Static Site / PWA to GitHub Pages: From Creating the Repo to Going Live
Deploy your front-end-only site (HTML/JS, PWA) to GitHub Pages for free: create a repo, push your code, enable Pages in Settings, and let GitHub Actions build and publish it automatically. Full screenshots, plus build-failure and domain troubleshooting.
 卡住很正常——點段落旁的 😵 卡關 讓我們知道,或直接往下滾到問答區發問。
也可以用 👍 看懂 / 😢 看不懂 告訴我們哪裡寫得好、哪裡要改。
卡住很正常——點段落旁的 😵 卡關 讓我們知道,或直接往下滾到問答區發問。
也可以用 👍 看懂 / 😢 看不懂 告訴我們哪裡寫得好、哪裡要改。
In one line: Push your code to a GitHub repo → in Settings → Pages set the Source to your branch → GitHub Actions auto-builds and publishes it, at
your-account.github.io/repo-name. Completely free.
Keywords: GitHub Pages, static site, PWA, deploy, Settings, Pages, Source, Deploy from a branch, GitHub Actions, pages build and deployment, Authorized domains, custom domain
Why GitHub Pages?
If your site is front-end only (HTML / CSS / JS, no backend), GitHub Pages is the easiest free way to publish it:
- Free, serverless: GitHub hosts the static files for you.
- Push to deploy: every
git pushafterward triggers GitHub Actions to rebuild and republish. - HTTPS included:
your-account.github.iohas a certificate by default.
Great for PWAs, portfolios, tutorial pages, and event sign-up pages — anything front-end only.
Step 1: Create a repo and push your code
Create a new repo on GitHub (no account yet? see Sign Up for GitHub). After creating it you’ll see the Quick setup page — follow it to push your local code:
git init
git add .
git commit -m "first commit"
git remote add origin https://github.com/your-account/your-repo.git
git branch -M main
git push -u origin main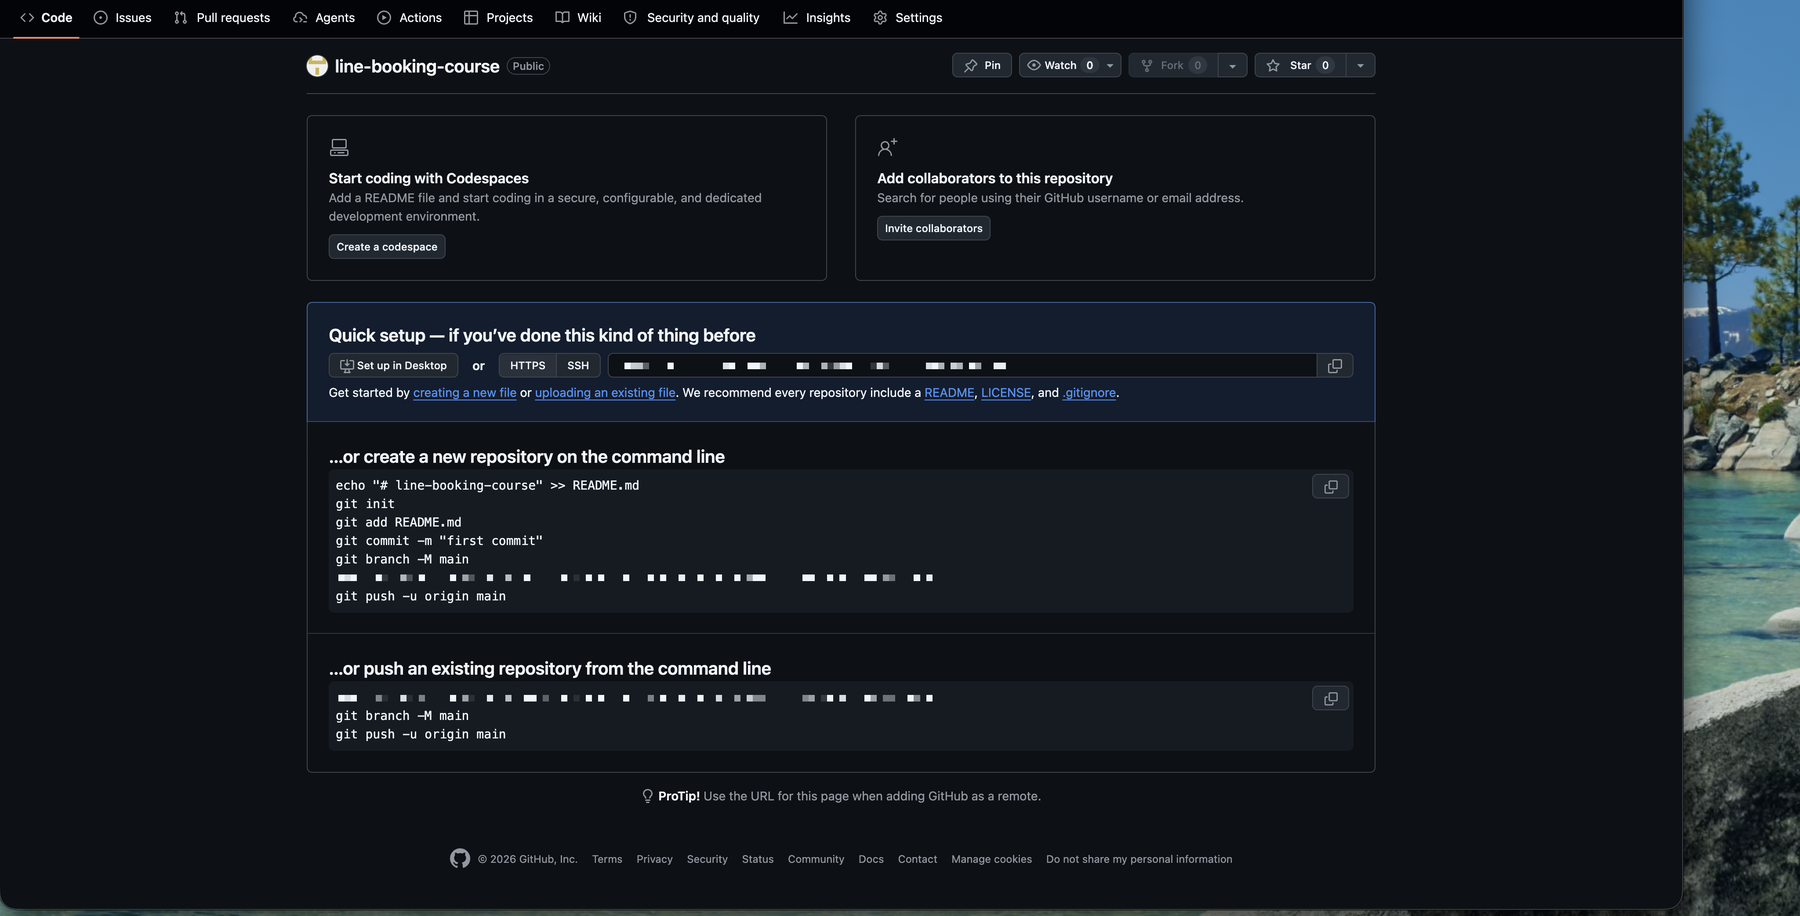
Refresh the repo after pushing and you’ll see your files (index.html, manifest.webmanifest, icons, etc.) are up.
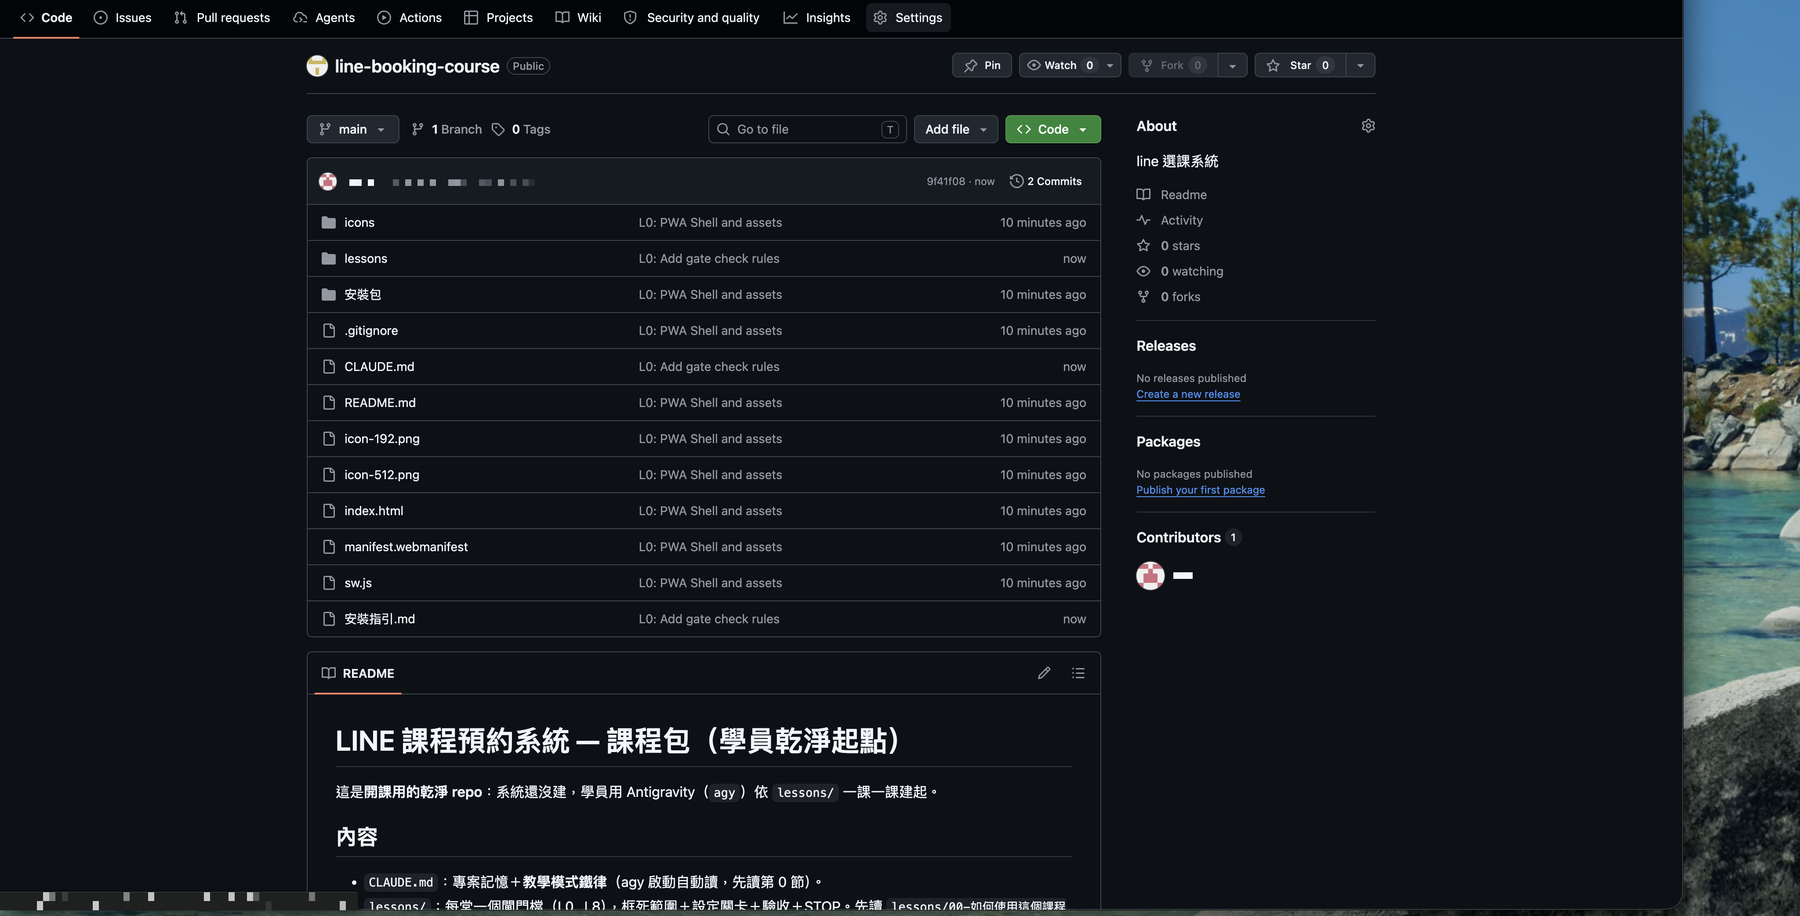
Step 2: Enable GitHub Pages in Settings
Go to the repo’s Settings → Pages. Under Build and deployment, set Source to Deploy from a branch, pick branch main and folder / (root), then click Save.
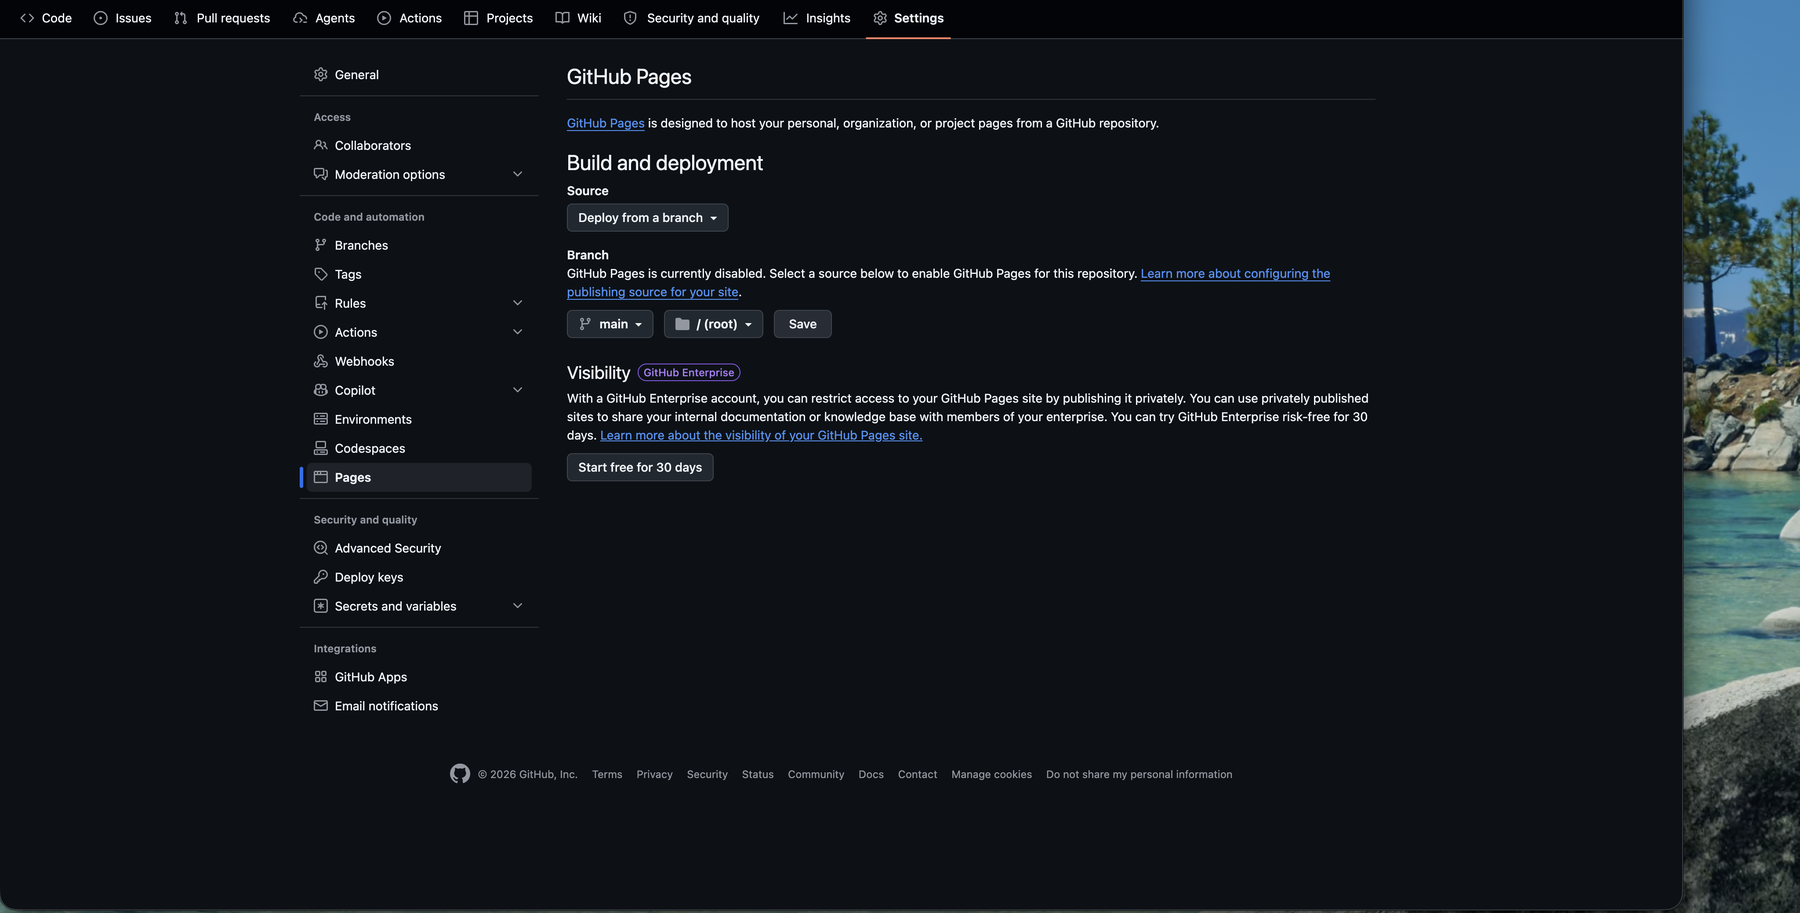
🚨 Source: “branch” or “GitHub Actions”?
- Deploy from a branch (simplest): for projects whose code is already host-ready static files (plain HTML/JS). GitHub uses its built-in
pages build and deploymentflow to deploy automatically. - GitHub Actions: for projects that need a build first (e.g. Astro, React need
npm run build) — a custom workflow produces the static files, then deploys.
This example is a directly host-able PWA, so Deploy from a branch is the fastest.
Step 3: Let GitHub Actions deploy automatically
After you click Save, GitHub triggers a deployment automatically. On the repo’s Actions tab you’ll see a pages build and deployment workflow running.
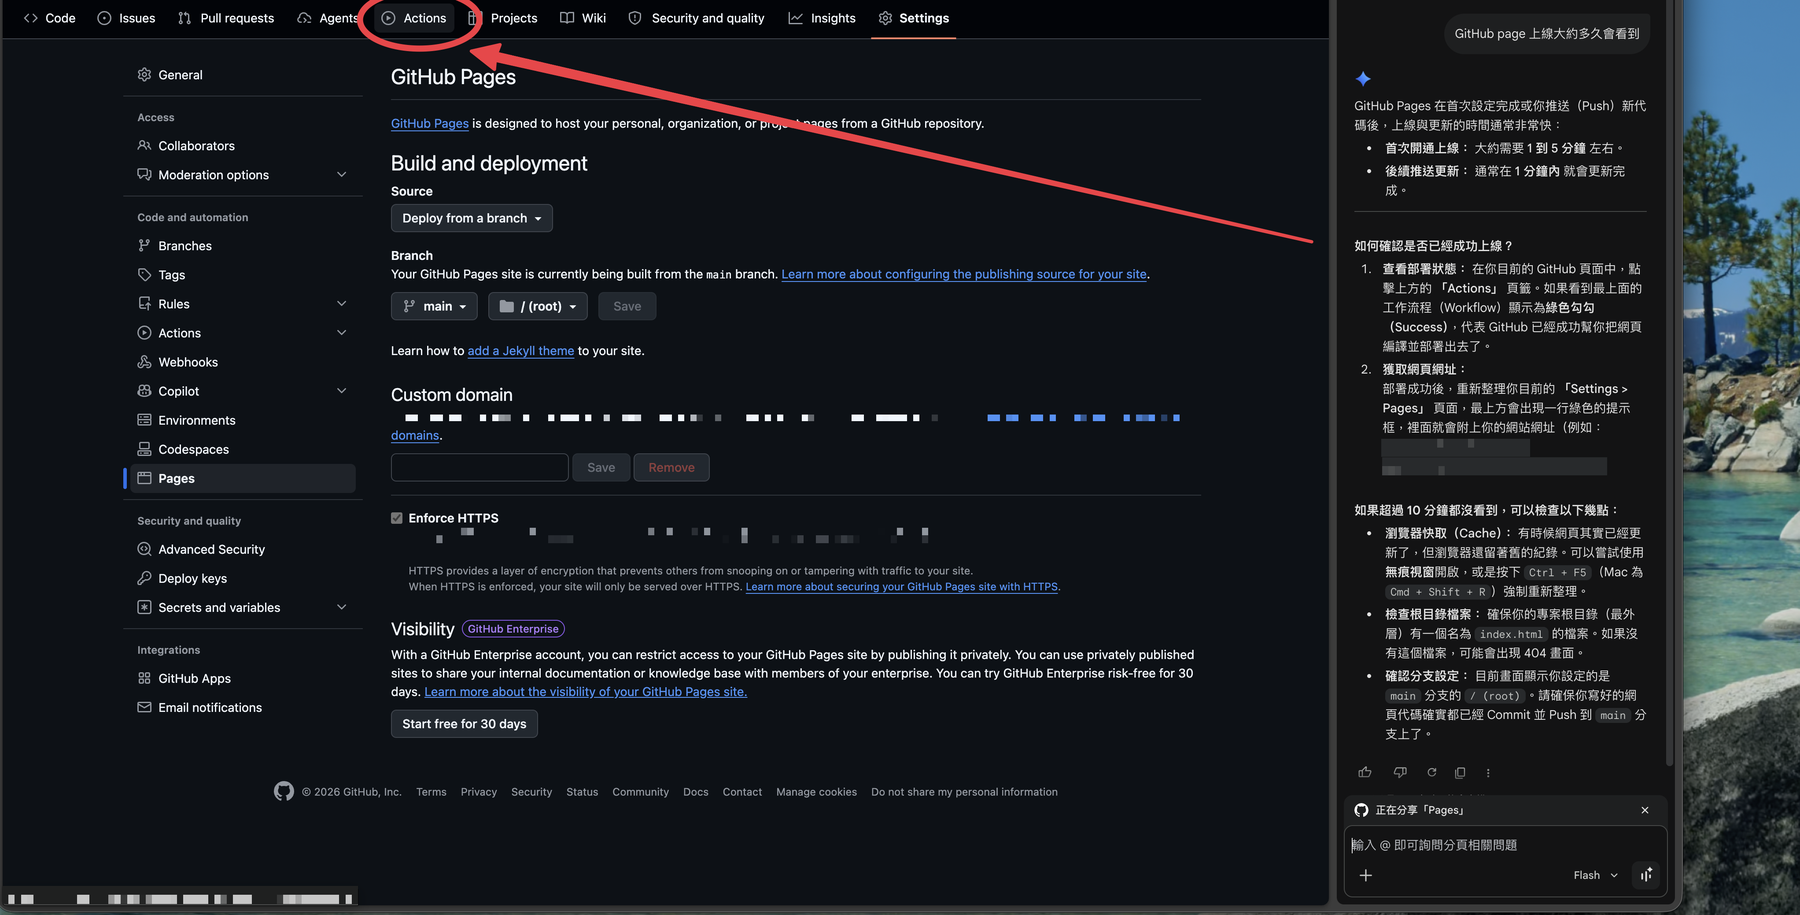
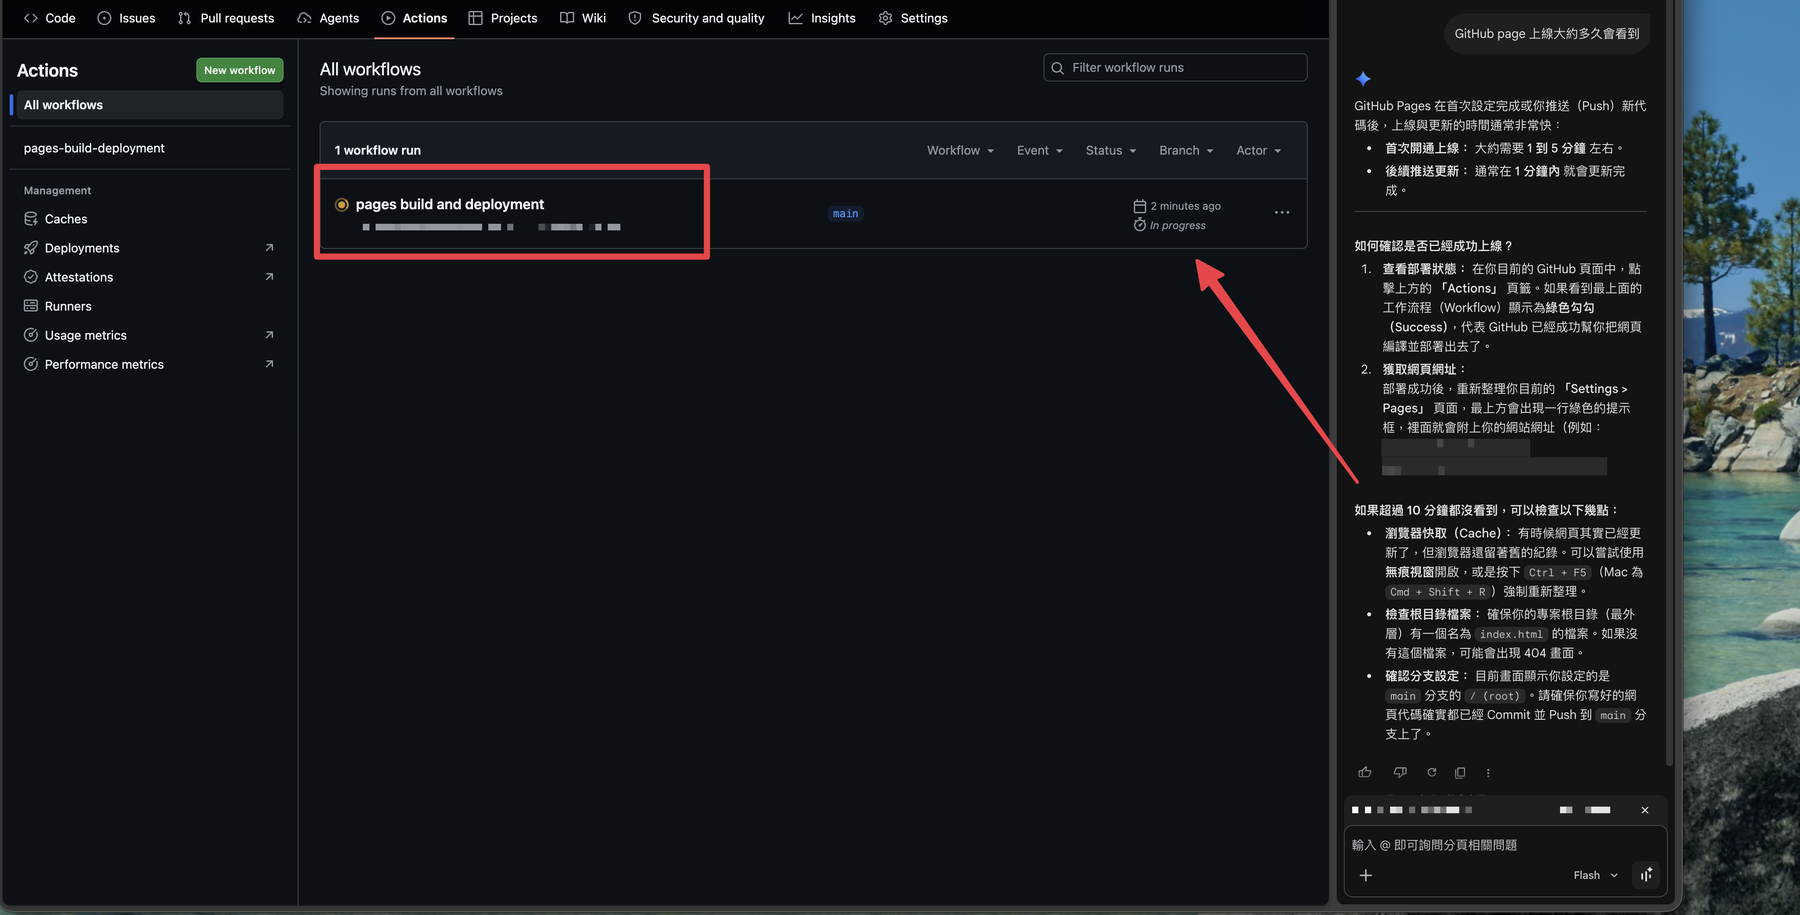
Open it to see the build → report → deploy stages. When all three are checked and green, deployment succeeded.
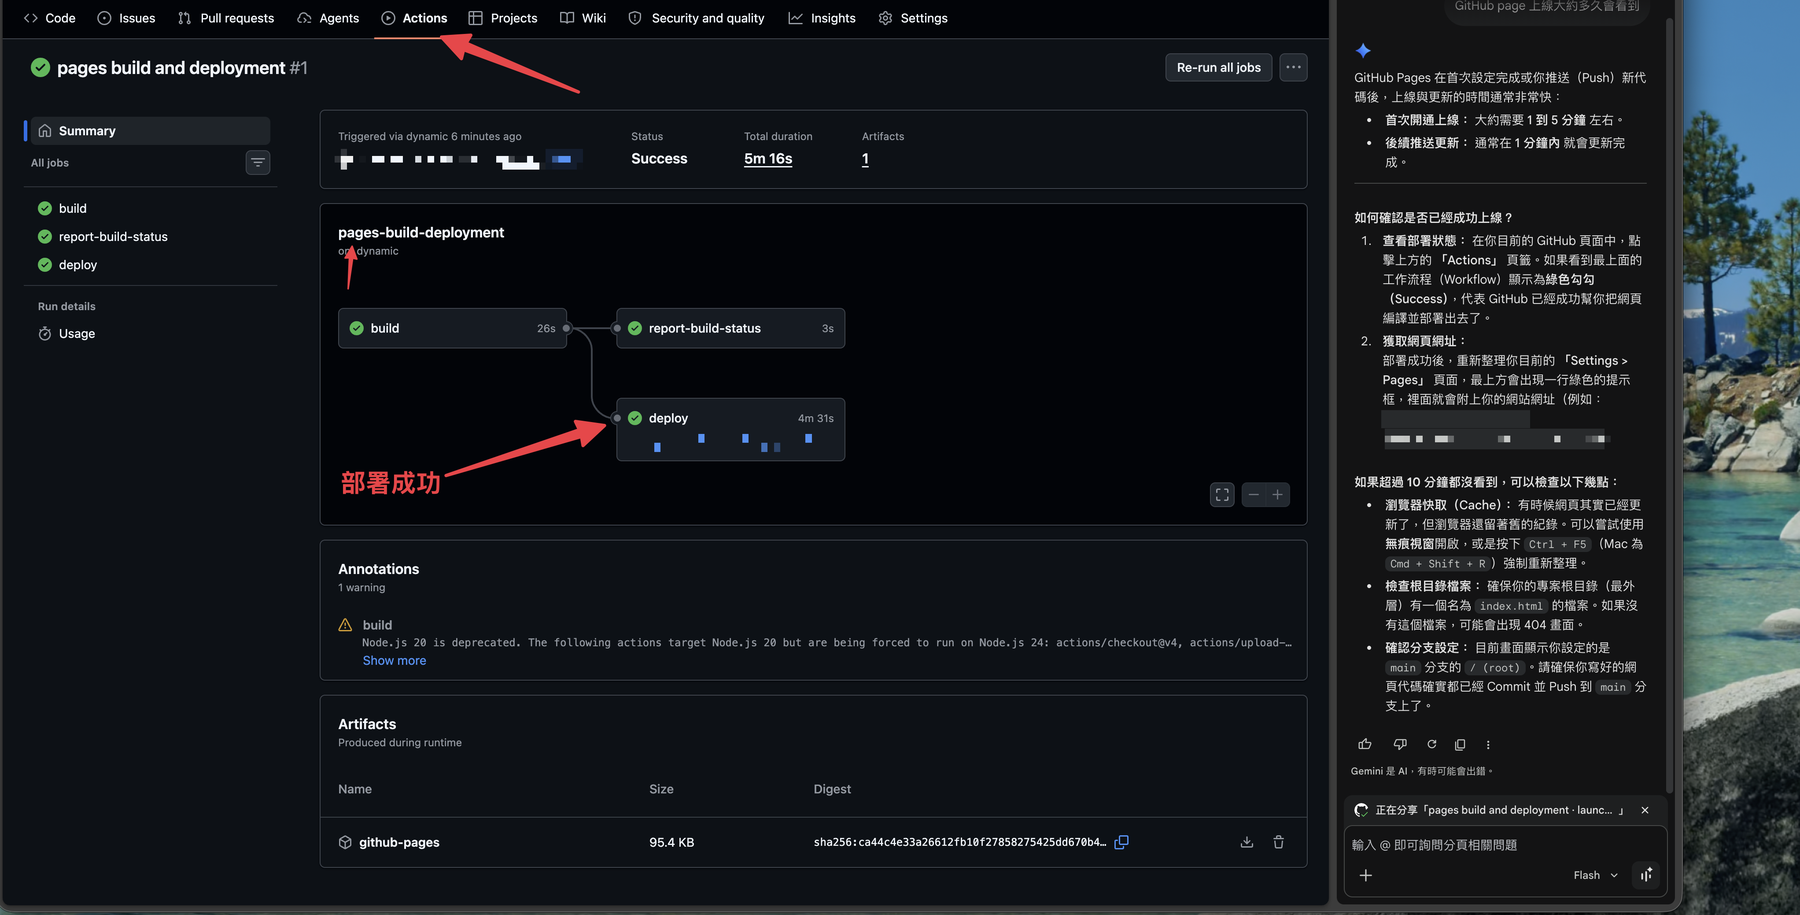
🚨 Build keeps failing?
Open the failed workflow and expand the red step to read the log. Plain branch deploys rarely fail; if you switched to GitHub Actions mode, the most common issue is a wrong build command or output folder (e.g. Astro must output to dist).
Step 4: The site is live
After a successful deploy, your site lives at https://your-account.github.io/repo-name/. Open it to see the result (here, a PWA course-booking system you can “Add to Home Screen” and run as an app).

🚨 URL opens but styles are broken / assets 404?
GitHub Pages URLs have an extra /repo-name/ sub-path. If your HTML loads assets with absolute paths (/style.css), they 404. Use relative paths (./style.css), or set your framework’s base to /repo-name/.
🚨 Trying to wire up Firebase login but it fails?
If your site uses Firebase login, remember to add your-account.github.io to Firebase’s Authorized domains, or login gets blocked (see Fix Missing permissions: Deploy Firestore Security Rules).
Recap
- GitHub Pages = a free, auto-deploying way to publish a front-end-only site.
- Flow: create repo → push code → Settings → Pages set Source → Actions auto-builds → live.
- Host-ready static files → Deploy from a branch; frameworks that need a build → GitHub Actions.
- The URL is
your-account.github.io/repo-name/; use relative paths for assets to avoid 404s. - For Firebase login, don’t forget to add your domain to Authorized domains.
這篇文章對你有幫助嗎?
💬 問答區
卡關了?直接在這裡問,其他讀者和作者都能幫忙解答。
載入中...
Found this useful? Share it with a friend who’s also getting their hands dirty
Share on LINE