AI Model API Key Guide: OpenAI, Anthropic, Google, OpenRouter — All in One Place
Step-by-step guide to applying for AI model API Keys. No matter which provider you choose, follow along and get the key that powers OpenClaw.
What’s This Article About?
This LaunchDock tutorial walks you through getting your API Key as quickly as possible so OpenClaw can connect to AI.
In the previous step, you chose your LLM plan. Now it’s time to get the key (API Key) that lets OpenClaw call AI models.
The entire process takes about 3–10 minutes, depending on which plan you chose.
You only need to pick one. You can always add other providers later.
🚨 Important Concept: An API Key Is Like a Password
An API Key is like the key to your home. Whoever has it can call AI using your account — and spend your money.
Three basic rules:
- Don’t screenshot and share your Key
- Don’t post it anywhere public (GitHub, forums, chat rooms)
- If it leaks, revoke it immediately and create a new one
Option A: Google AI Studio (Recommended for Beginners)
The simplest option — done in 3 minutes, no credit card needed.
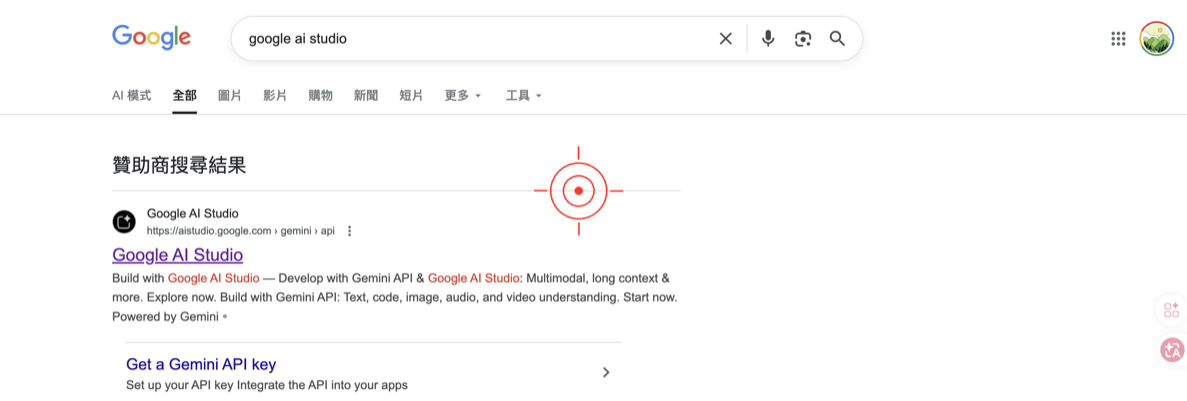
Step 1: Go to Google AI Studio
- Open your browser and go to Google AI Studio (search “Google AI Studio”)
- Sign in with your Google account
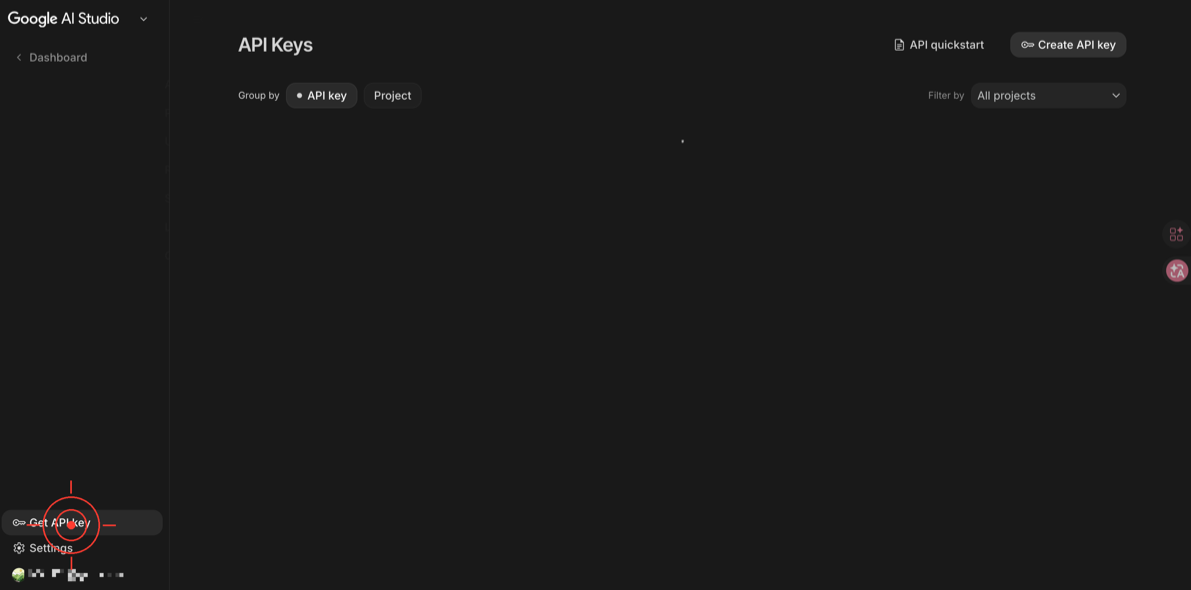
Step 2: Get Your API Key
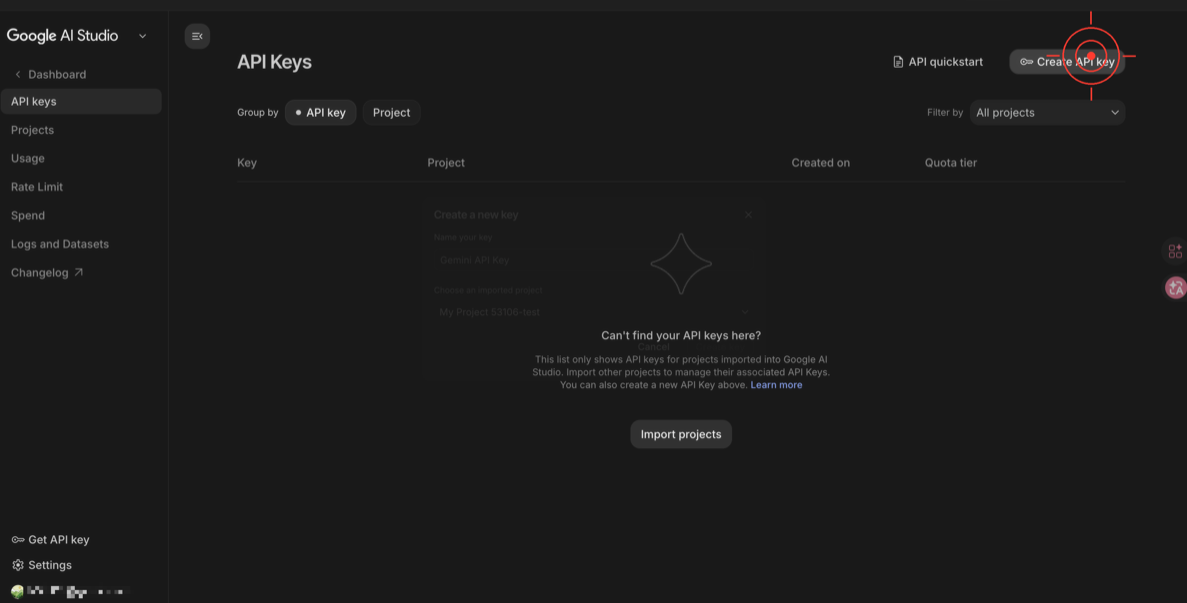
- After signing in, find “Get API key” in the left sidebar
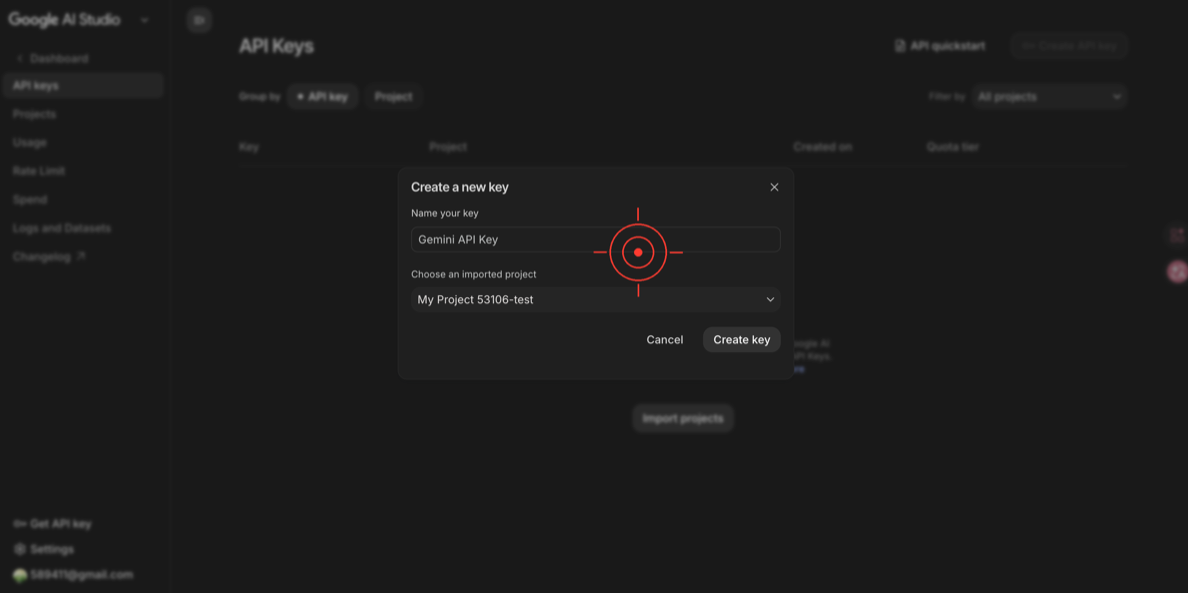
- Click “Create API key”
- Select a Google Cloud project (if you don’t have one, it will create one for you automatically)
- Click “Create API key in new project”
- Your Key will appear on screen in this format:
AIzaSyxxxxxxxxxxxxxxxxxxxxxxxxxxxxxxxxx- Copy this Key and store it somewhere safe (e.g., a password manager or a private note)
Step 3: Verify the Key Works
On the Google AI Studio page, you can test it directly:
- Go back to the main page
- Type “Hello” in the chat box
- If the AI responds, your account is working and the Key is valid

✅ Done! You’ve got your Gemini API Key. Jump to Next step: Install OpenClaw.
(Optional) Set a Spending Limit — Finally Safe to Add a Card
Before, many users hesitated to link a credit card to Gemini because there was no way to cap spending. Google AI Studio now supports spending limits, so you can safely upgrade to a paid plan!
- Go to the AI Studio Spend Management page
- The page shows all your projects (Free tier, Tier 1, etc.)
- Select a project and set your monthly spending cap
🚨 Common Issues
Q: It says “Google AI Studio is not available in your region”?
Some regions may have restrictions. Solutions:
- Check your Google account’s region settings
- Try using a different Google account
Q: Is this the same as a Google Cloud Console API Key?
No! These are two completely different things:
| Google AI Studio | Google Cloud Console | |
|---|---|---|
| Purpose | Call Gemini AI models | Connect Google Drive / Gmail |
| Key format | AIzaSy... | OAuth Client ID + Secret |
| Cost | Generous free tier, with spending limit support | Requires a billing account |
| Tutorial | This article | Google API Key Guide |
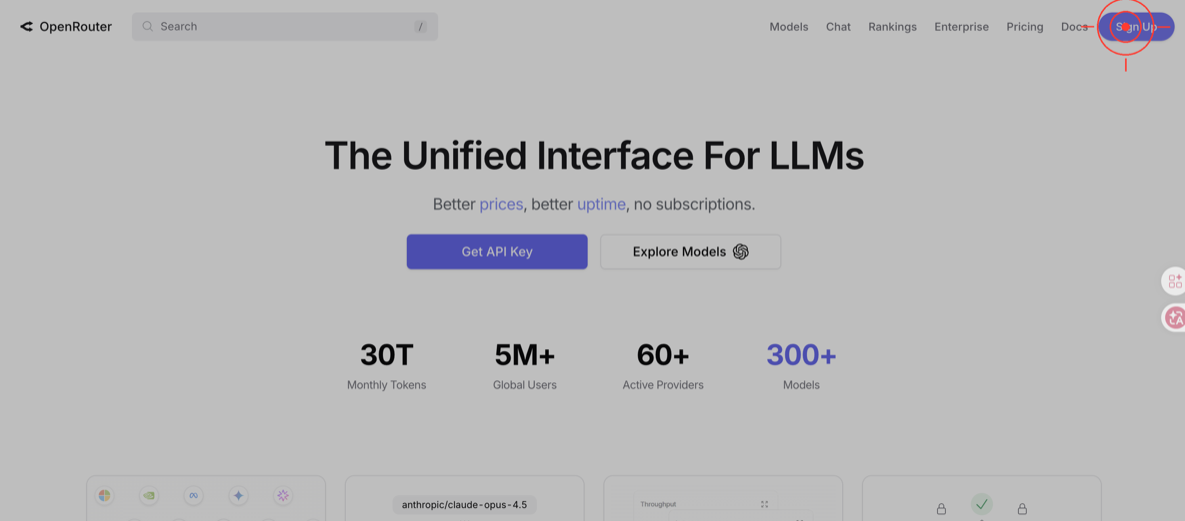
Option B: OpenRouter
One Key to access dozens of models.
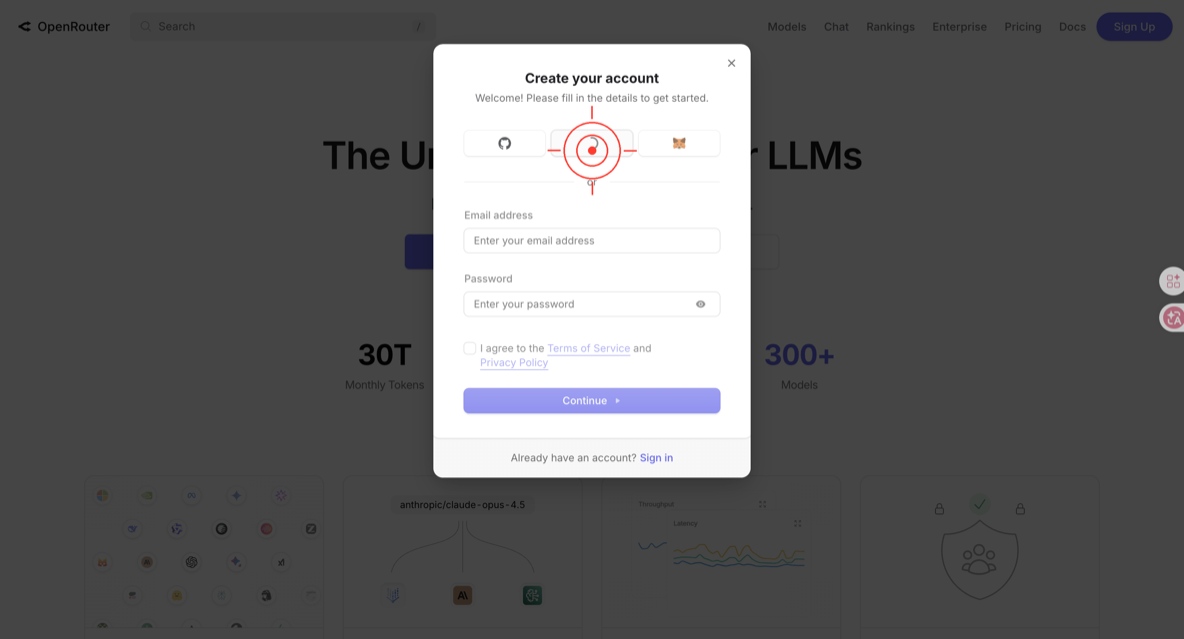
Step 1: Create an Account
- Go to the OpenRouter website
- Click “Sign Up”
- You can sign up directly with your Google account
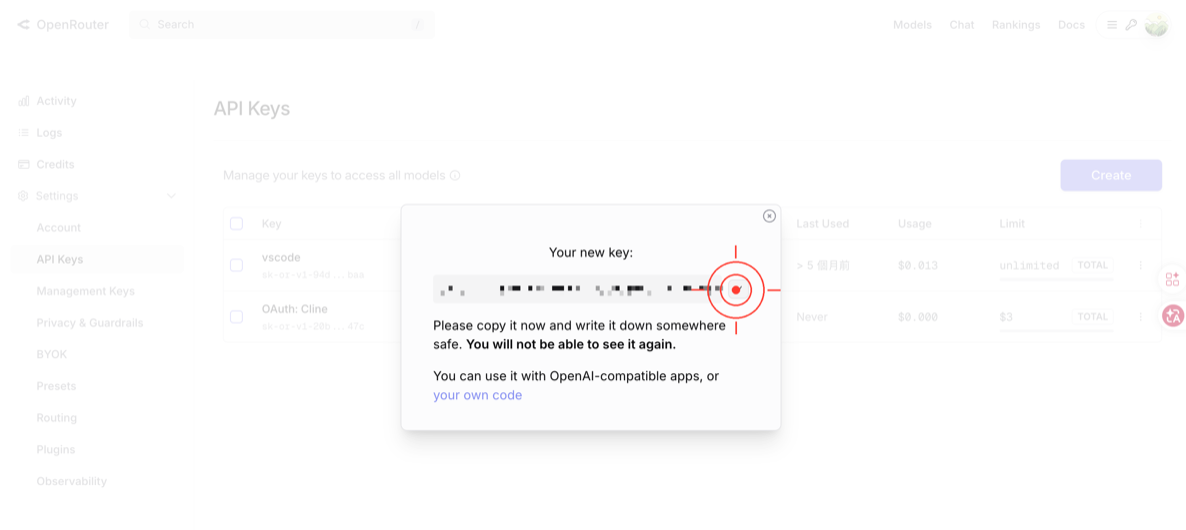
Step 2: Get Your API Key
- After signing in, click your avatar in the top right → “Keys”
- Click “Create Key”
- Enter
openclawas the name (or whatever you like) - Click “Create”
- The Key will appear once, in this format:
sk-or-v1-xxxxxxxxxxxxxxxxxxxxxxxxxxxxxxxx- Copy it immediately! You won’t be able to see the full Key after closing this dialog
Step 3: Add Credits (Optional)
- The free credit can be used for testing first
- Need more credit: Click “Credit” → Choose an amount → Pay
✅ Done! Jump to Next step: Install OpenClaw.
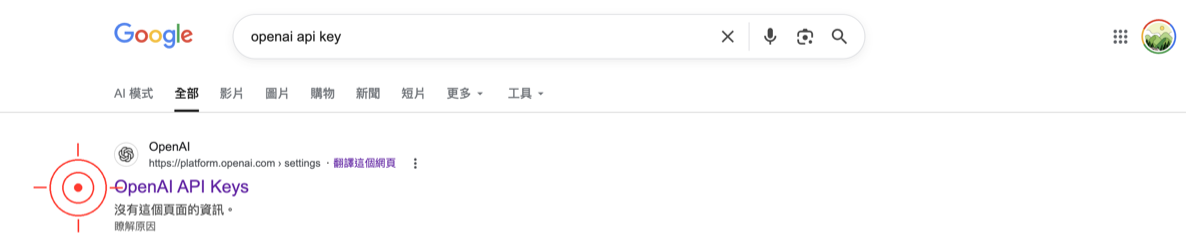
Option C: OpenAI API
Step 1: Create an OpenAI Platform Account
- Go to OpenAI Platform (search “OpenAI API”)
- Click “Sign up” to create an account (or sign in with your existing ChatGPT account)
⚠️ Note: The API and ChatGPT Plus are billed separately. Having ChatGPT Plus doesn’t mean you have API credits — you need to add funds separately.
Step 2: Add Funds
- After signing in, go to “Settings” → “Billing”
- Click “Add payment method” to add a credit card
- Add at least $5 USD
- Strongly recommended: Set a spending limit: In Billing → Usage limits → Set a Hard cap (e.g., $10/month)
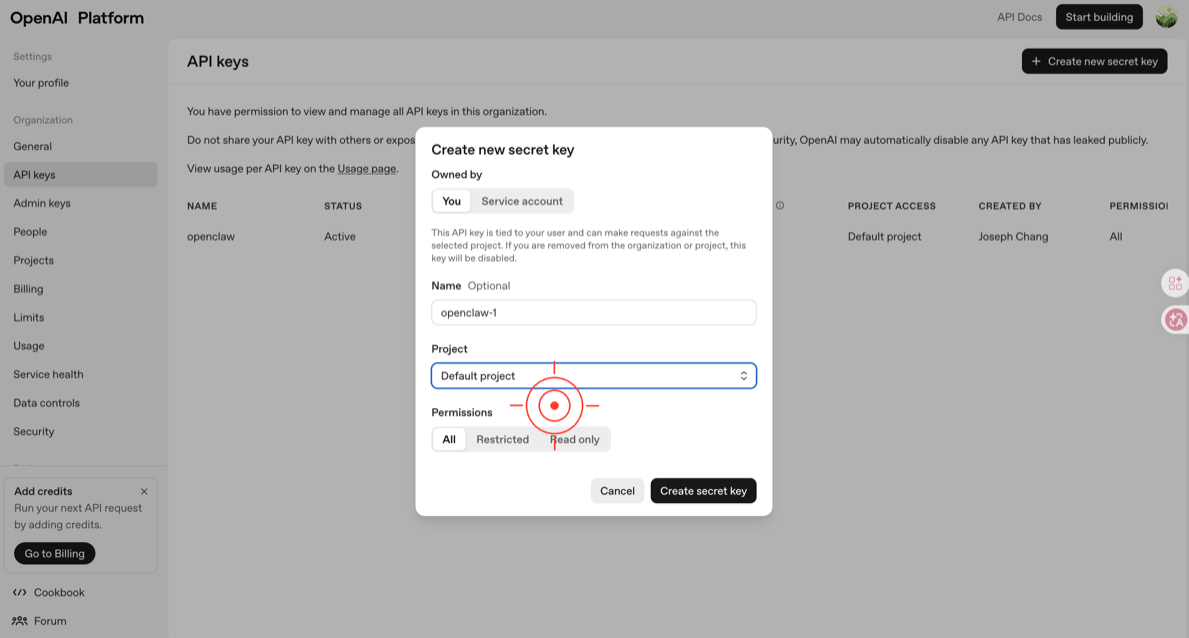
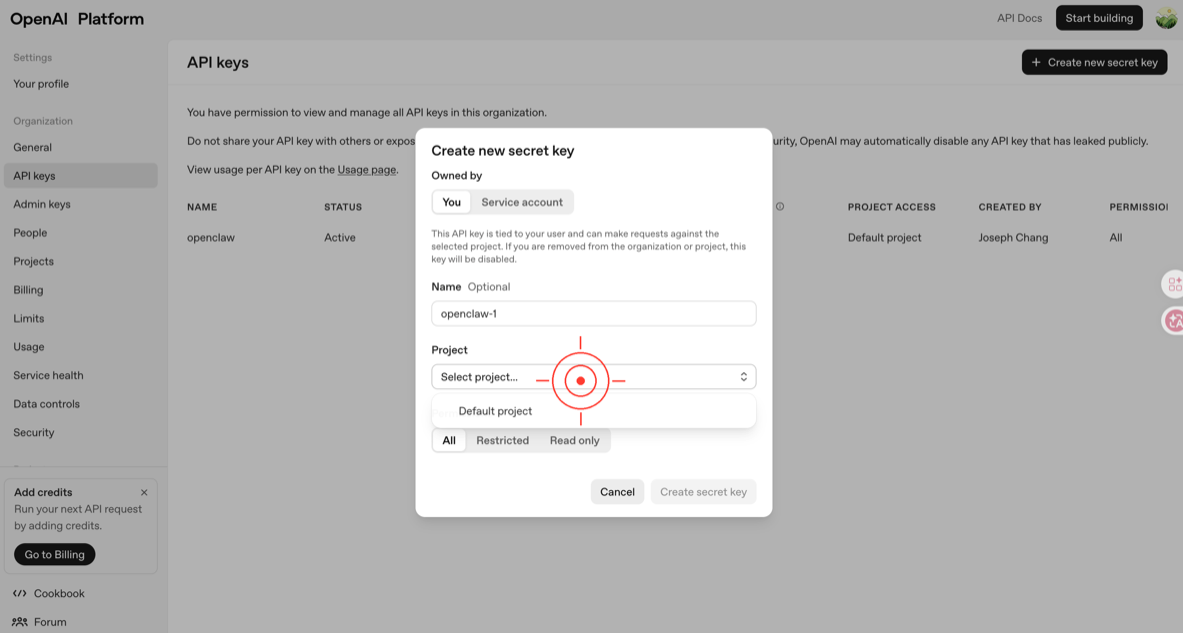
Step 3: Create an API Key
- Go to the “API keys” page
- Click “Create new secret key”
- Enter
openclawas the name - Click “Create secret key”

- The Key format looks like this:
sk-xxxxxxxxxxxxxxxxxxxxxxxxxxxxxxxxxxxxxxxx- Copy it immediately! This Key is only shown once
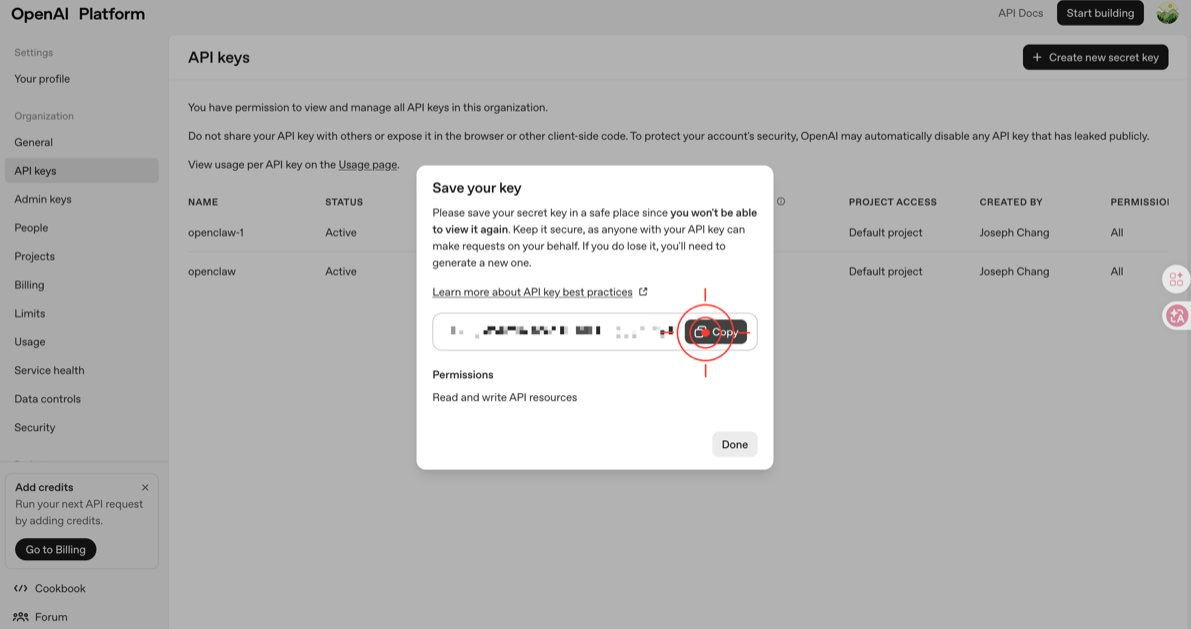
✅ Done! Jump to Next step: Install OpenClaw.
🚨 Common Issues
Q: I forgot to copy the Key after creating it?
No worries — just create a new one. You can delete the old one.
Q: My credit card was declined?
OpenAI doesn’t accept some prepaid cards and virtual cards. Try a regular credit card or debit card.
Option D: Anthropic API
Step 1: Create an Account
- Go to Anthropic Console (search “Anthropic Console”)
- Click “Sign Up”
- Register with email and complete verification
Step 2: Get Your Free Credit
- New accounts receive $5 USD free credit
- No credit card required to use it
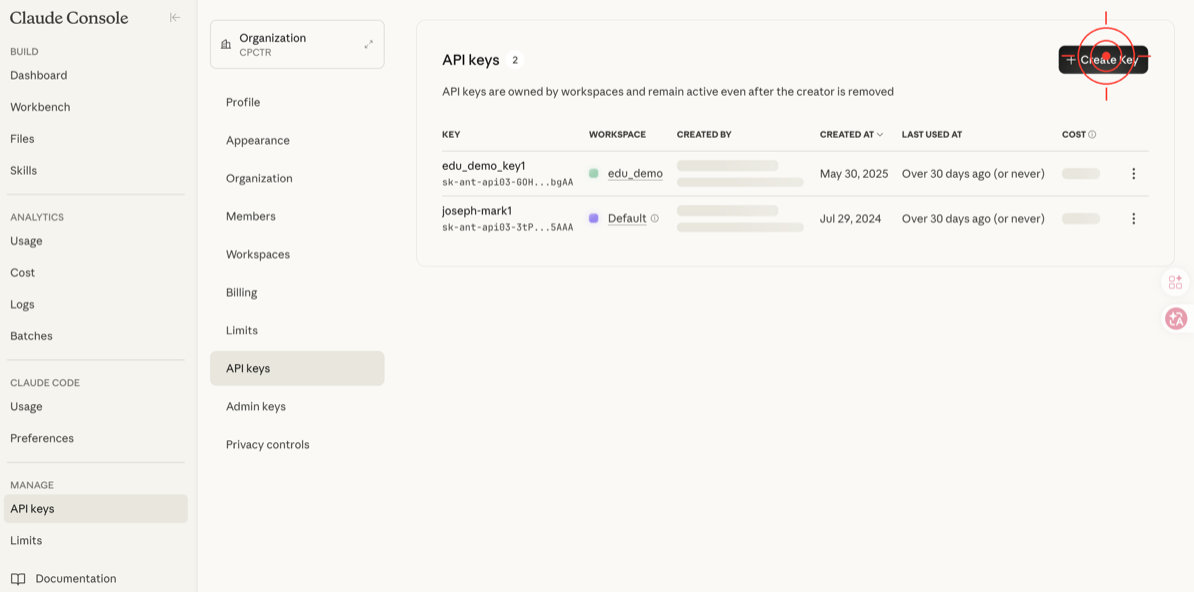
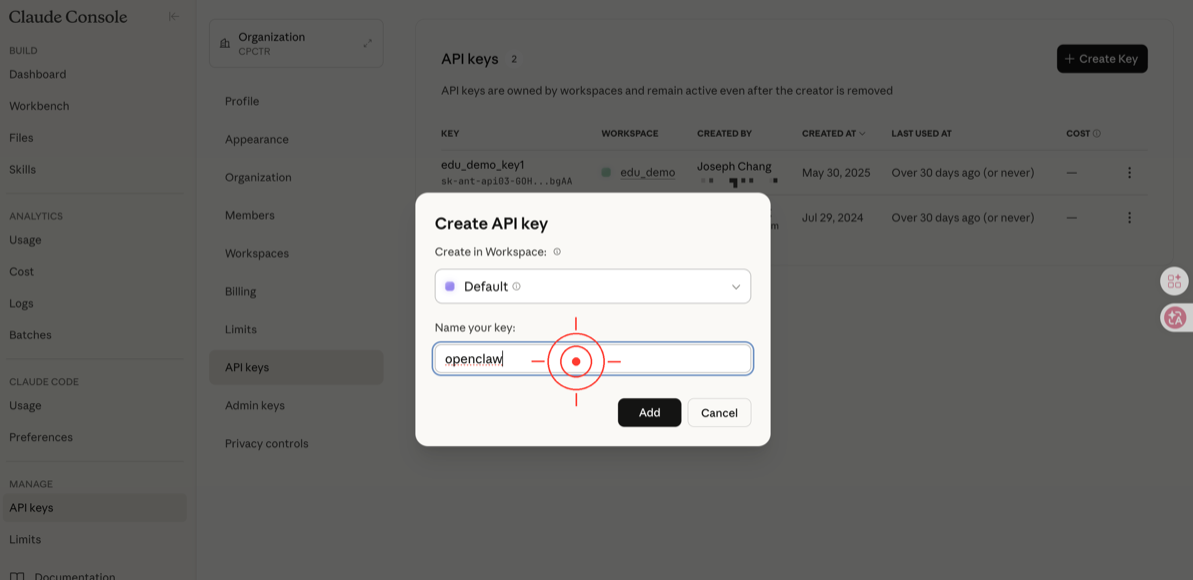
Step 3: Create an API Key
- After signing in, go to the “API Keys” page
- Click “Create Key”
- Enter
openclawas the name - Click “Create Key”
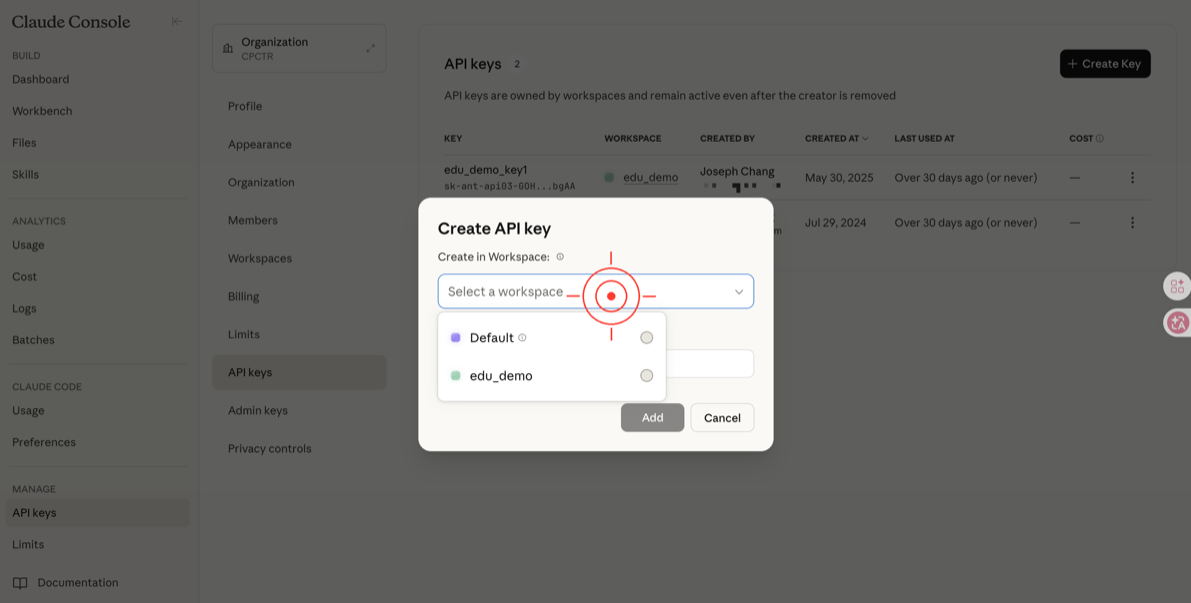
- The Key format looks like this:
sk-ant-api03-xxxxxxxxxxxxxxxxxxxxxxxxxxxxxxxx- Copy it immediately!
✅ Done! Jump to Next step: Install OpenClaw.
Got Your Key — What’s Next?
You now have an API Key in hand. Store it securely — you’ll need it during the OpenClaw setup wizard after installation.
Next step: Install OpenClaw → Choose your operating system
這篇文章對你有幫助嗎?
💬 問答區
卡關了?直接在這裡問,其他讀者和作者都能幫忙解答。
載入中...